This guide explores DNS options for a Virtual Private Cloud in AWS, demonstrating configuration and testing of DNS resolution and hostnames.
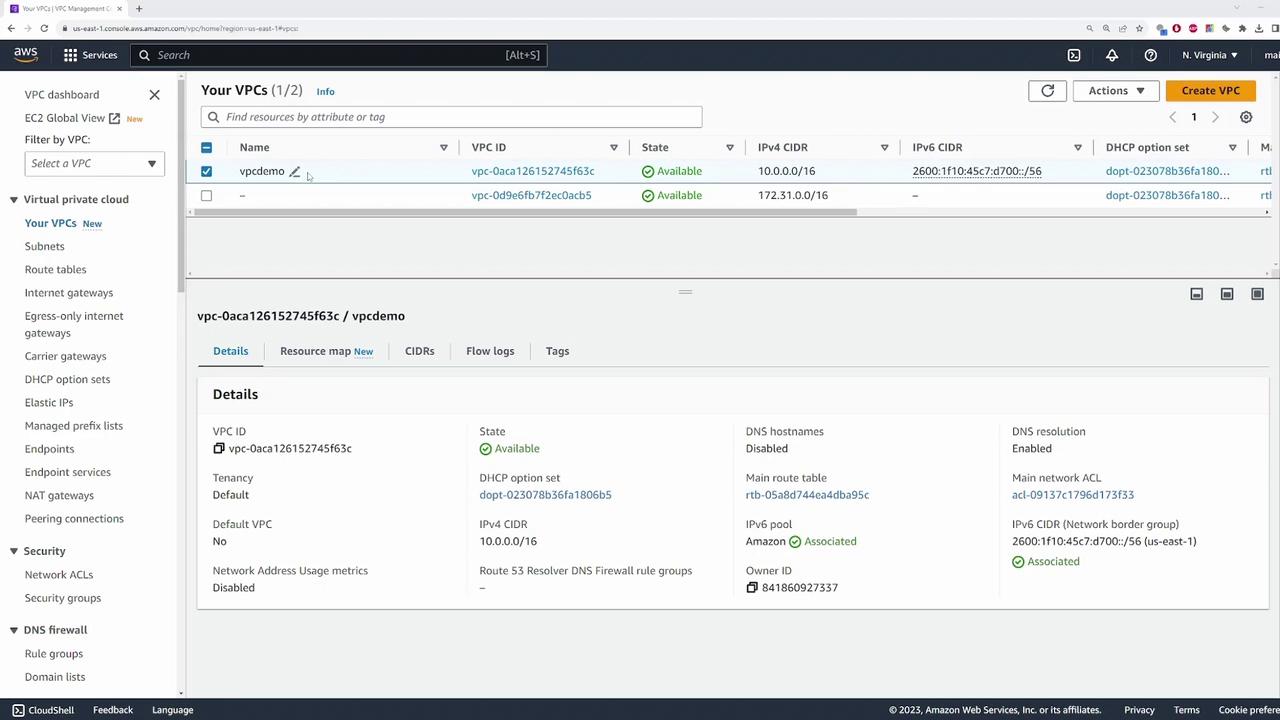
In this guide, we explore the various DNS options available for a Virtual Private Cloud (VPC) in AWS. In our example, a custom VPC is created with default settings, preconfigured with the standard DNS configuration. This VPC also includes an attached internet gateway, enabling public subnets.
When selecting the VPC, navigating to “Actions” and then “Edit VPC settings” will display two critical configuration options:
Enable DNS Resolution – This option allows the AWS provided DNS server to resolve host names.
Enable DNS Hostnames – When enabled, it assigns a domain name to an instance’s public IP address.
In this demonstration, the “Enable DNS Hostnames” option is initially disabled so that we can focus on testing the DNS resolution feature.
The next step involves launching an EC2 instance from the AWS EC2 console. Follow these steps:
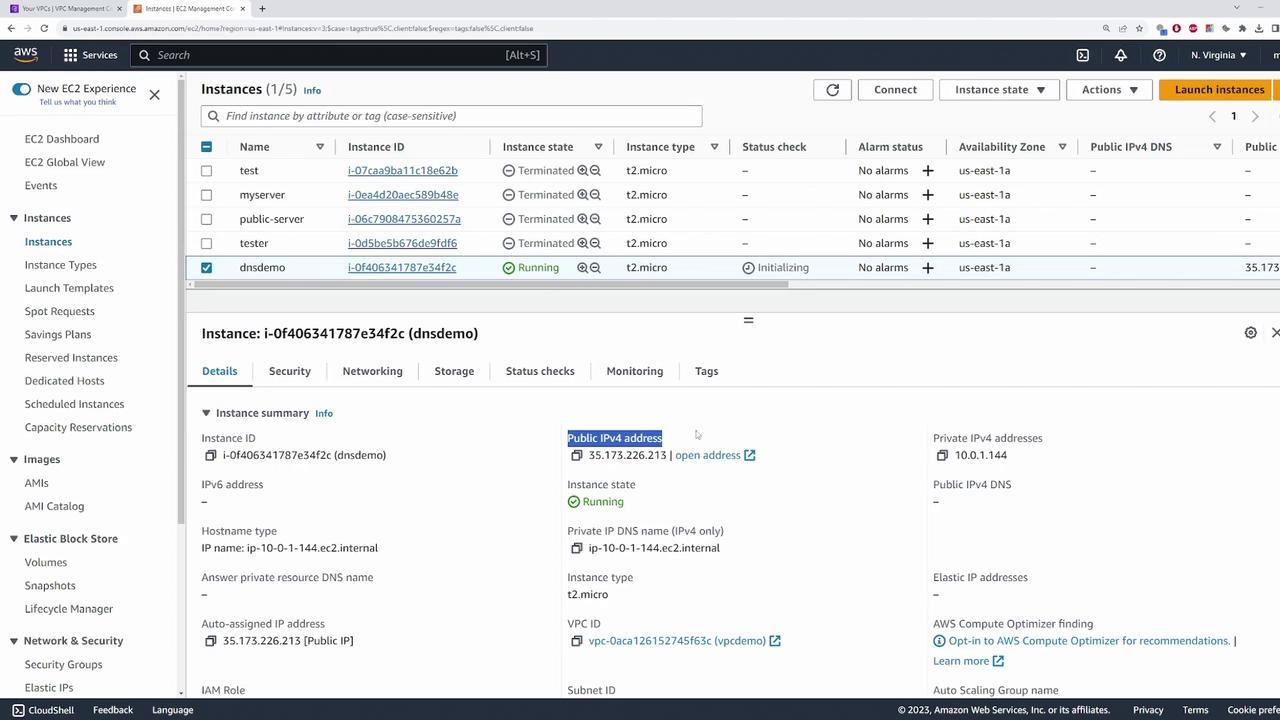
Launch an instance named “DNS demo.”
Select one of your key pairs.
Change the VPC to the VPC in focus.
Enable “Auto-assign Public IP.”
Additionally, configure a security group rule that allows all ICMP traffic for ping testing. Ensure the rule allows traffic from 0.0.0.0/0 before launching the instance.After the instance is launched, check its details. The private IP address is assigned an internal DNS name:
The internal (private) DNS name ensures that other servers within the VPC can communicate with this instance. However, since the “Enable DNS Hostnames” is disabled, the public IPv4 address does not have an associated DNS name.
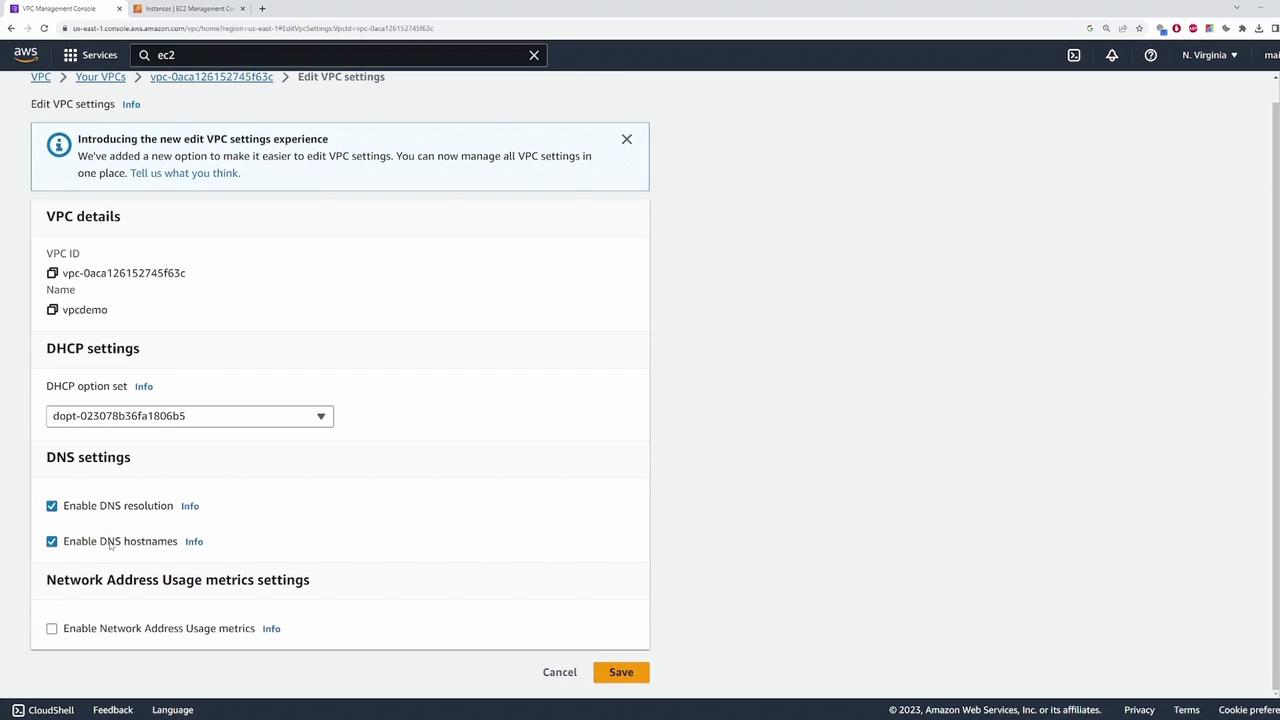
To assign a DNS name to the public IP address, follow these steps:
Return to “Actions” > “Edit VPC settings.”
Enable the “DNS Hostnames” option.
Click Save.
After refreshing the instance details, you will observe that the public IP now has an associated DNS name. This simplifies accessing the instance via its domain name rather than its IP address. To verify, copy the public DNS name and run a ping command. The response should resolve to the public IP (for example, 35.173.226.213).
Once connected, view the DNS configuration by displaying the contents of the resolv.conf file:
Copy
Ask AI
cat /etc/resolv.conf
You should see an output similar to:
Copy
Ask AI
nameserver 10.0.0.2search ec2.internal
This output confirms that the AWS DNS server at the second IP in the VPC subnet (10.0.0.2 for a CIDR block of 10.0.0.0/16) is active. Next, test external domain resolution using NS lookup:
This confirms that external domains are successfully resolved due to the enabled DNS resolution setting in the VPC.
For improved troubleshooting, verify your security group settings to ensure that ICMP traffic is permitted, as this is essential for successful ping tests.
If you choose to disable the DNS resolution option in the VPC settings, AWS will no longer answer DNS queries from your EC2 instances. To test this behavior:
Disable the DNS resolution setting in the VPC configuration.
Connect to your instance via SSH.
Run an NS lookup for a domain such as:
Copy
Ask AI
nslookup youtube.com
Since the instance continues to direct DNS queries to the AWS DNS server at 10.0.0.2 (which is no longer configured to respond), the lookup will fail. In this scenario, you must specify an alternative DNS server (for example, Google’s DNS at 8.8.8.8) or use an internally managed DNS server accessible to the instance.
Disabling DNS resolution can disrupt connectivity for your applications and services. Ensure you have alternative DNS servers configured to avoid outages.
This demonstration clarifies how modifying DNS settings within a VPC affects internal and external name resolution for your EC2 instances. This knowledge is especially valuable for those preparing for the AWS Solutions Architect Associate Certification exam and for understanding DNS behavior in AWS environments.For more resources on AWS and DNS configuration best practices, consider exploring: