Step 1: Creating a Database
Begin by accessing the AWS console and searching for RDS. In the RDS dashboard, click on the Create database button. Depending on your history with the service, the interface might present the options as a toolbar at the top or bottom, or as a pop-up if it’s your first visit. You will be presented with two options:- Standard Create – Offers full control over configuration.
- Easy Create – Automatically applies AWS best practices.
Engine Selection
Select the database engine you want to deploy. In this demonstration, we choose PostgreSQL, although other engines like Aurora, MySQL, MariaDB, Oracle, and Microsoft SQL Server are available. Once PostgreSQL is selected, you will have an option to choose a version; the default option is generally sufficient.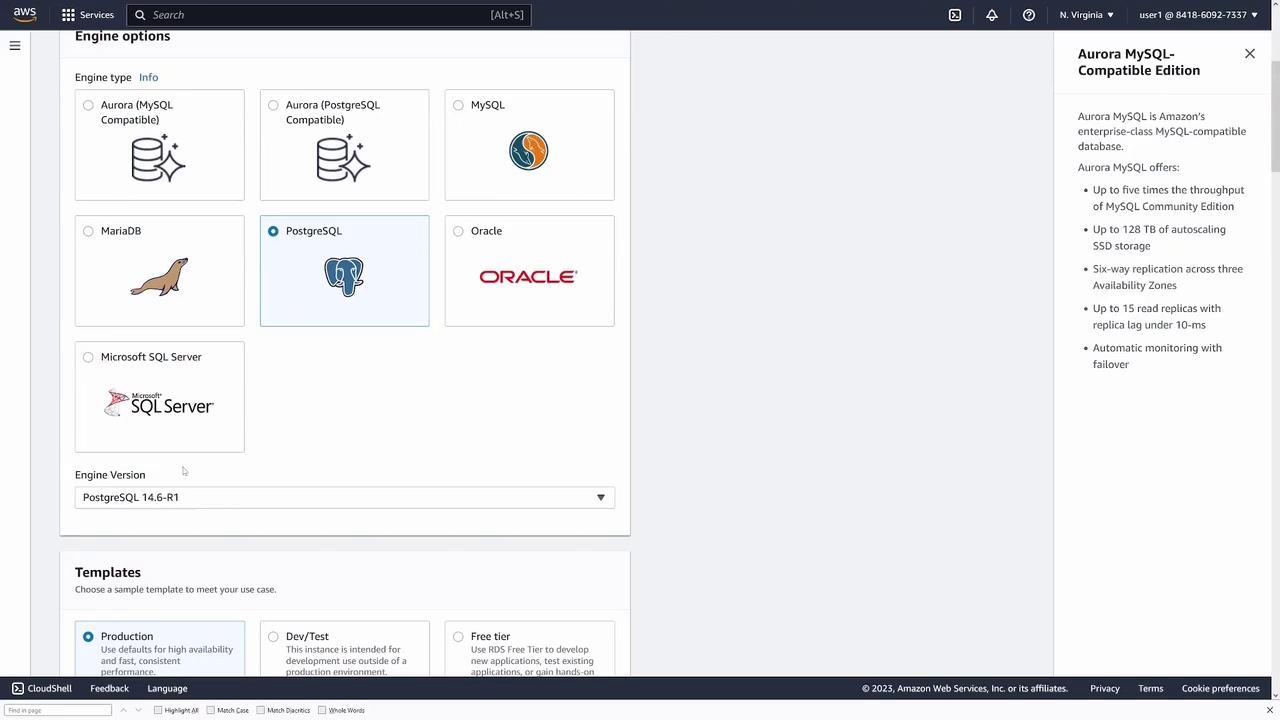
- Production: High availability and resilience.
- Dev/Test: Ideal for development and testing environments.
- Free Tier: Qualifies for free usage under AWS guidelines.
Instance Configuration
Provide a name for your database instance (e.g., “my-first-db”) and set the master username (default is “postgres”). You will then enter a password, though you can opt for AWS to generate a secure password automatically.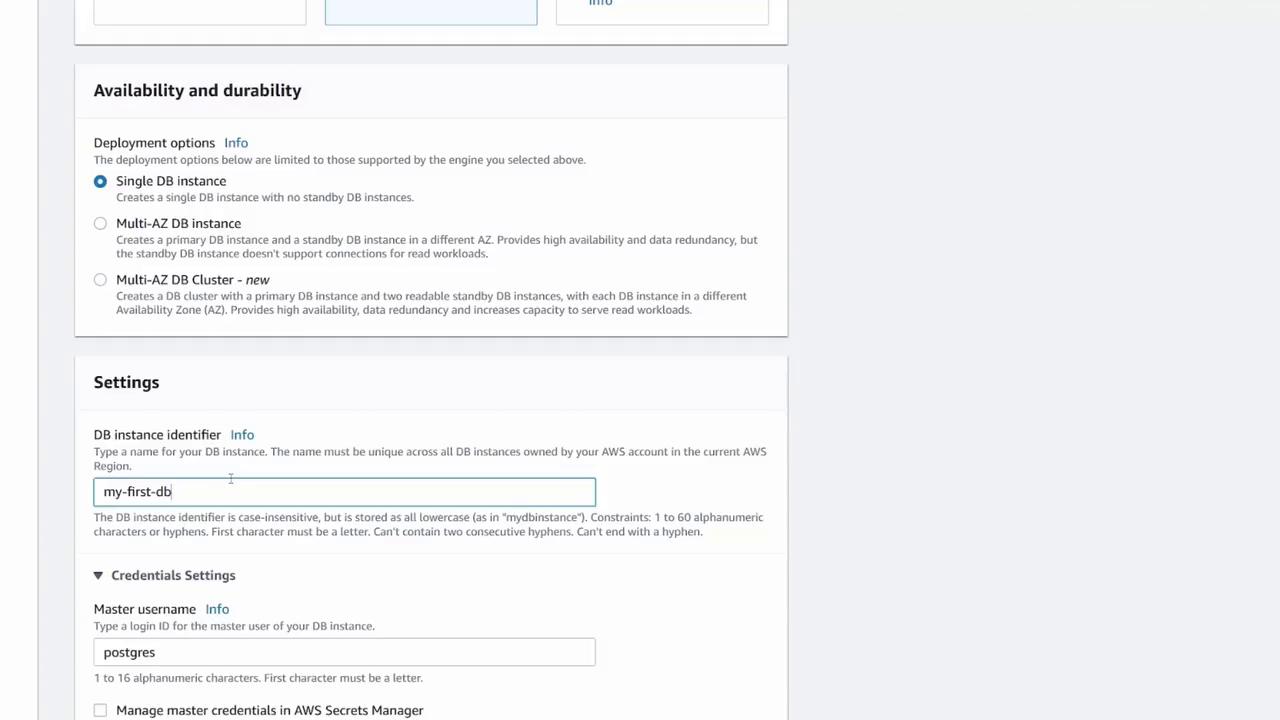
- The type and amount of allocated storage.
- Storage autoscaling (a good cost optimization feature, especially for free tier users).

Connectivity and Security
Under the Connectivity section, you can skip the compute settings if you’re not testing connectivity with an external EC2 instance. Select the default VPC and subnet. For production deployments, it’s recommended to set “Public access” to No and restrict connectivity to your backend or API. However, for this demo, enable “Public access” so you can connect to the database from your local machine. Select your VPC and create a new security group (for example, “my DB security group”) to control traffic. The availability zone can be selected or left as default if no specific preference is required.
Additional Configuration
In the additional configuration section, you can modify settings such as:- The default PostgreSQL port (modifiable if necessary).
- Authentication methods (default is password authentication).
- Monitoring and backup configurations.
Step 2: Connecting to Your Database
After your database instance is running, select it from the AWS console to view connectivity details. The key elements you need are the endpoint (IP/domain name) and the port.
- Host: The database endpoint.
- Port: Default PostgreSQL port, usually 5432.
- User: The master username (e.g., “postgres”).
- Password: The password you configured.
- Database: The default database, typically named “postgres.”
Method 1: Connecting via Code
The following JavaScript snippet uses the Knex query builder to connect to the PostgreSQL instance:Method 2: Connecting with pgAdmin
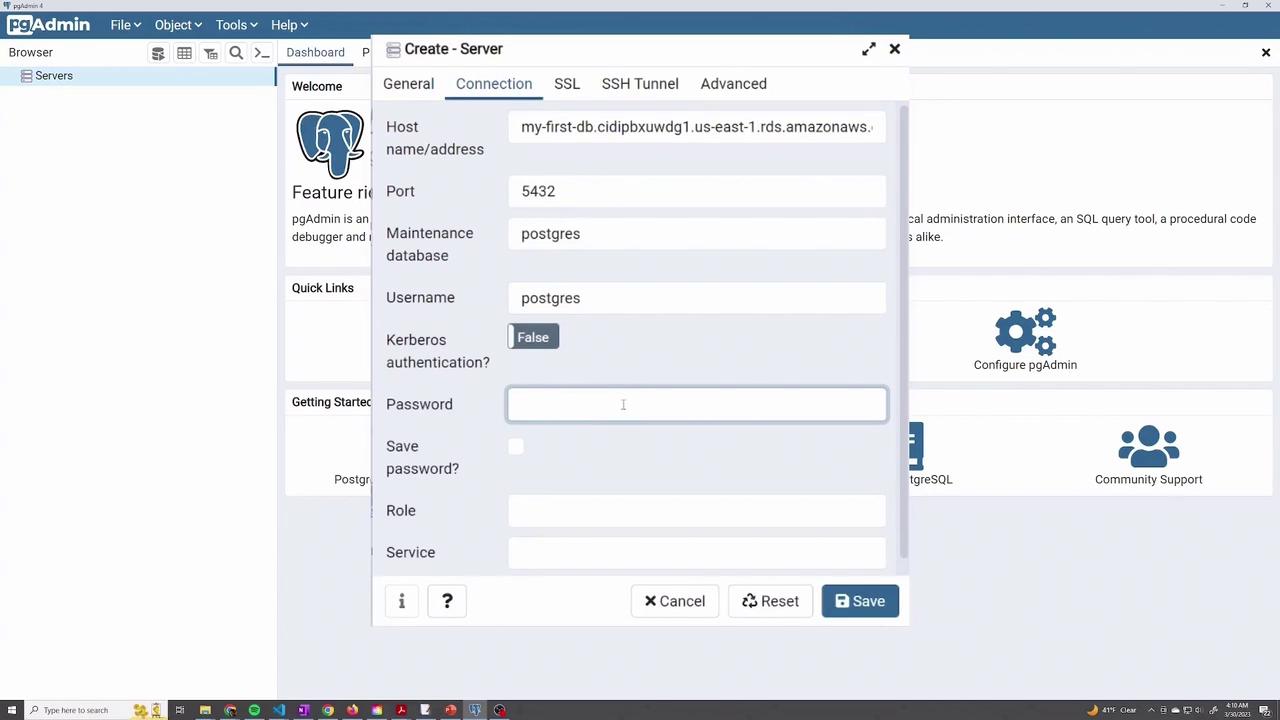
pgAdmin is a widely used GUI tool for managing PostgreSQL databases. Follow these steps to connect:- Open pgAdmin and create a new server.
- In the Create - Server dialog:
- Enter a name (e.g., “AWS - RDS”).
- Provide the server connection details including the host (the endpoint copied from AWS), port, username, and password.
- Save the configuration.
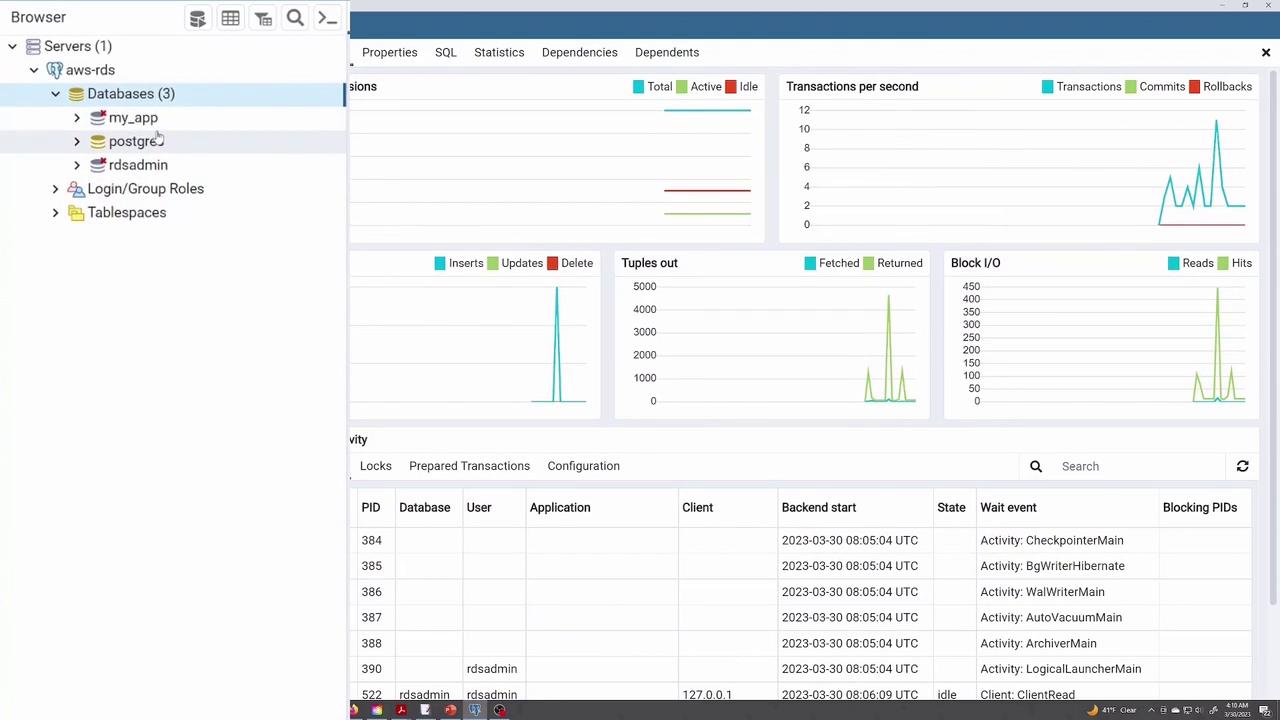
Step 3: Managing Your RDS Instance
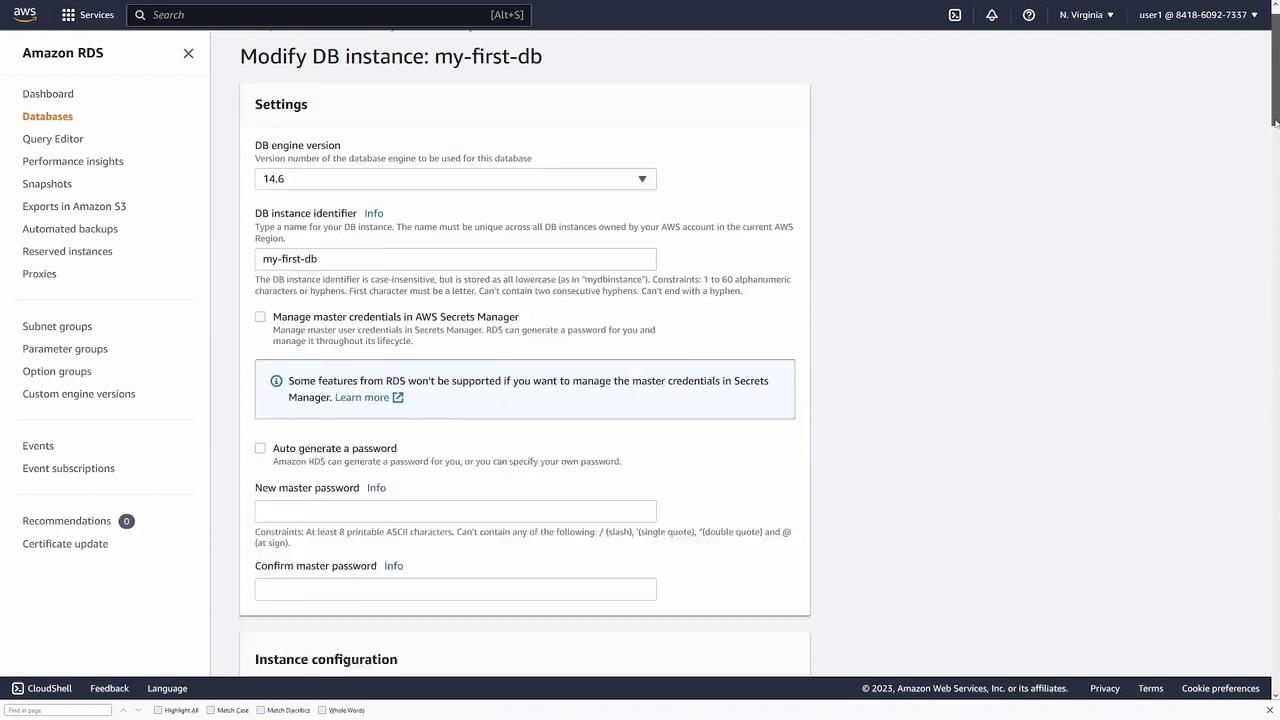
Once connected, you can manage your RDS instance through the AWS console.Modifying the Instance
If you need to update any configurations (such as engine version, instance type, or security settings), select the instance and click Modify. This option allows you to adjust various settings for your running PostgreSQL instance.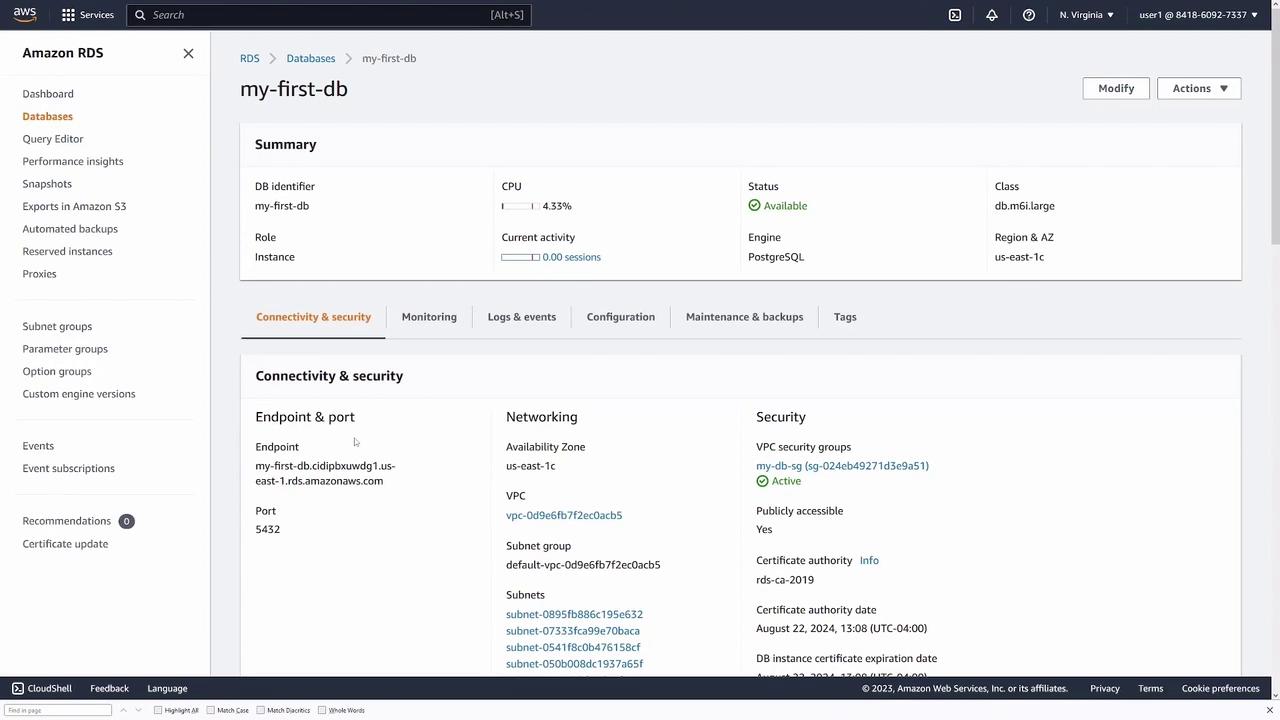
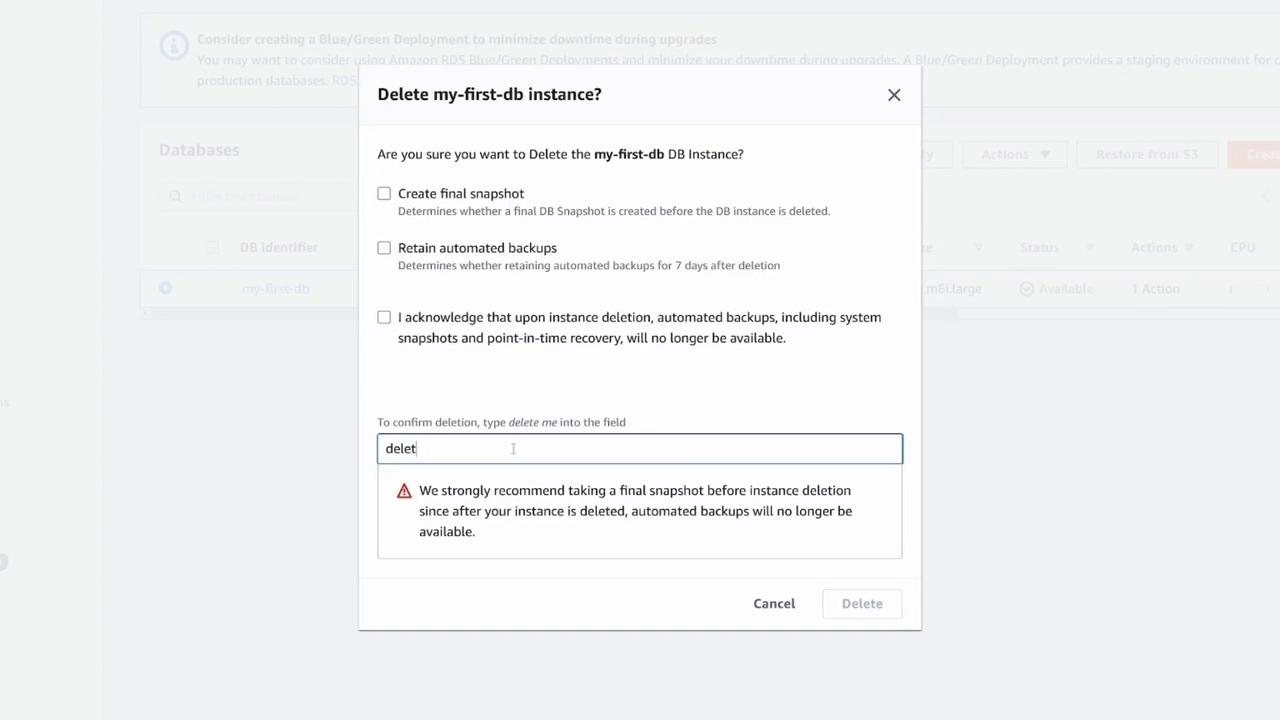
Deleting the Instance
When you are ready to remove the database instance, select it and click Delete. AWS will prompt you to confirm the deletion and ask if you wish to retain snapshots and automated backups.Deleting your database instance will result in data loss if snapshots or backups are not retained. Proceed with caution.
Conclusion
You have now successfully deployed, connected to, and managed a PostgreSQL database using Amazon RDS. This hands-on demonstration showcased how to configure your instance and perform key operations such as connecting via code and pgAdmin, modifying settings, and safely deleting the instance. Happy coding!Additional Resources
| Resource Type | Details | Link |
|---|---|---|
| AWS RDS | Amazon Relational Database Service documentation for further configuration details | AWS RDS Documentation |
| PostgreSQL | Official PostgreSQL documentation for advanced database features | PostgreSQL Docs |
| Knex.js | Learn more about the Knex query builder for Node.js | Knex.js Documentation |
For further insights into AWS and PostgreSQL best practices, refer to the resource links provided above.