1. Launching Azure AD Domain Services in the Azure Portal
Begin by logging into your Azure portal and searching for “Azure AD Domain Services.” This will locate the service along with accompanying documentation and related services.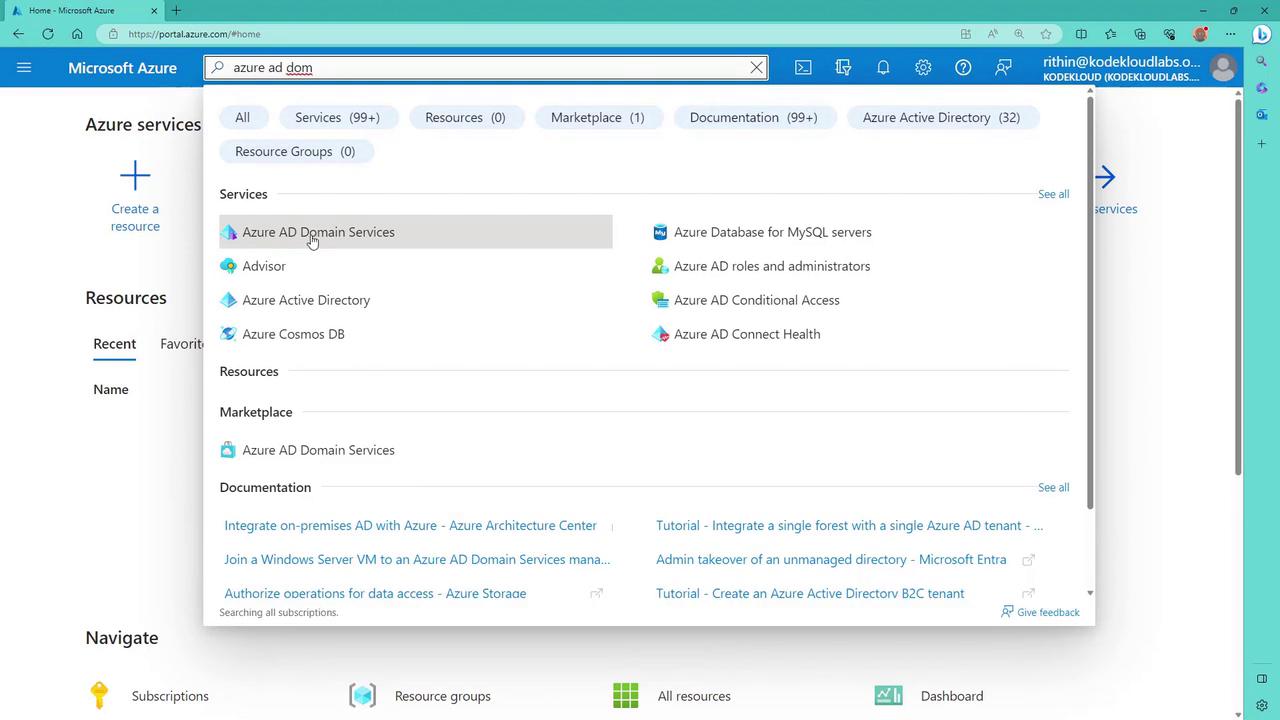
2. Creating the Azure AD Domain Services Resource
To deploy the service, you must first create an Azure AD Domain Services resource. Start with a resource group (for instance, name it “RG”) and specify a DNS name. For seamless integration with your existing Azure AD, use your default Azure AD DNS name to maintain a consistent domain across services.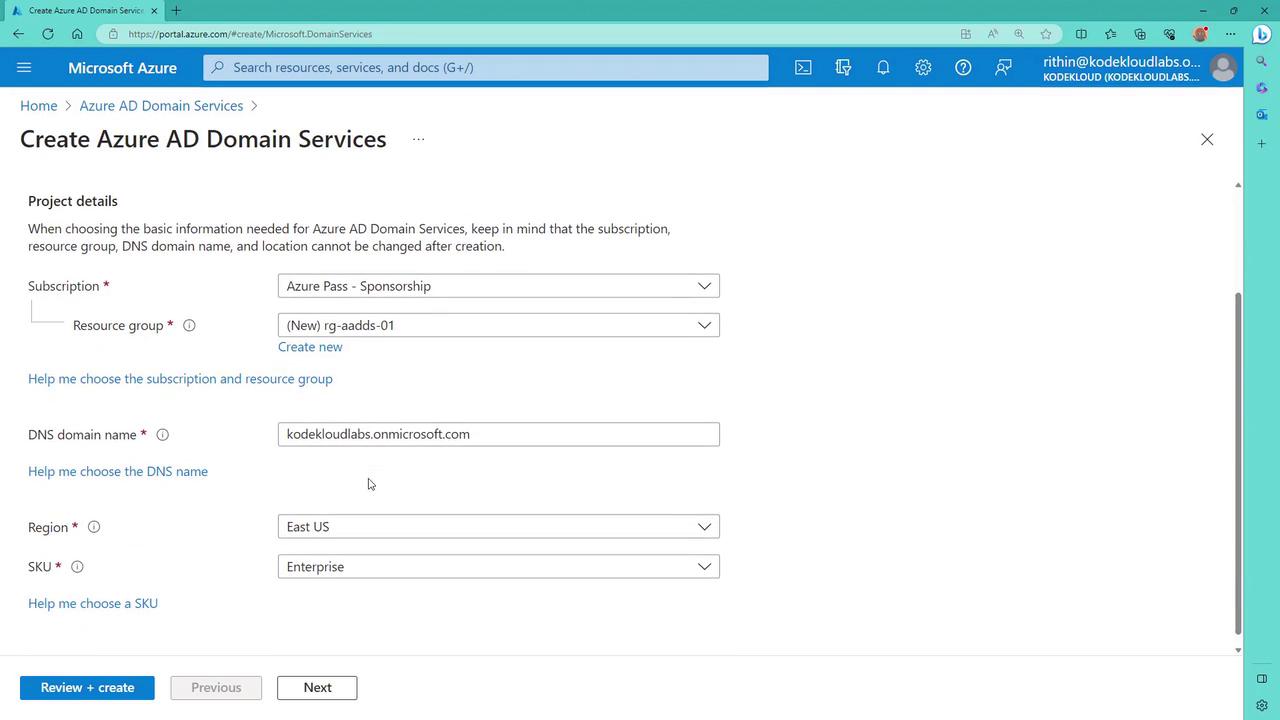
3. Configuring Region, SKU, and Pricing
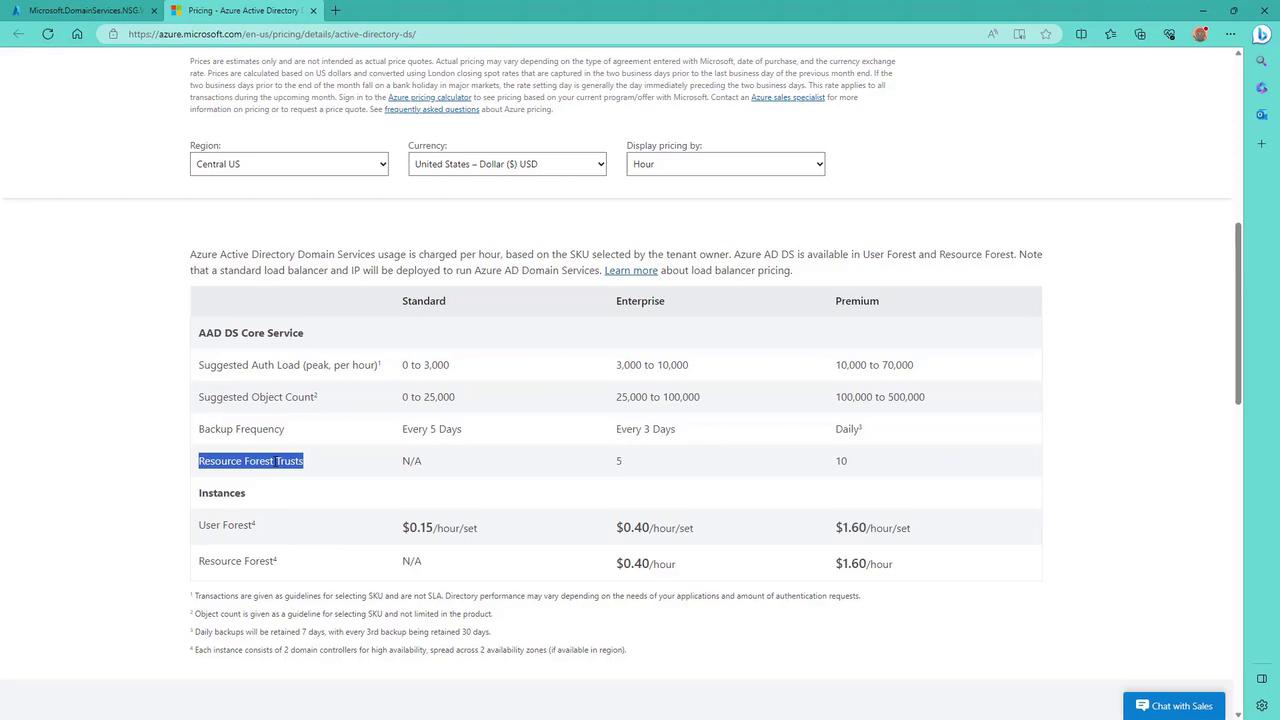
Select your preferred region (e.g., East US) and choose an appropriate SKU from enterprise, standard, or premium. If you’re uncertain which SKU best meets your requirements, click on “help me choose a SKU” for a detailed review of factors like object count, authentication load per hour, backup frequency, and additional features such as forest trust capabilities.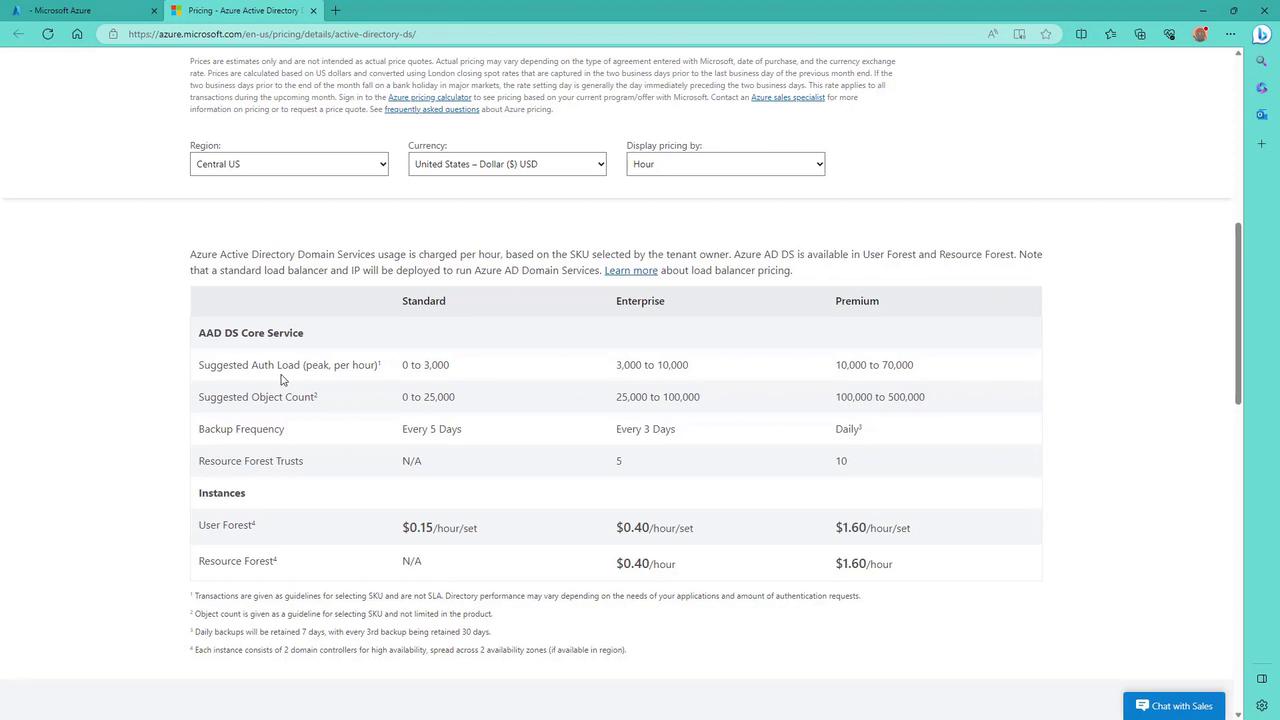
For a development deployment, the Standard SKU is used. Always analyze your production requirements before choosing a higher SKU level.
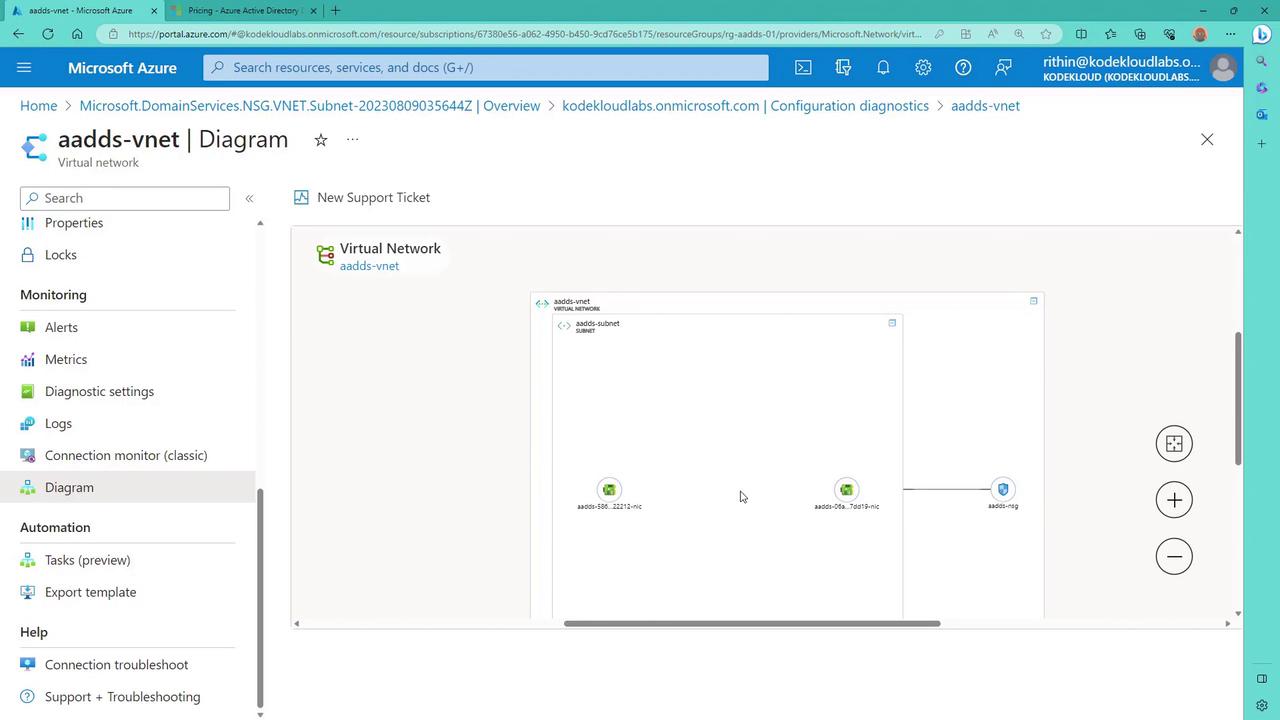
4. Setting Up the Virtual Network
Azure AD Domain Services is deployed into a virtual network. In a new subscription, Azure will automatically propose a virtual network with an address range that avoids conflicts with other networks.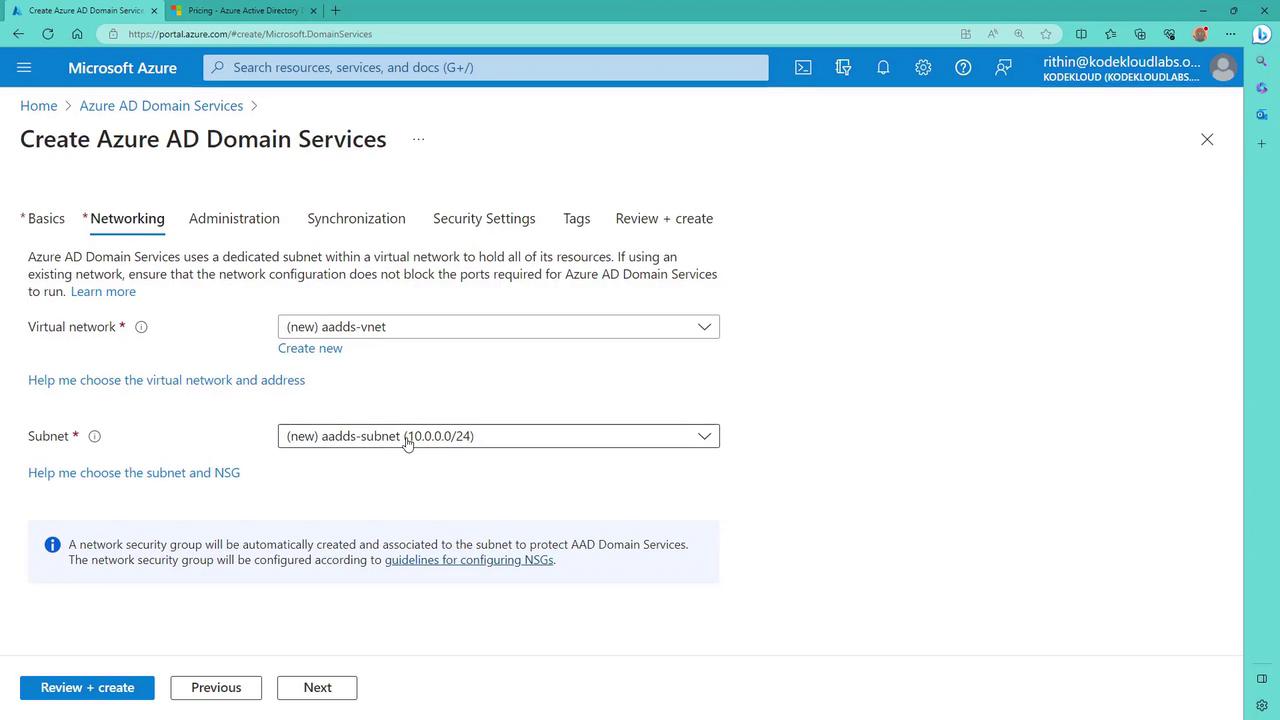
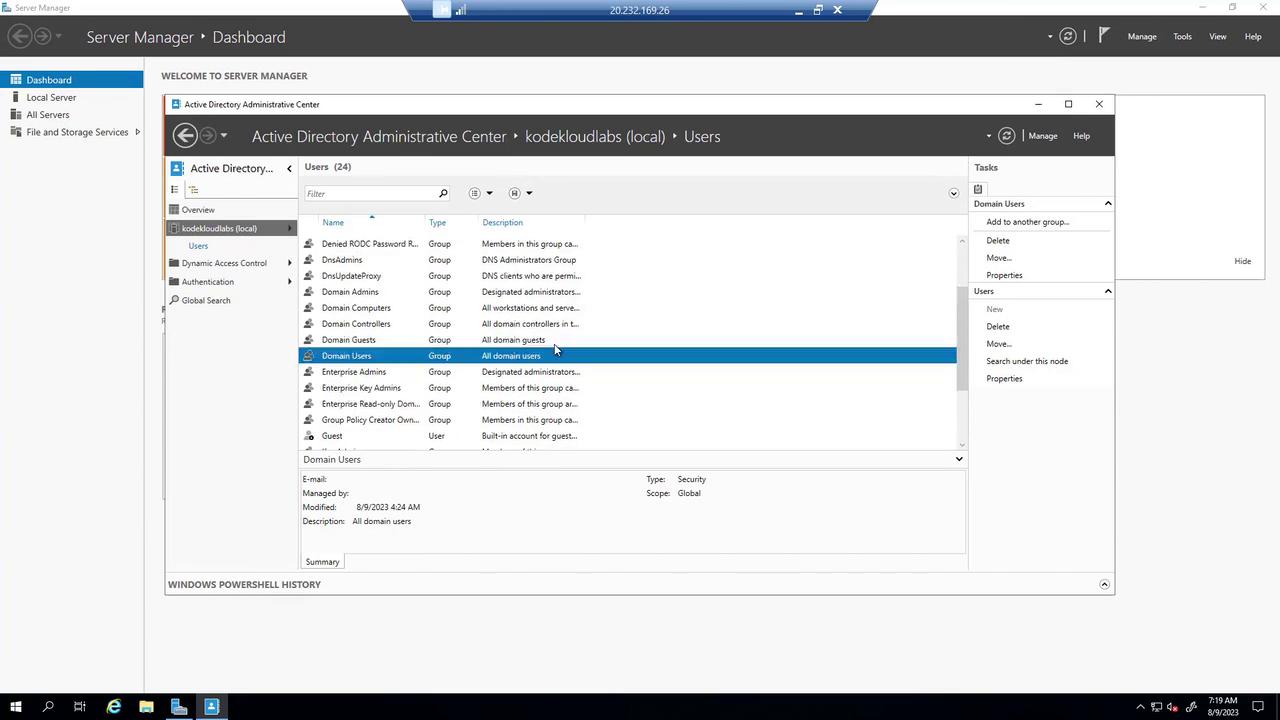
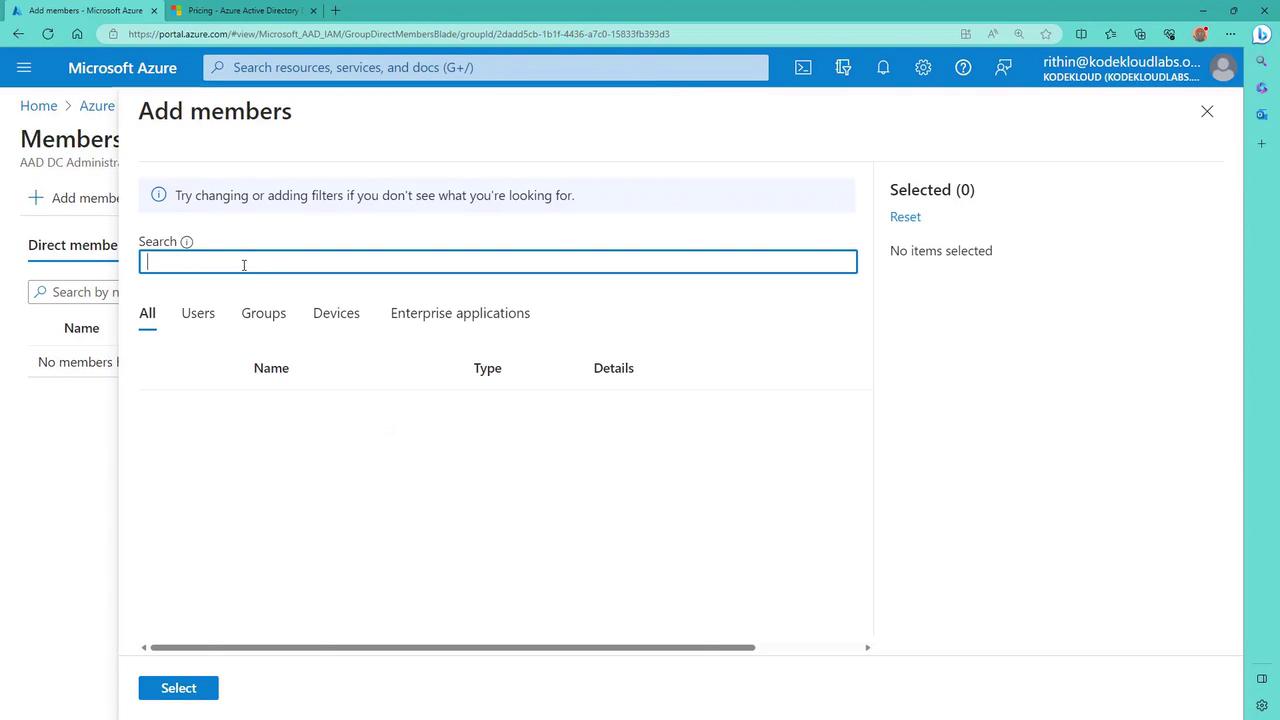
5. Configuring Domain Administration
Manage domain controller administrators by adding users or groups to the Azure AD group named “AADDC administrators.” Global administrators can also opt to receive alerts via notifications. To manage permissions, click “manage group membership” and add the required users.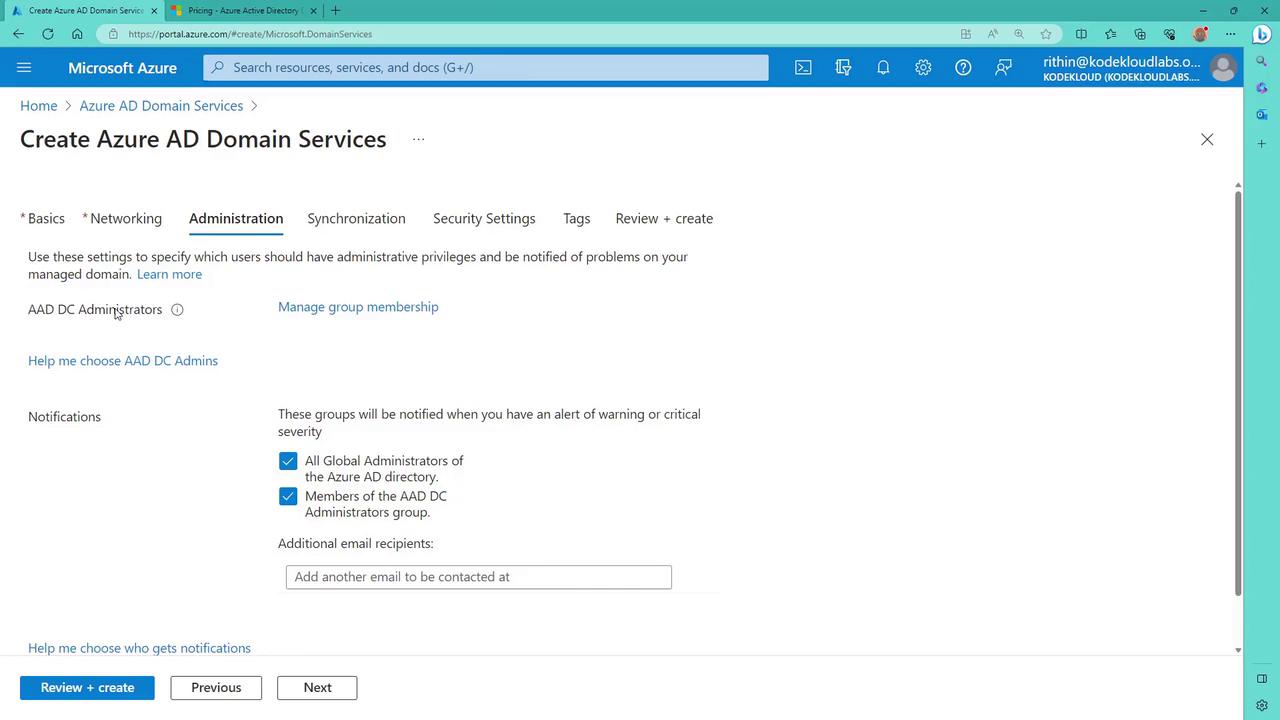
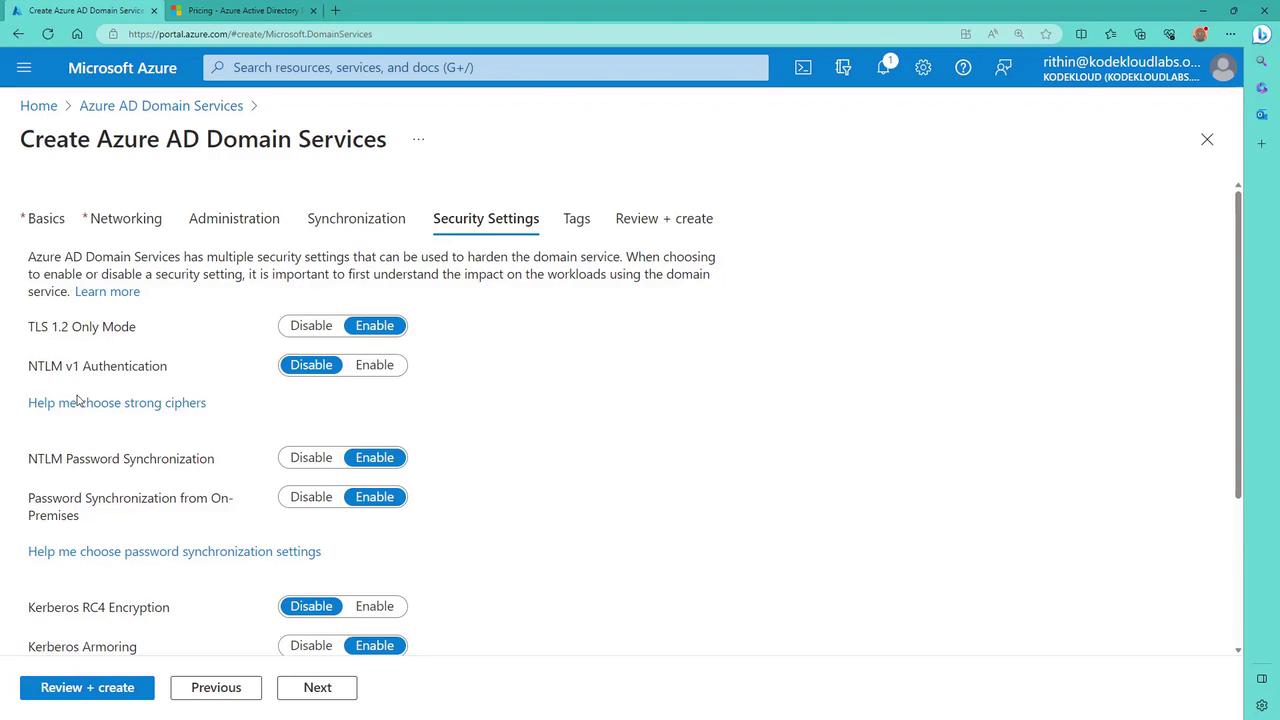
6. Configuring Synchronization Settings
Navigate to the Synchronization tab and select a synchronization type of “all” to ensure that every identity from Azure AD is synchronized. Additional options (such as TLS mode, NTLM v1, password synchronization, Kerberos, and LDAP) are available to meet specific security and operational needs.
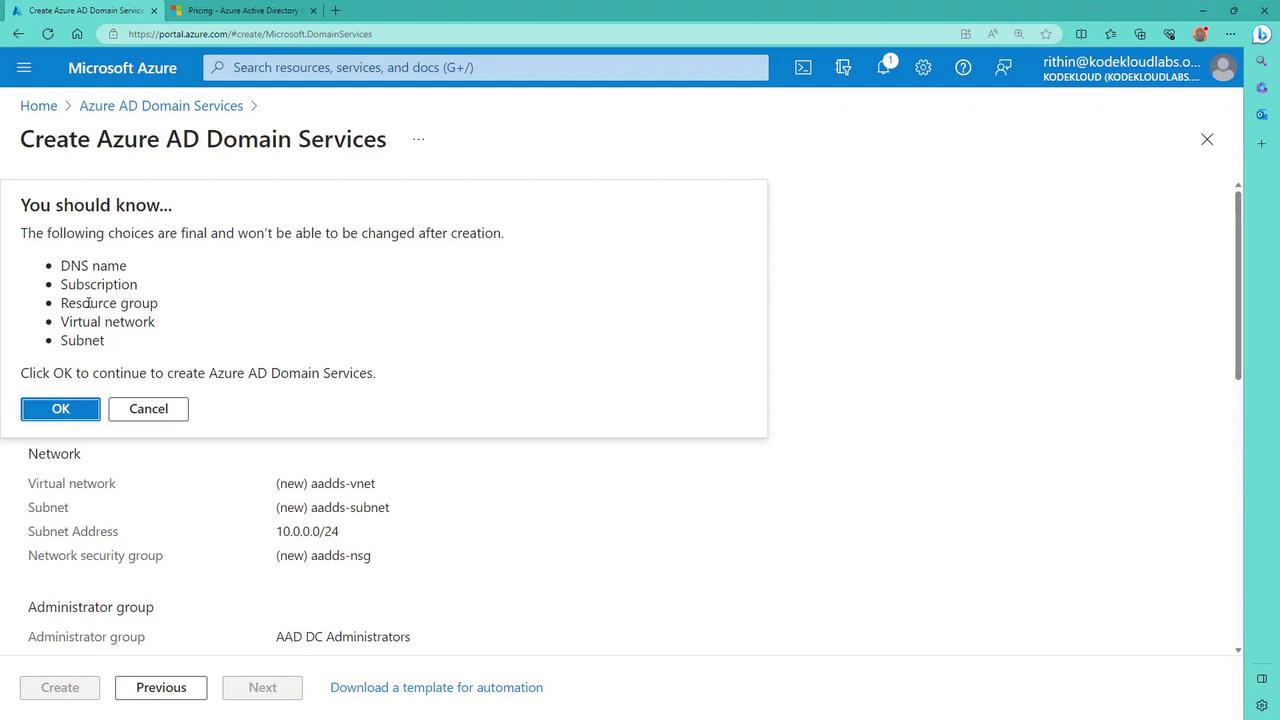
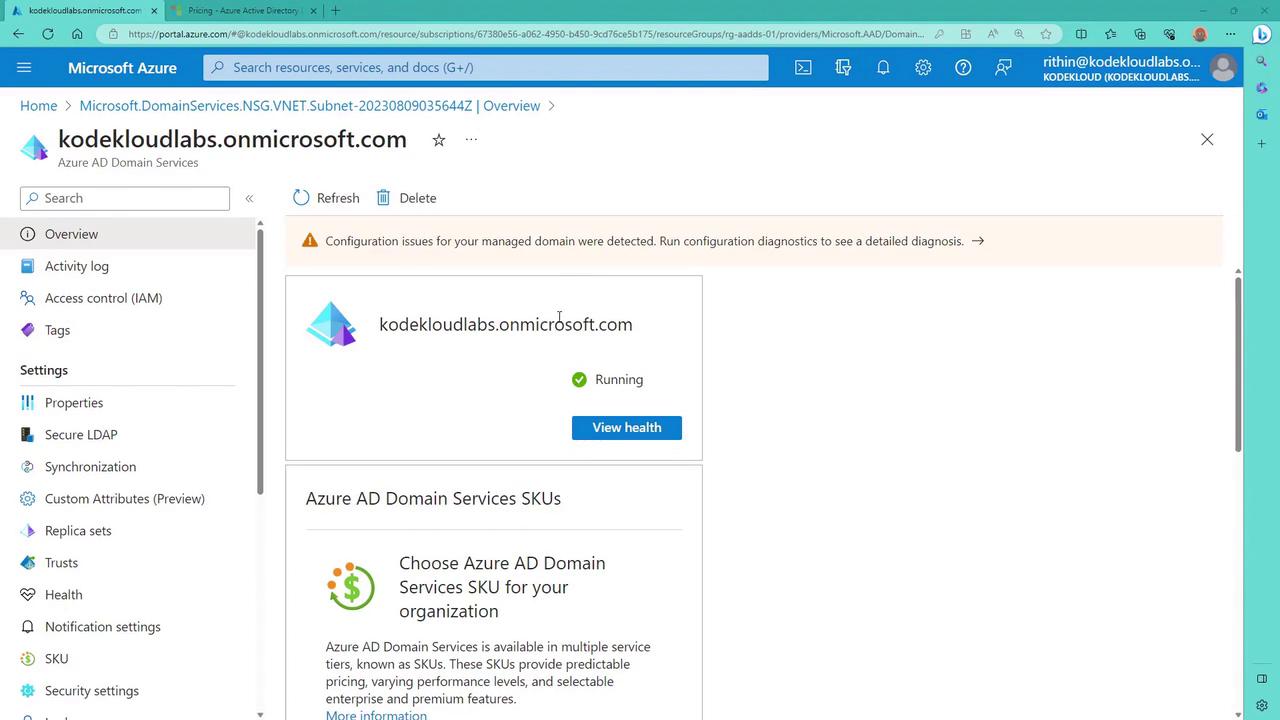
7. Reviewing Settings and Finalizing Deployment
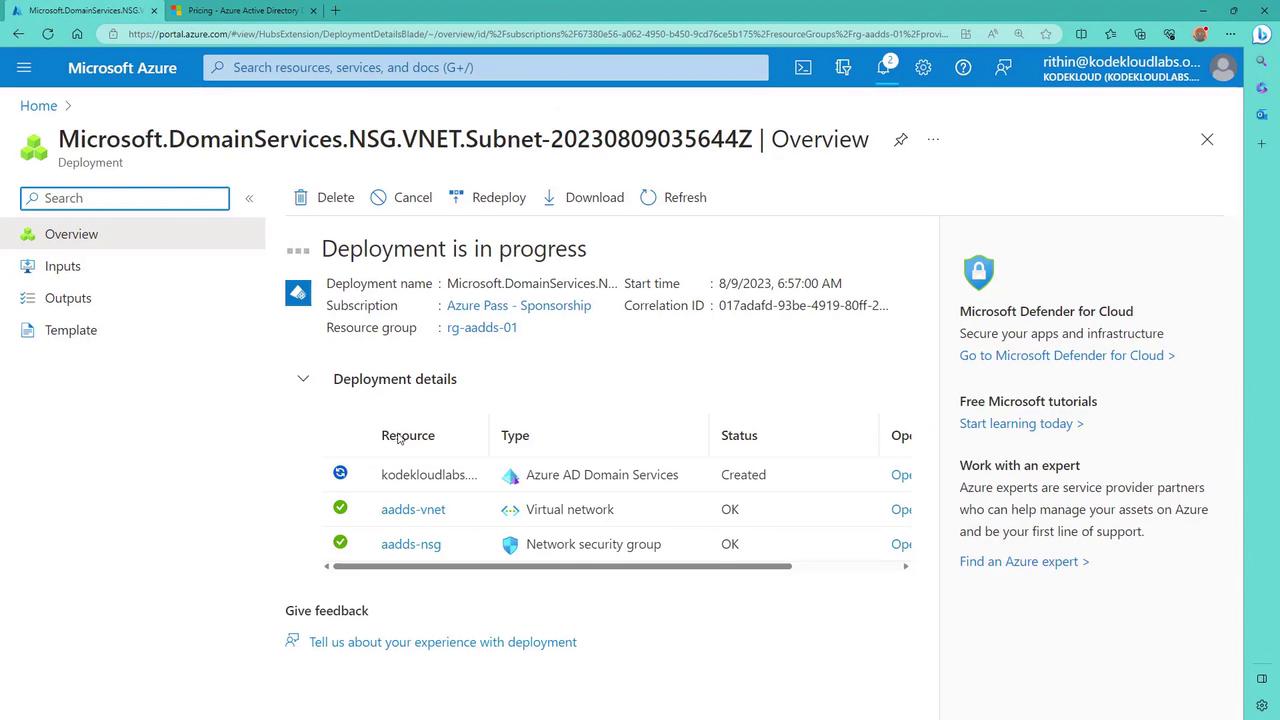
After configuring all settings, click on “Review + Create” and then “Create” once validation passes.A warning will appear indicating that your configuration choices are final and cannot be modified after deployment. Accept the warning by clicking “OK.”
8. Preparing a Virtual Machine for Domain Join
While the domain service is deploying, create a virtual machine (VM) that will join the domain. For this demonstration, set up a separate resource group (e.g., “RG workloads”) to host workload VMs. Deploy a Windows Server 2019 Datacenter VM with the necessary credentials, ensuring the RDP port is open for remote access.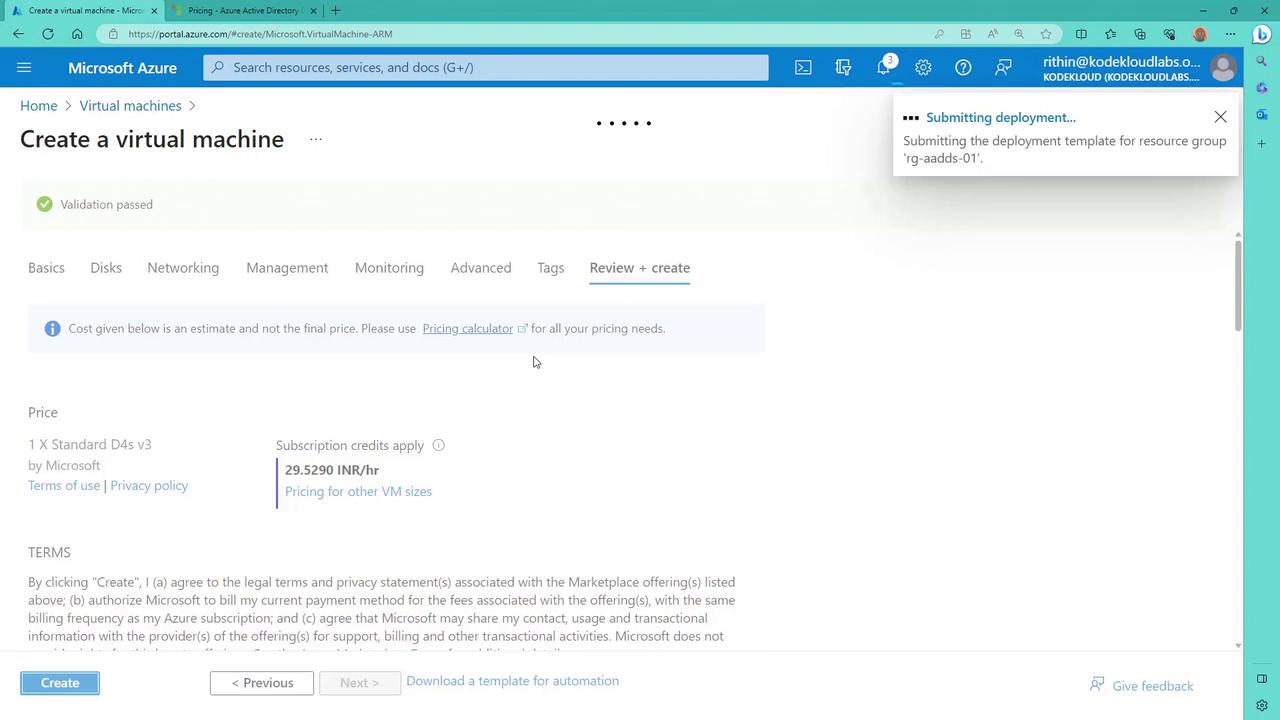
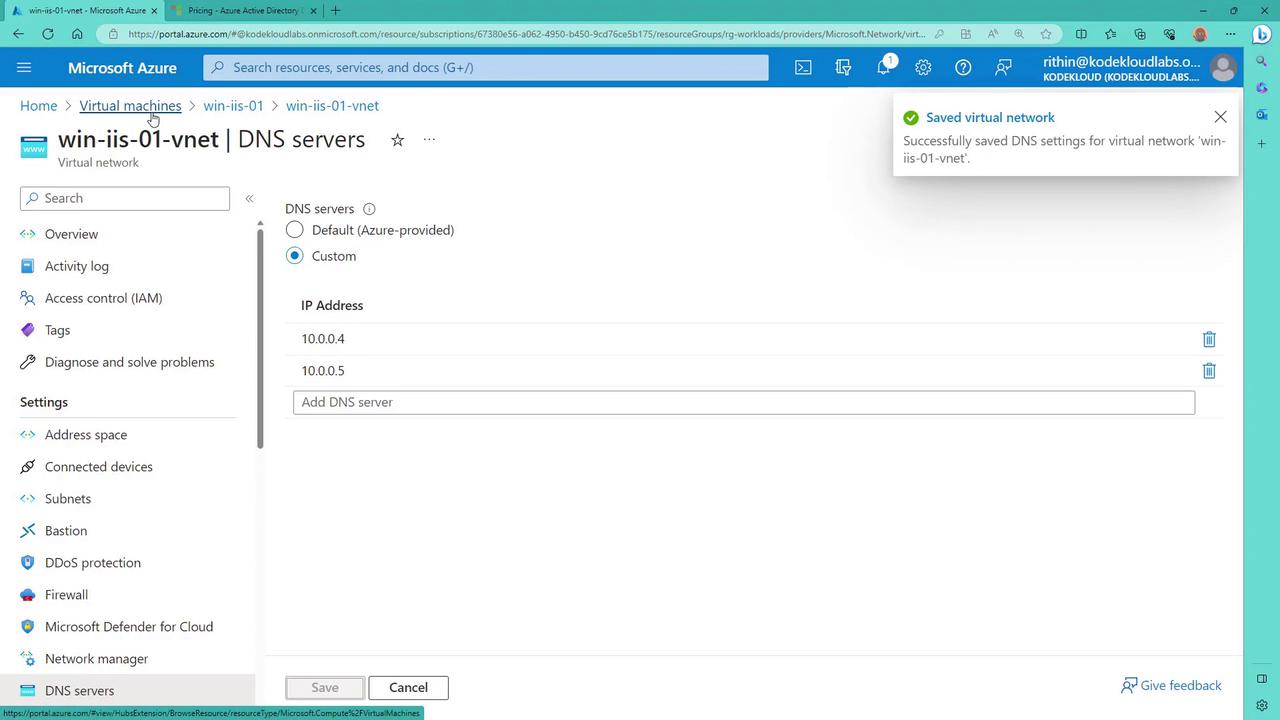
9. Updating DNS Settings on the Virtual Machine
If you encounter a warning regarding DNS records, click on it to review detailed network analysis. This warning indicates that you need to update the virtual network’s DNS servers with the domain controllers’ IP addresses to allow domain join operations.
- Navigate to the VM’s Networking settings.
- Change the DNS configuration from Default to “Custom.”
- Enter the IP addresses of the domain controllers (or Azure AD Domain Services).
- Save the changes. Note that the VM will restart to apply the updated DNS settings.
ping 10.0.0.4), proceed to establish connectivity between the networks if needed.
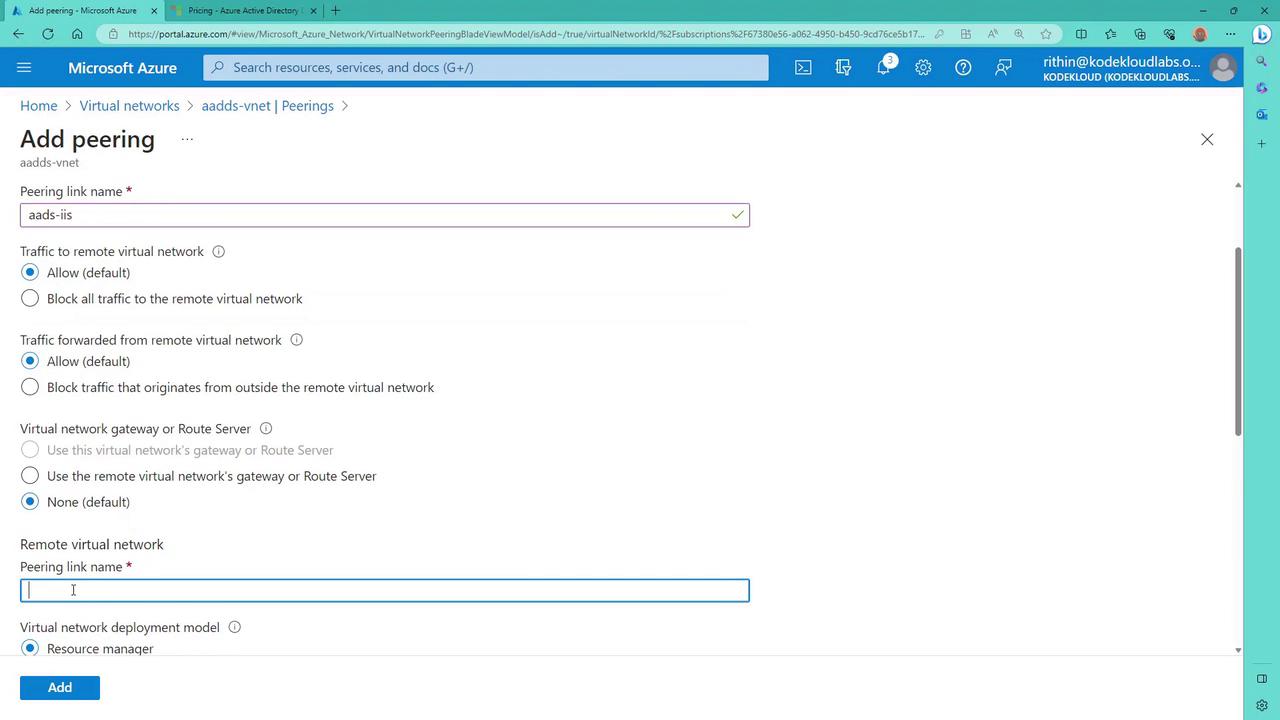
10. Configuring Virtual Network Peering
If the ping test initially shows timeouts, establish connectivity between the virtual network hosting your VM and the virtual network containing Azure AD Domain Services by creating a peering connection:- Navigate to the virtual network that hosts Azure AD Domain Services.
- Click “Add peering” and configure it (for example, name it “AAD to IAS”), ensuring that inbound and outbound traffic is allowed.
- Select the IaaS network as the remote network and click “Add.”
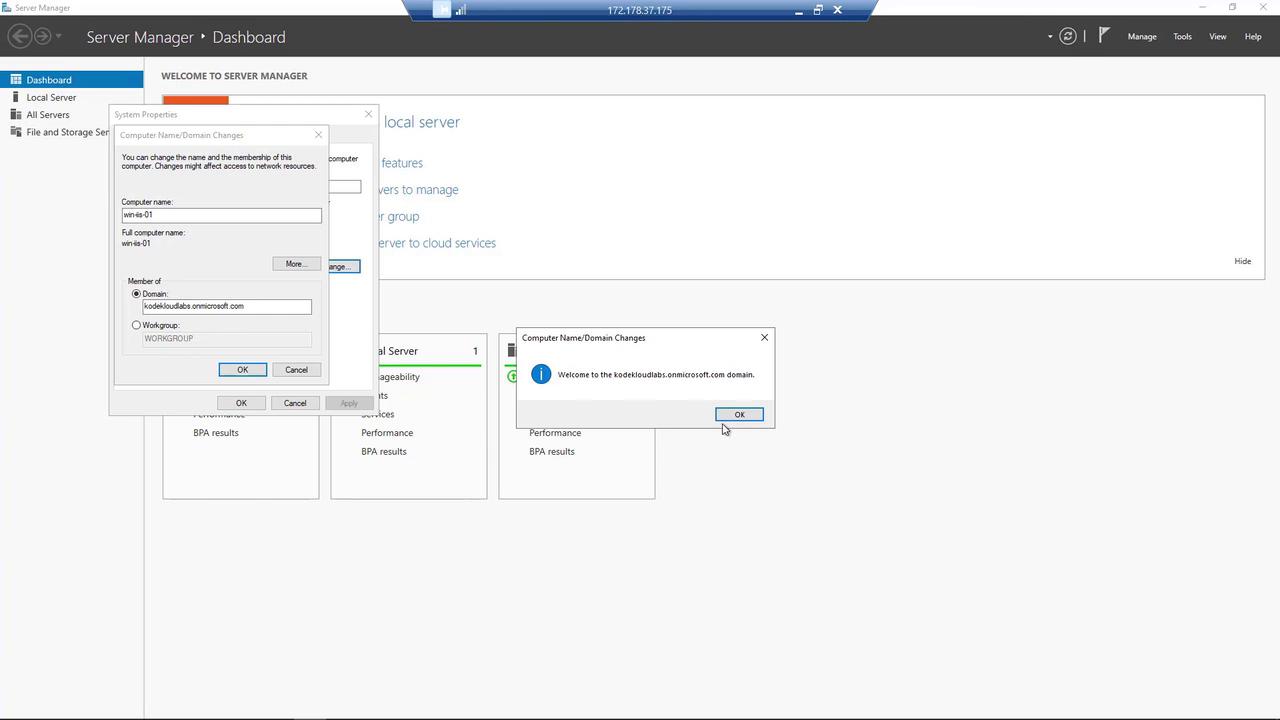
11. Joining the Virtual Machine to the Domain
Once network connectivity is confirmed, join the VM to the domain:- Open System Properties or use the “Change settings” option in the System control panel.
- Set the computer name to match the domain name provided in the Azure portal.
If your domain administrative password hasn’t synchronized yet, you might encounter authentication issues. In such cases, use the self-service password reset (SSPR) portal at https://aka.ms/SSPR to reset your password. Note that synchronization may take 10 to 15 minutes.
12. Managing Domain Services with RSAT
After the VM has joined the domain, log in using domain administrator credentials (local accounts will not display Active Directory objects). Install the Remote Server Administration Tools (RSAT) to manage Active Directory Domain Services:- Open Server Manager.
- Add roles and features.
- Include the RSAT tools such as DNS Server Tools.