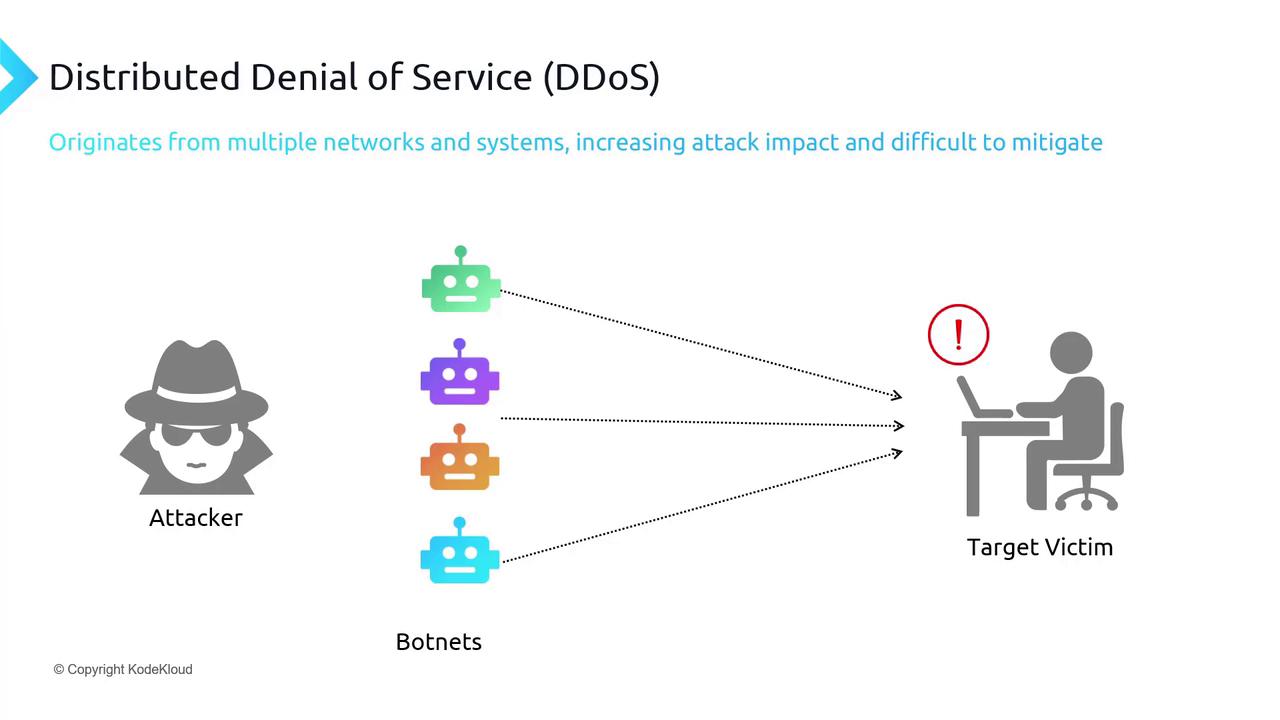
- An attacker targets a specific victim—such as a website or an email server.
- The attacker harnesses numerous compromised devices (botnets) to generate a flood of requests.
- The inundated traffic prevents legitimate users from accessing the service.
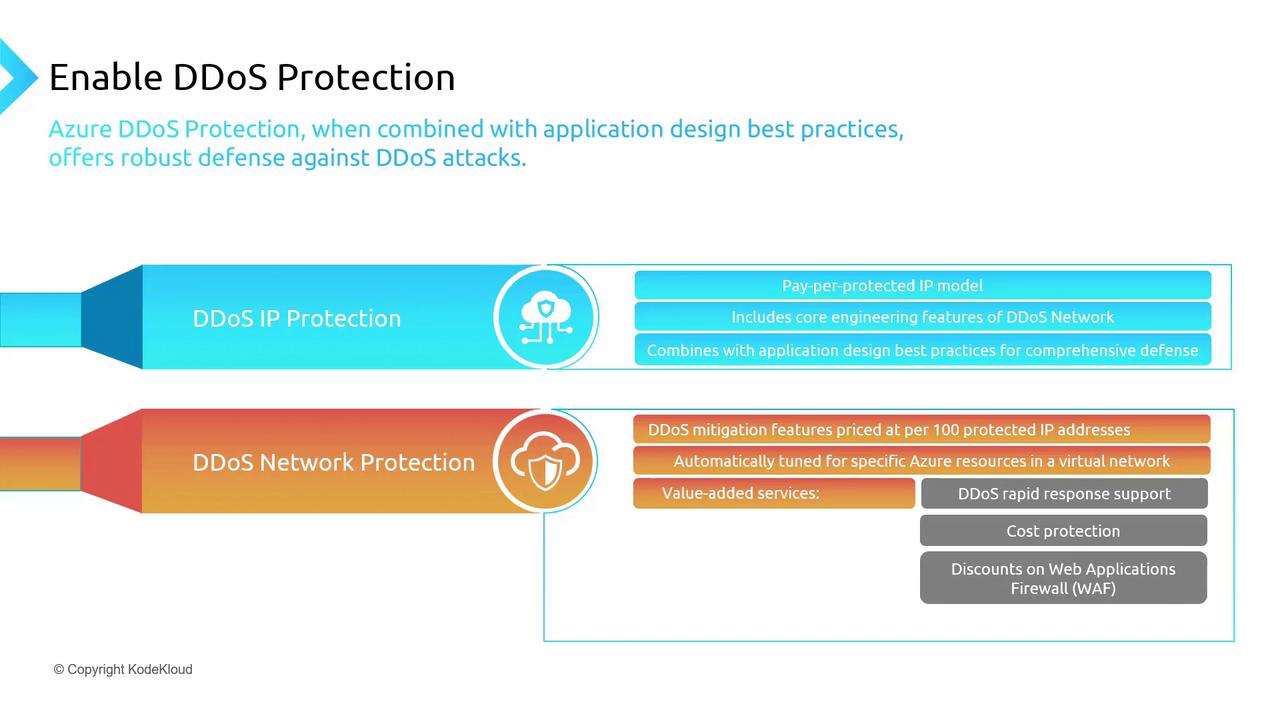
Azure DDoS Protection Offerings
Azure provides two primary offerings that integrate with robust application design and best practices:- DDoS IP Protection
This pay-per-protected IP model secures each public IP address individually. Key features include:- Mitigation policies tailored to your application needs
- Detailed mitigation reports, metrics, alerts, and flow logs
- Integration with Microsoft Sentinel for enhanced monitoring
DDoS IP Protection supports only standard public IP addresses. Basic Tier public IP addresses are not eligible, making this option ideal for protecting one or two dedicated public-facing IPs.
- DDoS Network Protection
Charged per 100 protected IP addresses, this plan dynamically adjusts to safeguard all resources within your virtual network. It protects IPv4 and IPv6 addresses across various resources, such as virtual network interfaces, application gateways, and load balancers. Benefits include:- Rapid response support during DDoS attacks
- Cost protection from unexpected financial impacts
- Discounts on Web Application Firewall (WAF) usage for additional layers of security
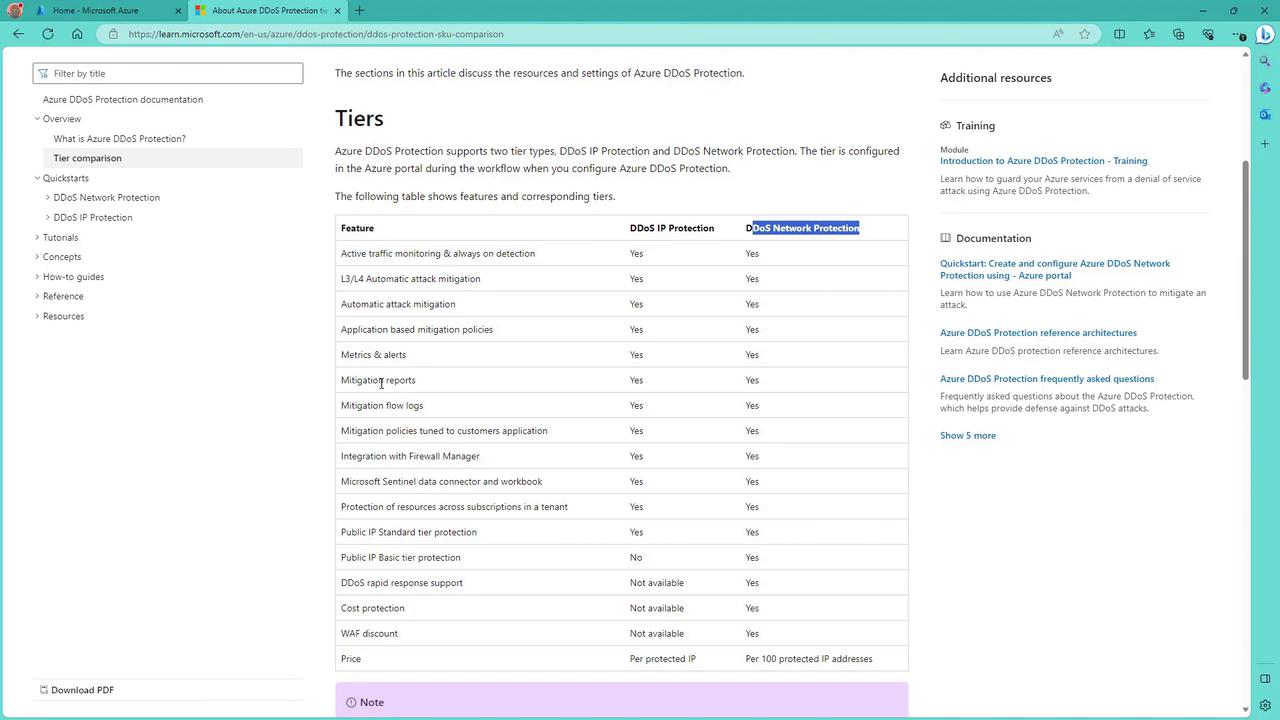
Key Differences Between Protection Plans
- DDoS IP Protection: Provides per-IP protection ideal for a limited number of resources with standard public IP addresses.
- DDoS Network Protection: Offers comprehensive protection for multiple resources, including Basic Tier public IPs, making it the better option for environments with extensive internet exposure.
Enabling DDoS Protection in Azure
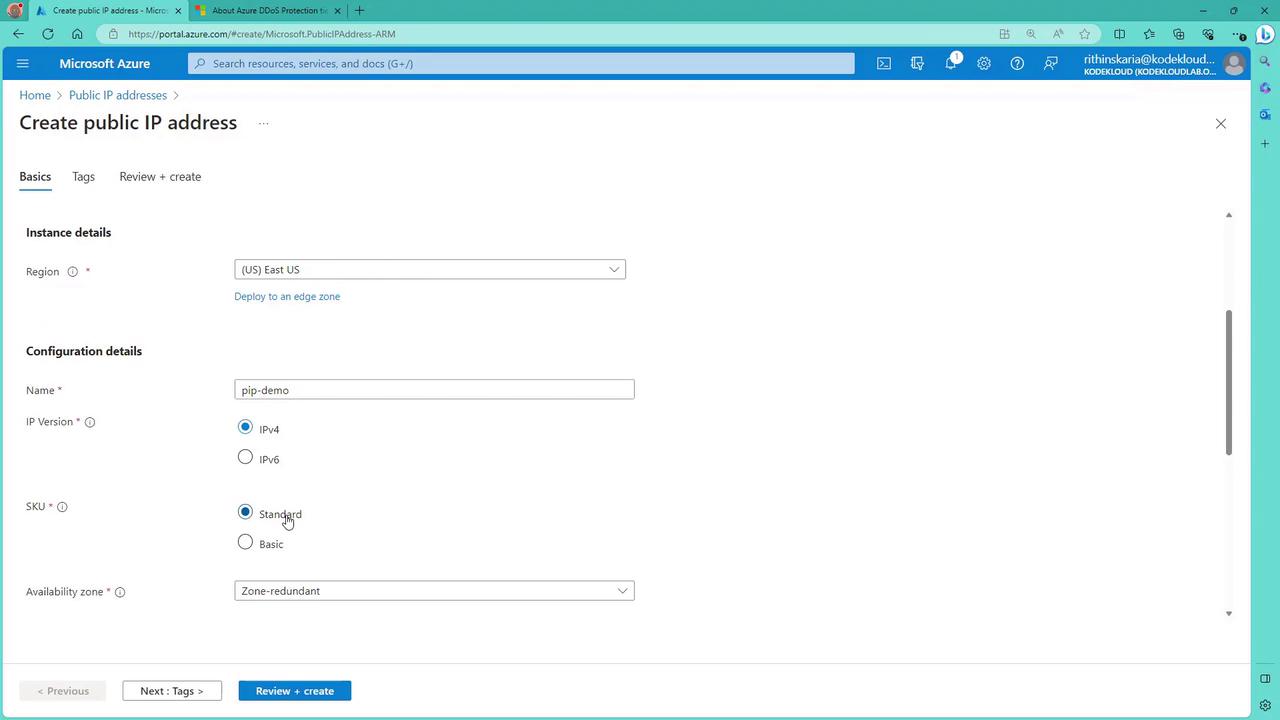
Follow these steps to enable Azure DDoS Protection for your resources using the Azure portal.Step 1: Creating a Public IP Address
Begin by creating a public IP address with the Standard SKU (the Basic SKU is not supported for DDoS IP Protection).- In the Azure portal, click on “Create public IP address.”
- Fill out the required details (e.g., set Resource Group to
rgprodand Name toPIP-demo). - Ensure that the SKU is set to “Standard.”
- Click on “Review and create,” then “Create.”
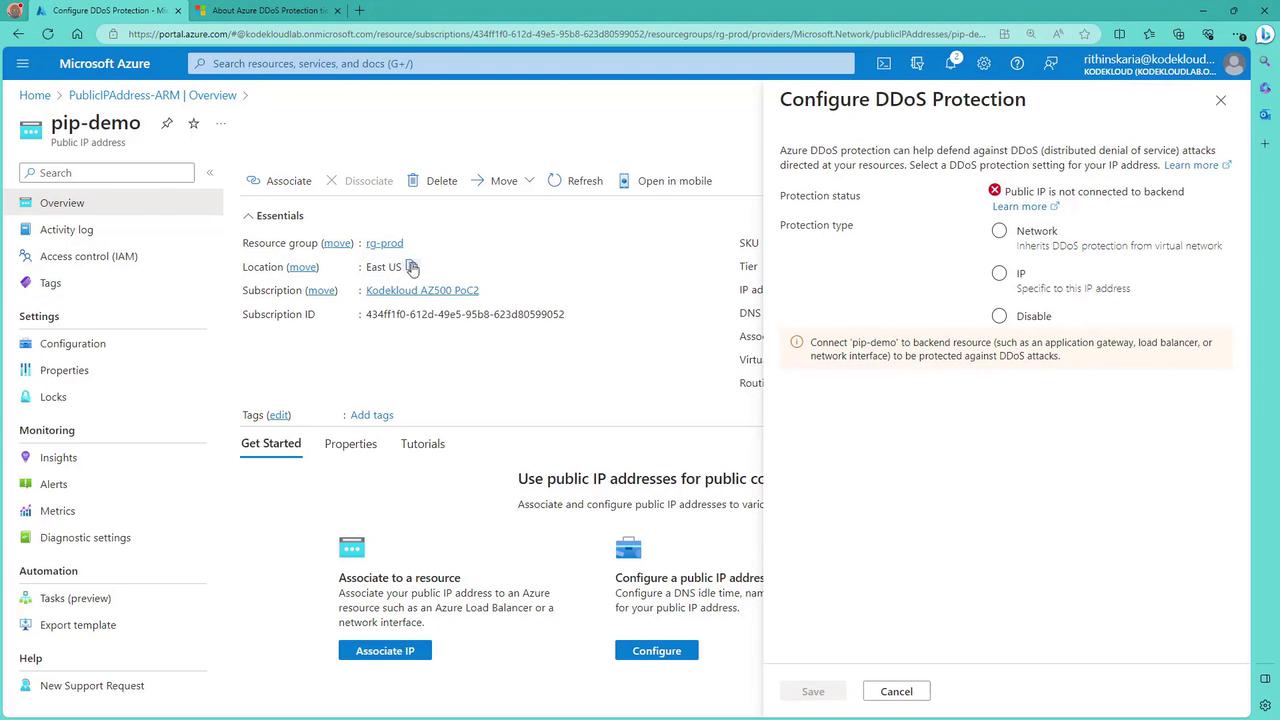
Step 2: Configuring DDoS Protection for the Public IP
- Within the public IP resource page, click on “Protect IP address.”
- A notice will display that the public IP is not yet connected to any backend resource.
- Choose from three available options:
- Inherit the DDoS Protection from an existing plan applied to the associated virtual network.
- Apply a dedicated DDoS Protection plan for this specific IP.
- Create a DDoS Protection Plan to cover all resources across your subscriptions.
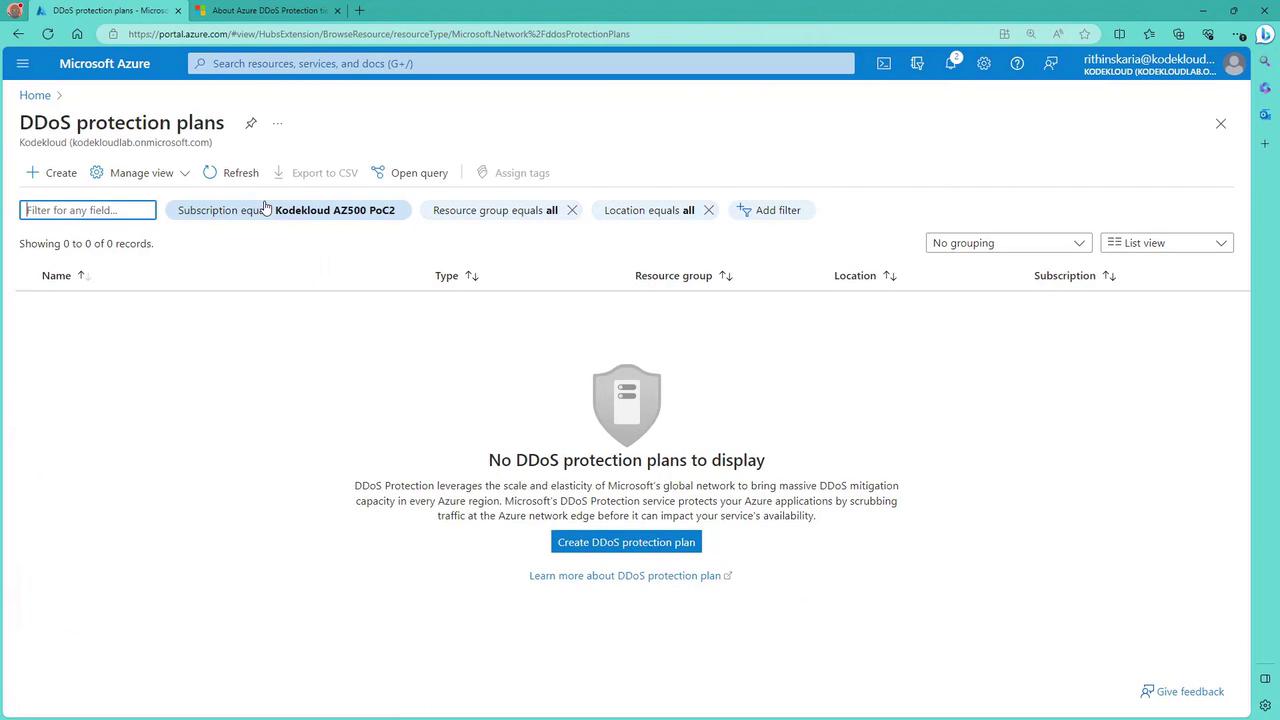
Step 3: Creating a DDoS Protection Plan
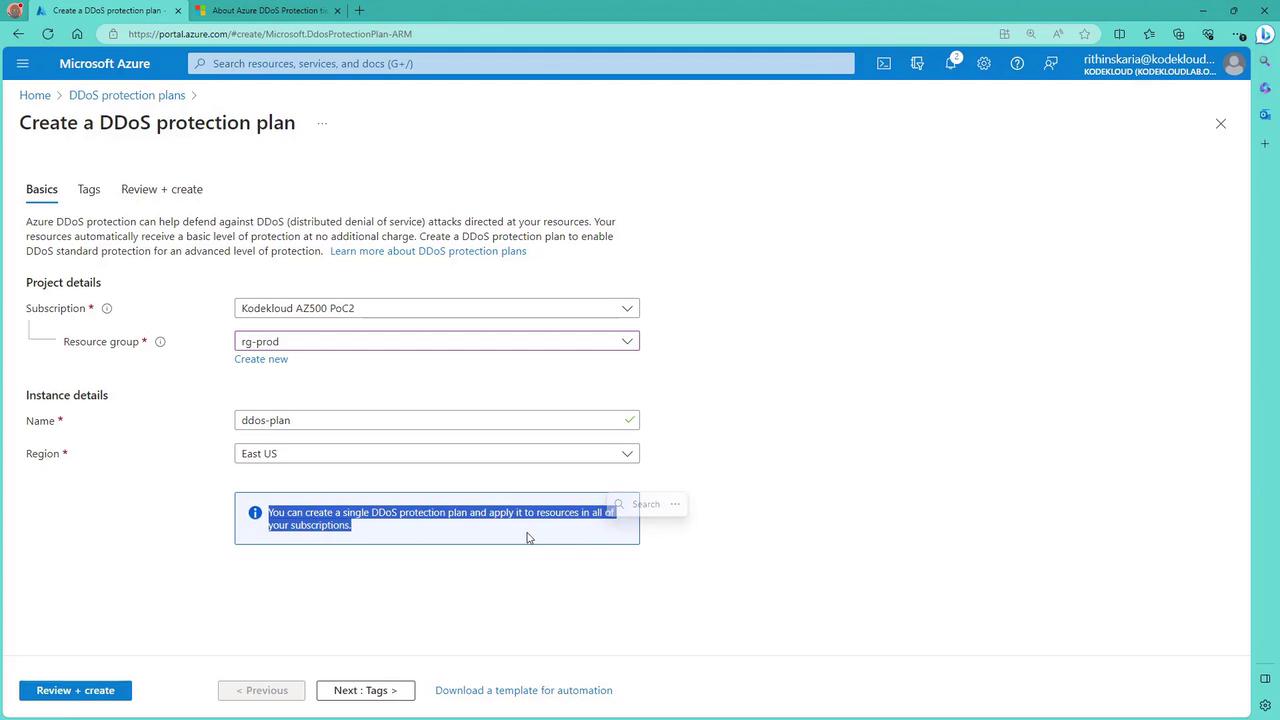
For broader protection across multiple resources, create a DDoS Protection Plan:- In the Azure portal, search for “DDoS” and select “DDoS Protection Plan.”
- Click “Create” and provide the required details:
- Resource Group: Use an existing resource group or create a new one.
- Name: For example, “DDoS Plan East US.”
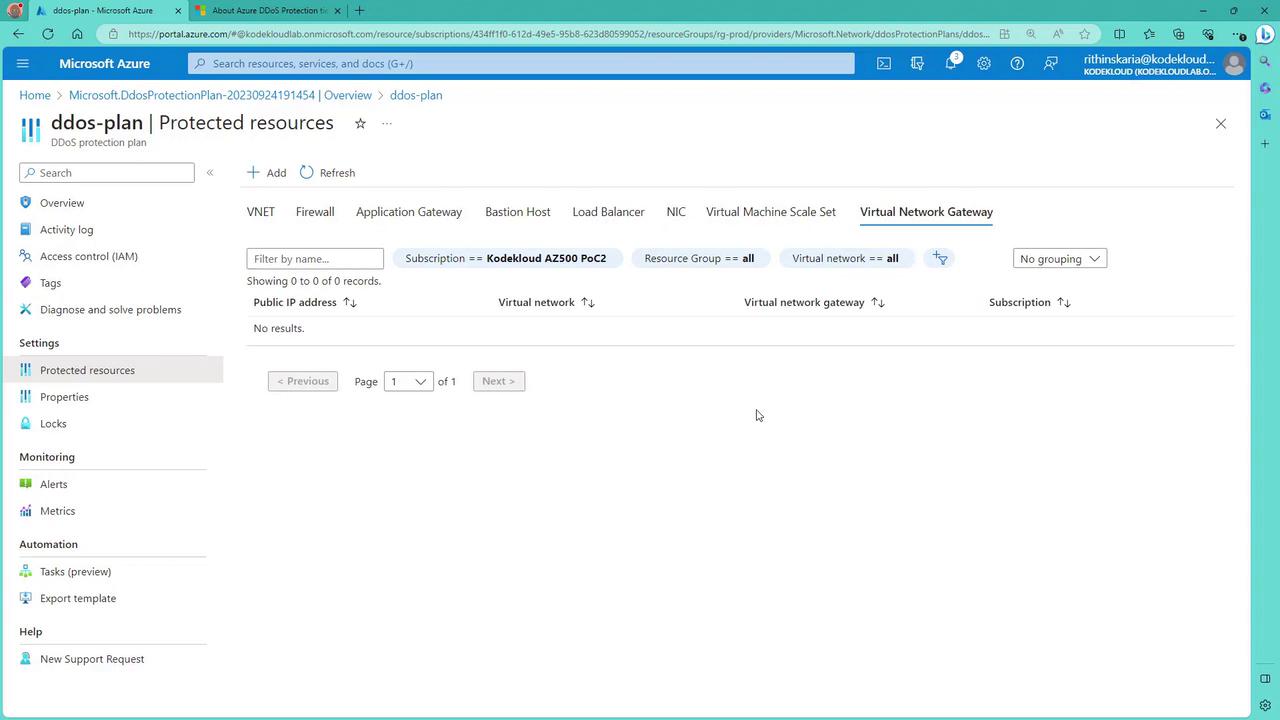
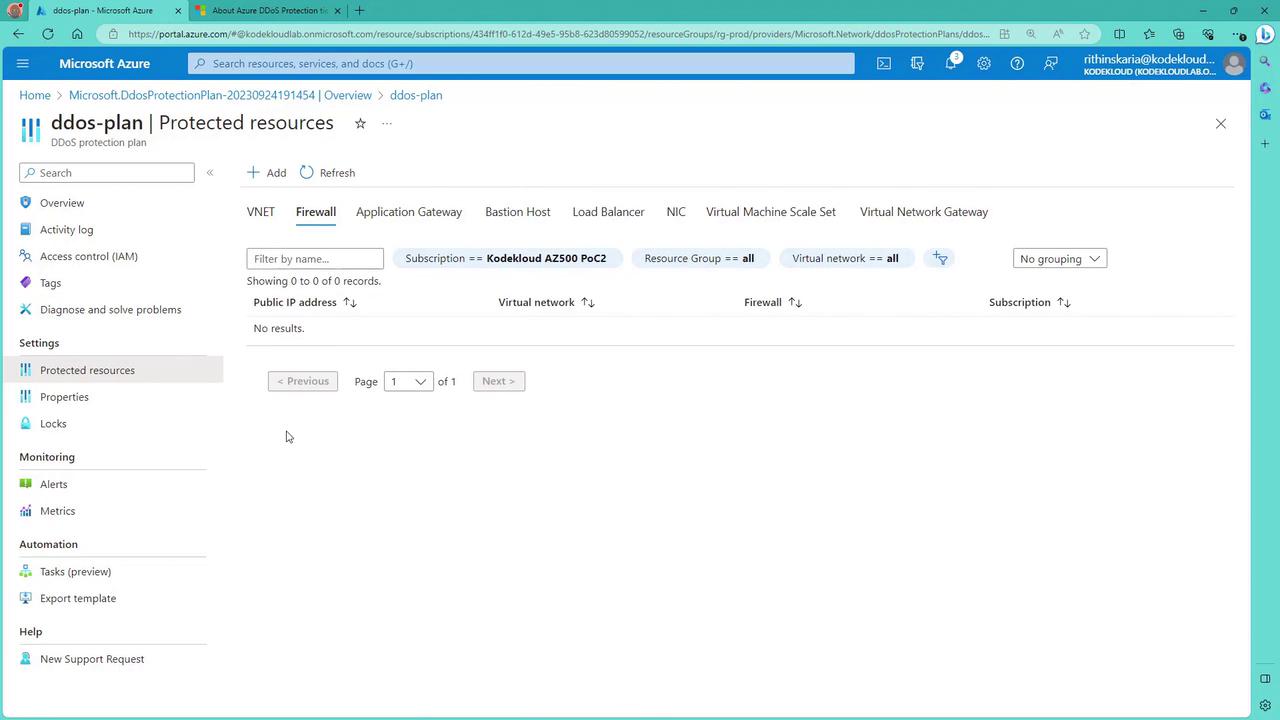
- Once the plan is deployed, you can link various resources (public IP addresses, virtual network interfaces, application gateways, load balancers, etc.) across subscriptions and resource groups to this single plan. Note that each plan supports up to 100 protected IPs—additional IPs may incur extra costs.
Choosing Between Per IP and DDoS Protection Plans
- Use the per IP plan if you need to secure one or two public-facing IP addresses.
- Select the DDoS Protection Plan when you have multiple IP addresses or resources (such as virtual networks, firewalls, and load balancers) that require comprehensive protection. Although the network plan involves slightly higher costs, it delivers extensive coverage for your entire infrastructure.
For more insights into protecting your infrastructure, visit the Microsoft Azure Security documentation.