This article explains how to customize a SQLAlchemy table by adding a created_at timestamp column and configuring default values.
In this article, we demonstrate how to customize the SQLAlchemy table generation for our custom “posts” table. We start by addressing an issue with the default behavior in SQLAlchemy and then extend the table to include a “created_at” timestamp column.
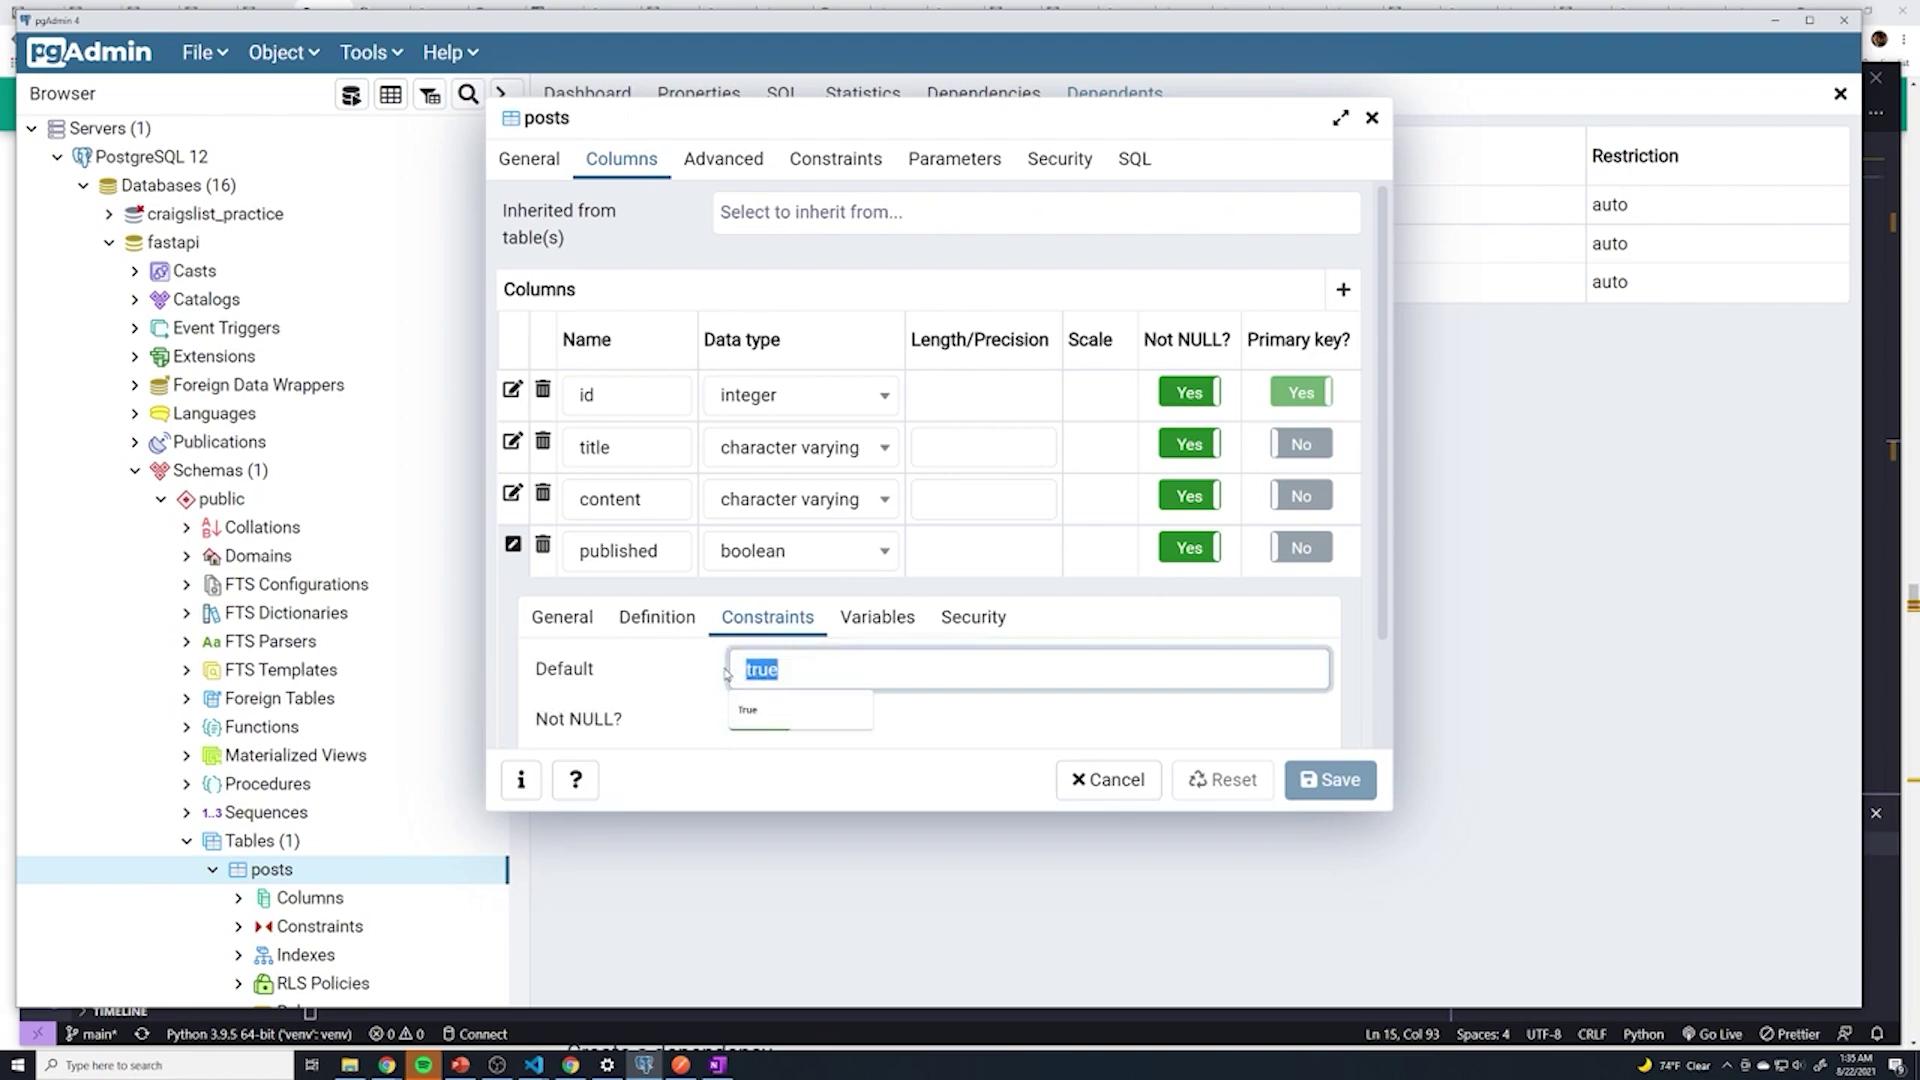
When SQLAlchemy initially creates the table, each column is set with a NOT NULL constraint, and the primary key is applied to the “id” field. However, if you inspect the “published” column (using properties → columns → constraints), you might notice that the default value is not configured. This is because SQLAlchemy’s “default” parameter operates on the Python side. To have PostgreSQL handle the default value, you must use the “server_default” parameter.Below is the modified model definition where the “published” column has a server default of ‘TRUE’ (as a string) and all columns are non-nullable:
Copy
Ask AI
from sqlalchemy import Column, Integer, String, Booleanfrom .database import Baseclass Post(Base): __tablename__ = "posts" id = Column(Integer, primary_key=True, nullable=False) title = Column(String, nullable=False) content = Column(String, nullable=False) published = Column(Boolean, server_default='TRUE', nullable=False)
When the application starts, SQLAlchemy checks if a table named “posts” exists. If it doesn’t, SQLAlchemy creates the table with the specified schema. However, if the table already exists, SQLAlchemy will not automatically update its schema—even if the underlying model has been modified.
Since SQLAlchemy does not automatically alter existing table schemas, you must drop the existing table before restarting the application to allow SQLAlchemy to recreate the table with the new configuration.
After making any changes to the schema, drop the existing table so that when the application is restarted, SQLAlchemy creates the “posts” table with the updated configuration. You can confirm that the “published” column now has the proper default value (TRUE) by inspecting its properties.
To log when each post is created, we need to add a “created_at” column using PostgreSQL’s current timestamp. Initially, add the TIMESTAMP type from SQLAlchemy:
Copy
Ask AI
from sqlalchemy import Column, Integer, String, Booleanfrom sqlalchemy.sql.sqltypes import TIMESTAMPfrom .database import Baseclass Post(Base): __tablename__ = "posts" id = Column(Integer, primary_key=True, nullable=False) title = Column(String, nullable=False) content = Column(String, nullable=False) published = Column(Boolean, server_default='TRUE', nullable=False) created_at = Column(TIMESTAMP(timezone=True))
To ensure that the “created_at” column is always populated, mark it as NOT NULL and set a server default value using SQLAlchemy’s text function (imported from sqlalchemy.sql.expression). This server default ensures that PostgreSQL applies the current timestamp when a new record is created:
This approach mirrors the method used in pgAdmin, where you manually set a default constraint to now(). Verifying the schema in pgAdmin should show the “posts” table containing the columns “id,” “title,” “content,” “published,” and “created_at” with their respective constraints and data types.
After updating the model, drop the existing “posts” table and restart the application. This ensures that SQLAlchemy recreates the table with the new “created_at” column, configured with a default timestamp.
To verify that everything works as intended, create a new post using the application interface. Then, execute the following SQL query to inspect the contents of your “posts” table:
Copy
Ask AI
SELECT * FROM public.postsORDER BY id ASC;
The query output should display rows where each post has a valid timestamp in the “created_at” column, confirming that PostgreSQL correctly applies the default value.By following these steps, you ensure that your SQLAlchemy models align with your database schema, providing consistent behavior for default values and timestamps.