- Create and peer an HCP Virtual Network with your AWS VPC
- Deploy a managed Consul cluster on HCP
- Download client configuration and CA certificates
- Join an EC2 instance as a Consul client
- Verify cluster membership and use the Consul KV store
1. Access the HCP Dashboard
Log in to the HashiCorp Cloud Platform to get started. From the Overview page, you can create managed Consul or Vault clusters.Consul is GA and available at a low hourly rate for development environments. Vault remains in beta.

2. Review Your HCP Virtual Network
Before you deploy Consul, navigate to HashiCorp Virtual Network to confirm your network details. In this example:- Region:
us-west-2 - CIDR block:
172.25.16.0/20

3. Peer Your AWS VPC
Under Peerings, review existing connections between your AWS VPC and the HCP Virtual Network:
- Click Create peer and connection
- Enter your AWS Account ID, VPC ID, region, and CIDR block
- Submit the request
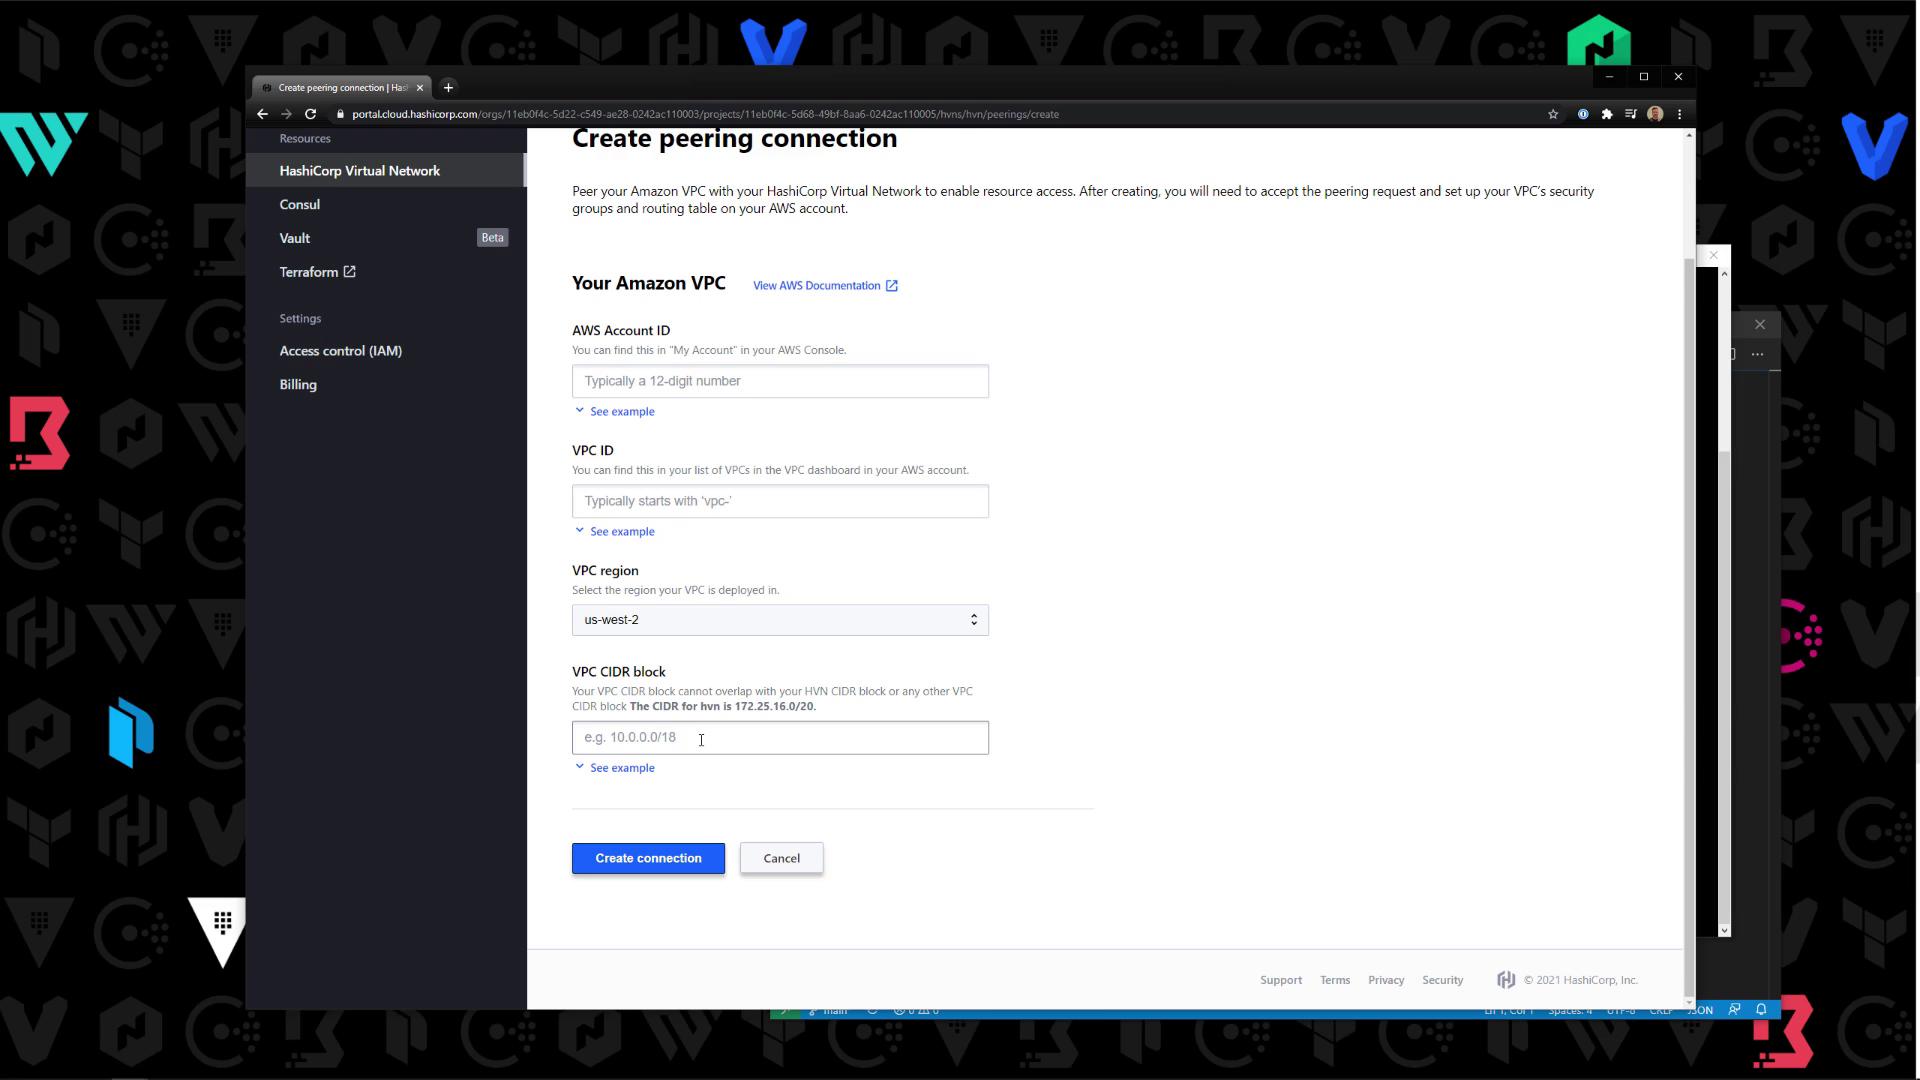
172.25.16.0/20 to the new connection.
Refer to the AWS VPC Peering documentation when updating route tables.
4. Create a Managed Consul Cluster
With peering in place, navigate to Consul » Create cluster and configure:- Cluster ID: A unique name for your cluster
- Virtual Network: Select your HCP VNet
- Tier & Region: Choose the development tier and target region
- Public Connectivity: Enable if you need public API access
- Consul Version: Pick the desired version

5. Explore the Cluster Management Interface
After provisioning, open the cluster dashboard to:- Generate ACL tokens
- Download client configuration
- Take snapshots or delete the cluster
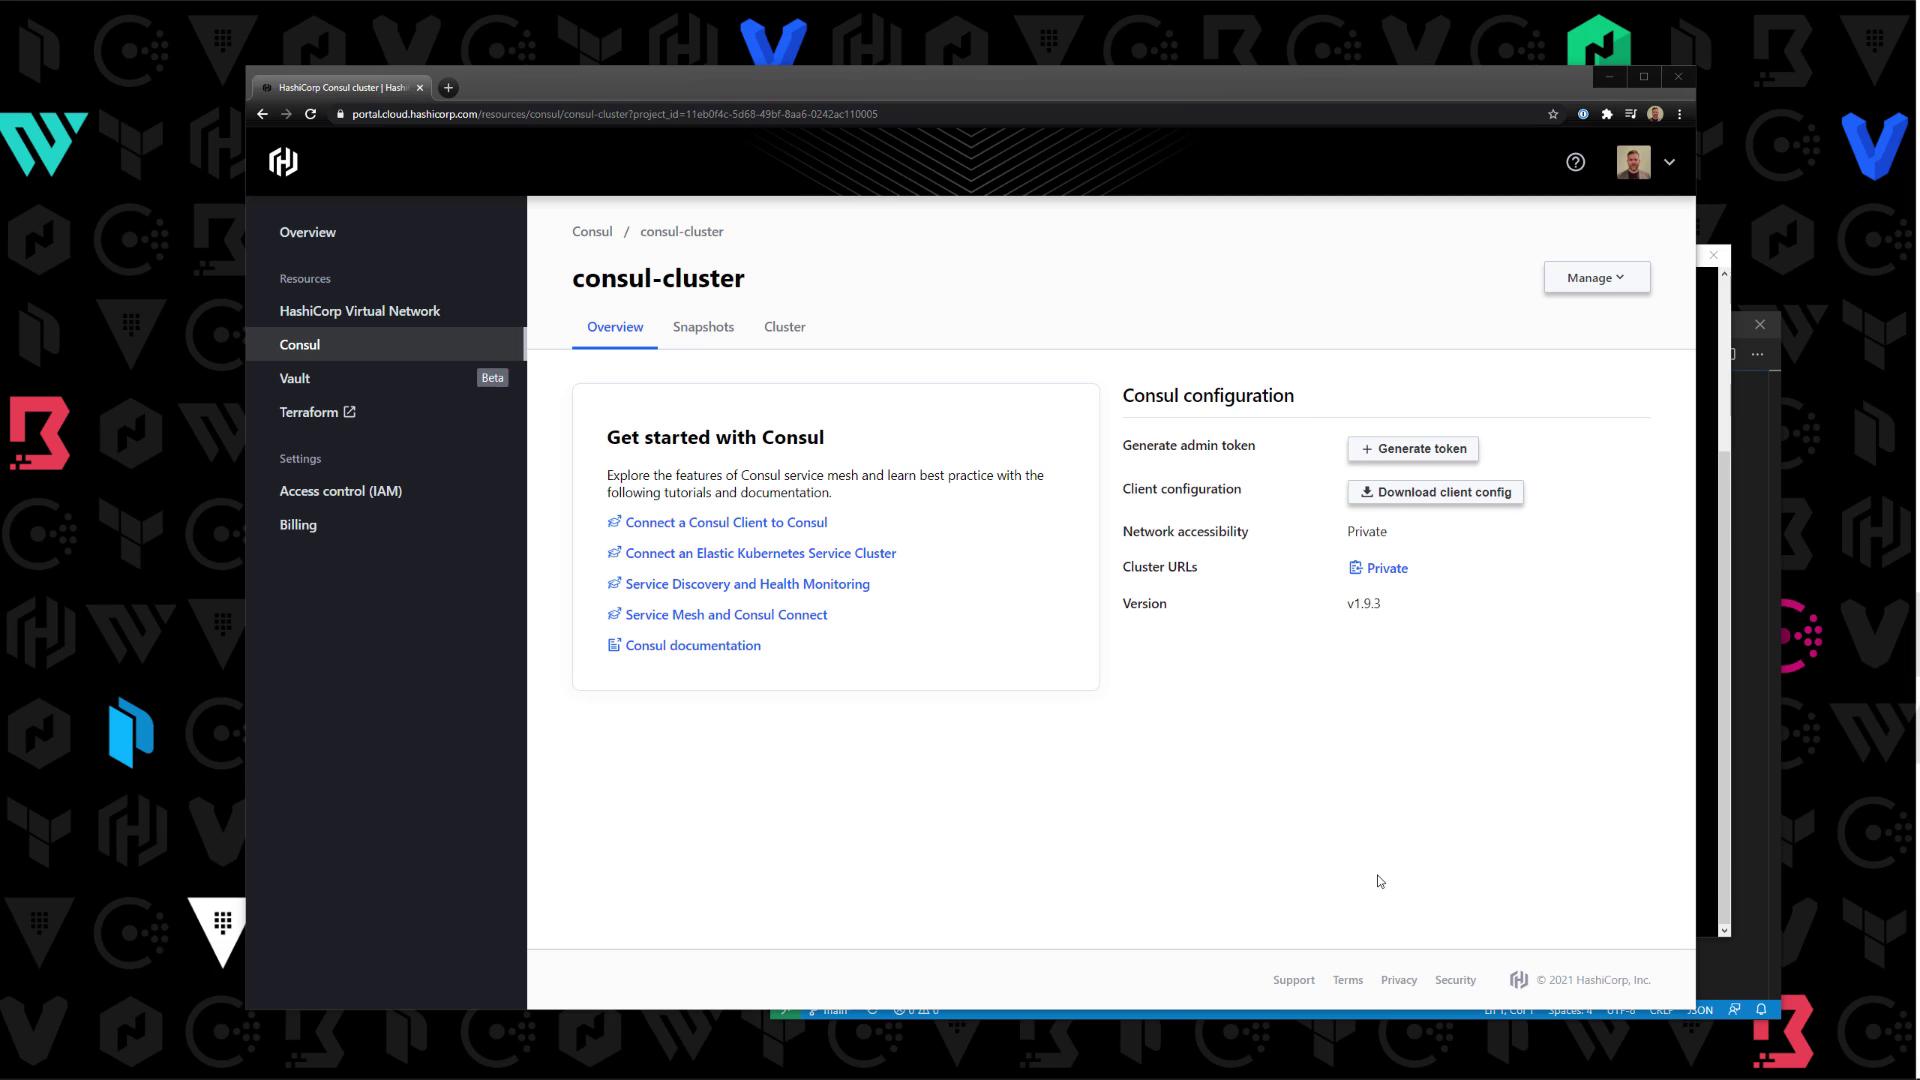

6. Download Client Configuration
Click Download client configuration to obtain two files:| File | Description |
|---|---|
| config.json | Consul client agent settings |
| ca.pem | Certificate Authority (CA) |
6.1 Inspect config.json
Open the file to review settings for ACLs, gossip encryption, datacenter, and retry join:
6.2 Inject the Agent ACL Token
- In the HCP console, click Generate token under ACL.
- Copy the Agent Token.
- Update
config.jsonto include the token:
7. Prepare Your EC2 Instance
On your EC2 host, install Consul and then configure the client:| Task | Command |
|---|---|
| Create config directory | sudo mkdir -p /etc/consul.d |
Upload config.json | sudo tee /etc/consul.d/config.json > /dev/null <<EOF ... EOF |
Upload CA certificate ca.pem | sudo tee /etc/consul.d/ca.pem > /dev/null <<EOF ... EOF |
| Enable & start Consul service | sudo systemctl enable consul && sudo systemctl start consul |
| Set CLI authentication token | export CONSUL_HTTP_TOKEN="b05a5a39-3885-7712-9bcd-c582c7b92dfb" |
| Verify cluster membership | consul members |
| Test KV store | consul kv put app/Bryan Woods |
If you encounter errors about invalid ACL keys, ensure
tokens (not token) is under the "acl" section and that boolean keys (encrypt_verify_incoming, etc.) match the HCP-generated config.