Overview of Azure Event Hubs
Azure Event Hubs is a unified streaming platform designed to collect, retain, and process data streams in real time. Key benefits include:- Real-time data ingestion with configurable time retention, allowing you to replay or process data later.
- Decoupling of data producers and consumers so that multiple applications can consume the same data stream simultaneously.
- High scalability that supports millions of events per second, ensuring efficient handling of massive data volumes from IoT devices, applications, or cloud infrastructure.
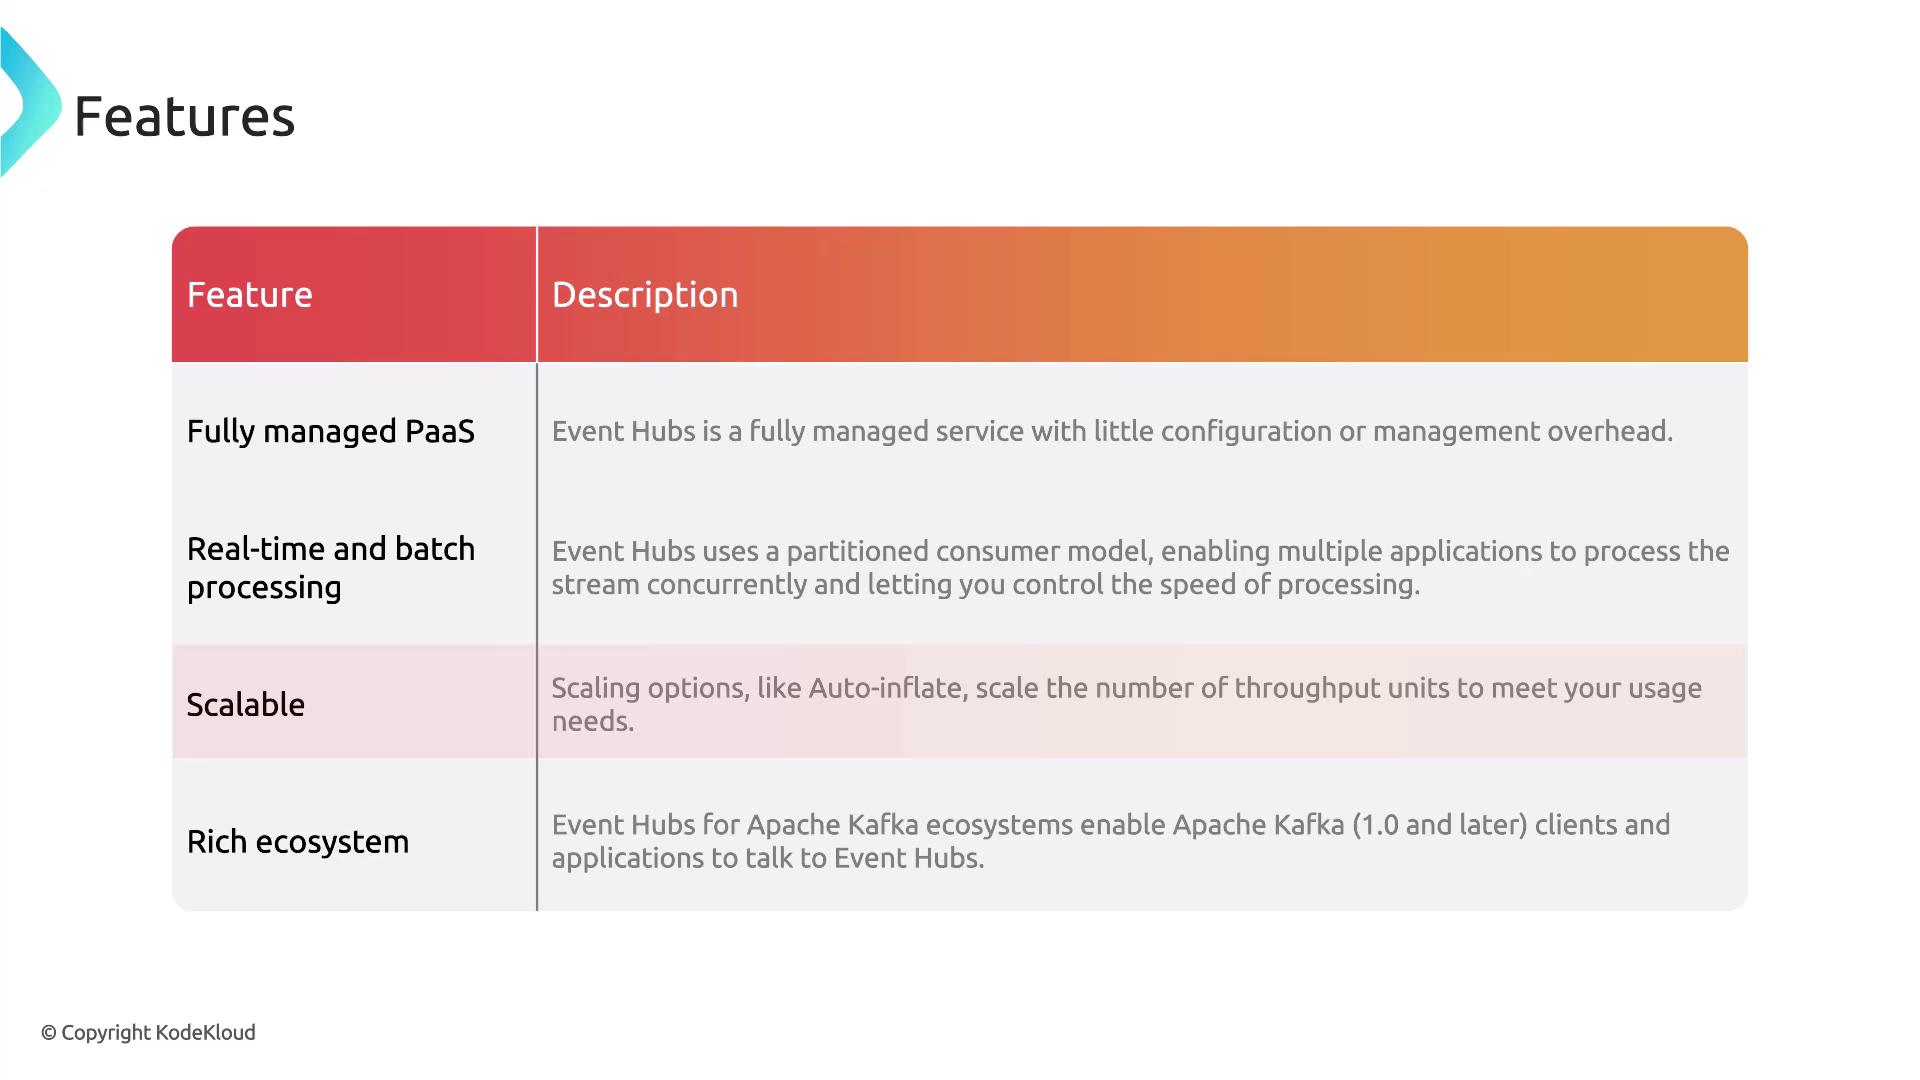
- Fully managed Platform as a Service (PaaS), minimizing configuration overhead.
- Flexibility for both real-time and batch processing.
- Dynamic scaling with features like auto-inflate to meet rising data demands.
Core Components of Event Hubs
Understanding the main components of Azure Event Hubs is crucial before deployment. These include:- Event Hub Client: The application interface for connecting and sending data.
- Event Hub Producer: Responsible for publishing events to the Event Hub.
- Consumer: Reads and processes incoming event streams.
- Partition: Organizes data into segments that allow parallel processing.
- Consumer Group: Enables multiple consumers to read from the same partition independently.
- Receivers: Components that retrieve events for further processing or storage.
- Throughput/Processing Units: Define the capacity for handling data, which can be scaled to meet your demand.
Deploying an Event Hub via Azure Portal
- Create an Event Hub Namespace:
- In the Azure Portal, search for “Event Hub” and create a new namespace within a resource group.
- Ensure that the namespace has a unique name registered under servicebus.windows.net.
- Choose your region and select an appropriate pricing tier based on your required throughput units.
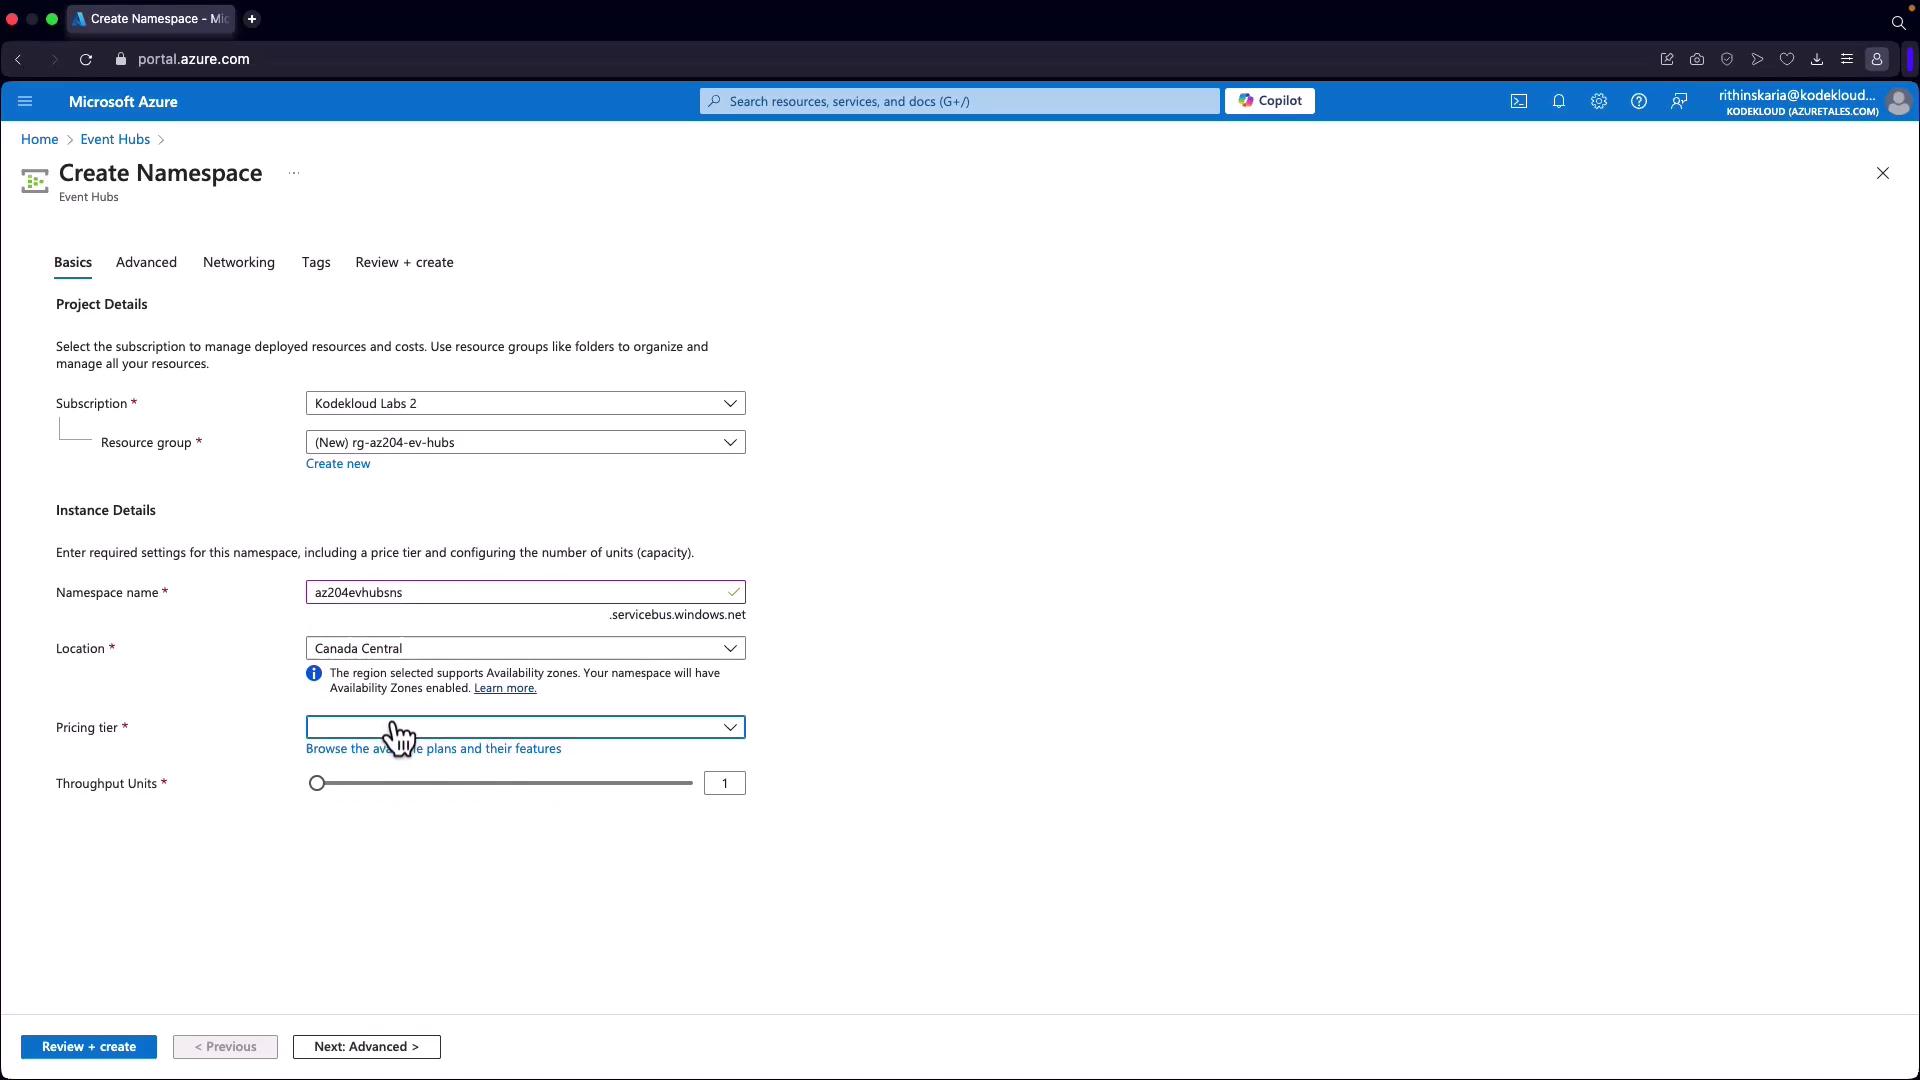
For demonstration purposes, select the basic pricing tier. It offers a cost-effective option (approximately $11) with the potential to scale throughput. The standard tier includes additional features such as auto-inflate for autoscaling.
-
Configure Advanced Settings:
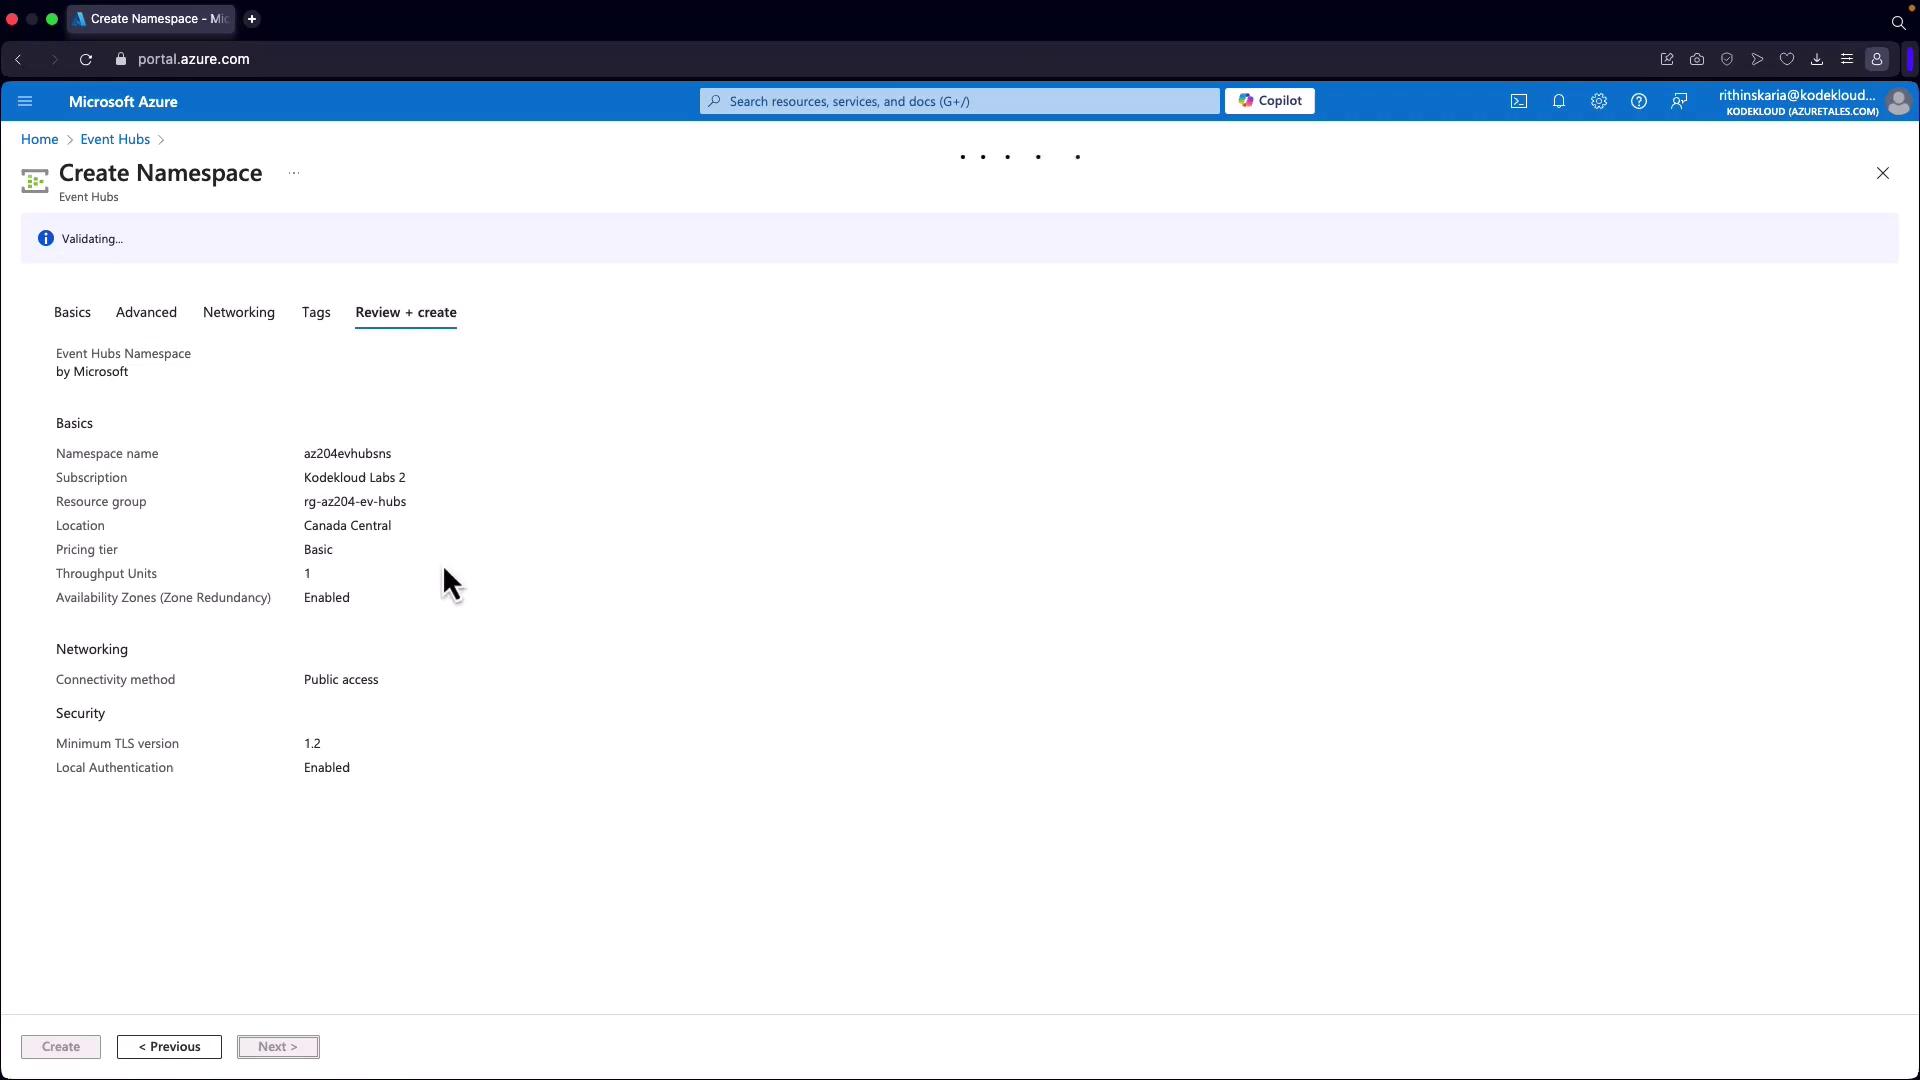
- Specify security settings, including the minimum TLS version and local authentication requirements. You must provide the access key or connection string when posting data.
- Note that public networking is enabled by default. To enable private access, consider upgrading to the standard or premium tier.
-
Finalize Namespace Creation:
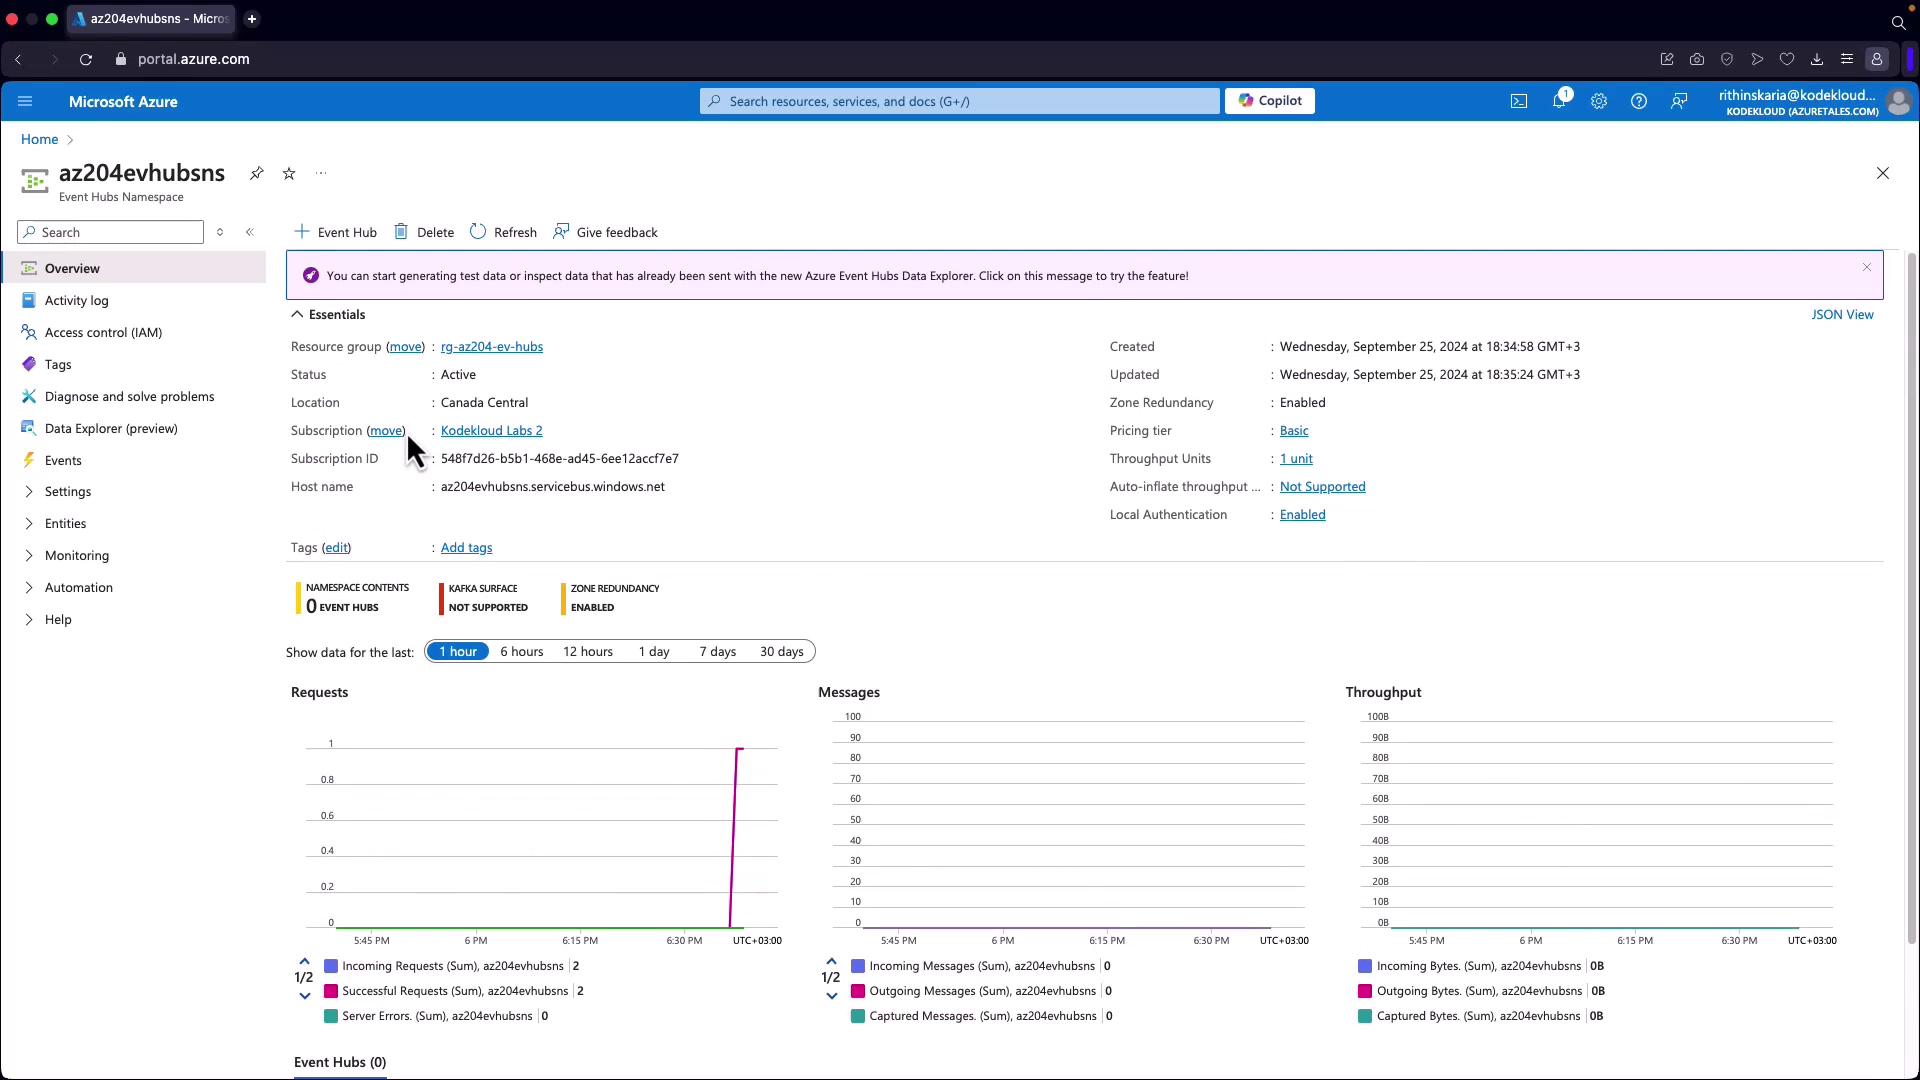
- After running the validation, create your Event Hub namespace.
- Create a New Event Hub:
- Once the namespace is deployed, click on “Go to resource” to proceed with creating an individual Event Hub within the namespace.
- Familiarize yourself with additional concepts such as Event Hubs Capture, which is designed for automatic data capture and long-term retention or batch processing.