Learn how to send real-time Falco security alerts into a Slack channel using Falco Sidekick and Slack Incoming Webhooks. This guide walks you through creating a Slack channel, configuring a webhook, installing Sidekick via Helm, and testing alerts.

Prerequisites

  • A running Kubernetes cluster with Falco installed via Helm
  • A Slack workspace with permission to create channels and apps
  • helm and kubectl CLI tools configured for your cluster

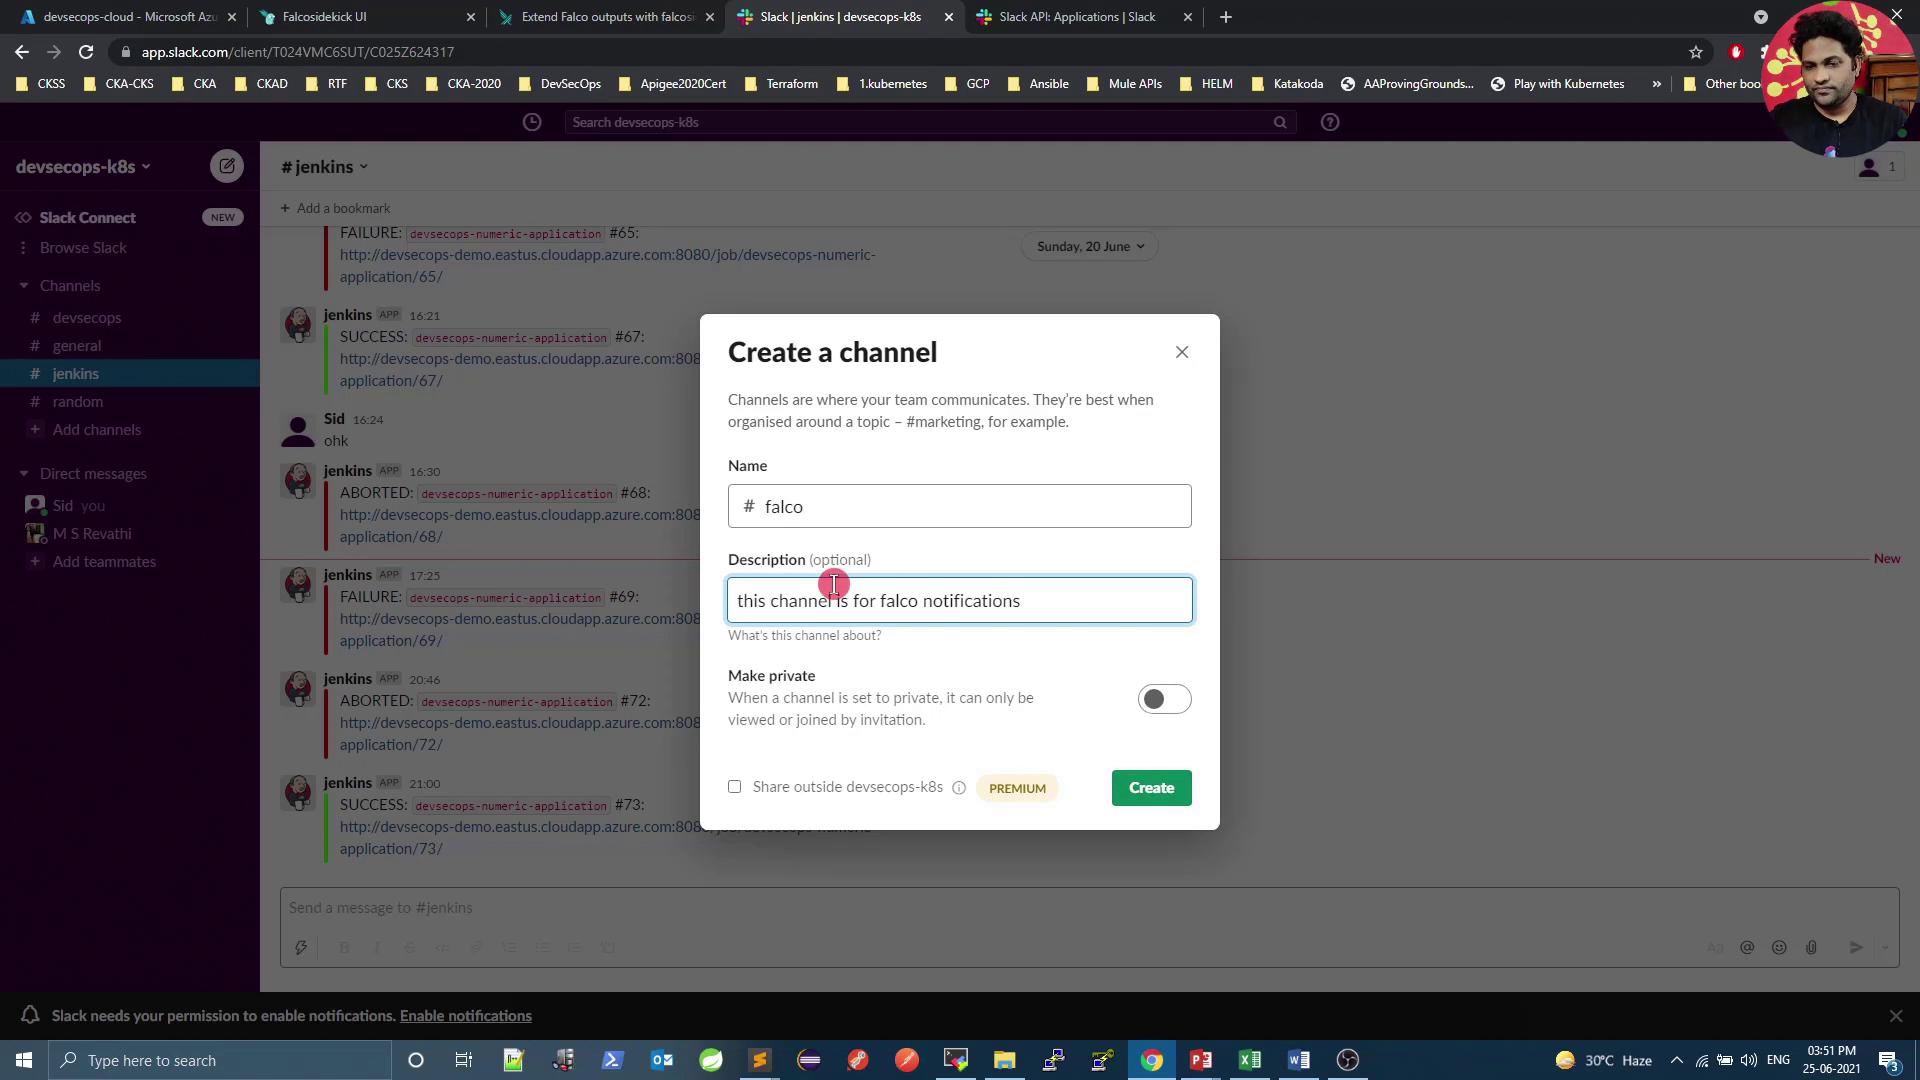
1. Create a Slack Channel

Create a dedicated channel (for example, #falco) to receive Falco alerts.
The image shows a Slack interface with a "Create a channel" dialog open, where a user is entering details for a new channel named "#falco" with a description for Falco notifications. The background displays a conversation in the "#jenkins" channel.

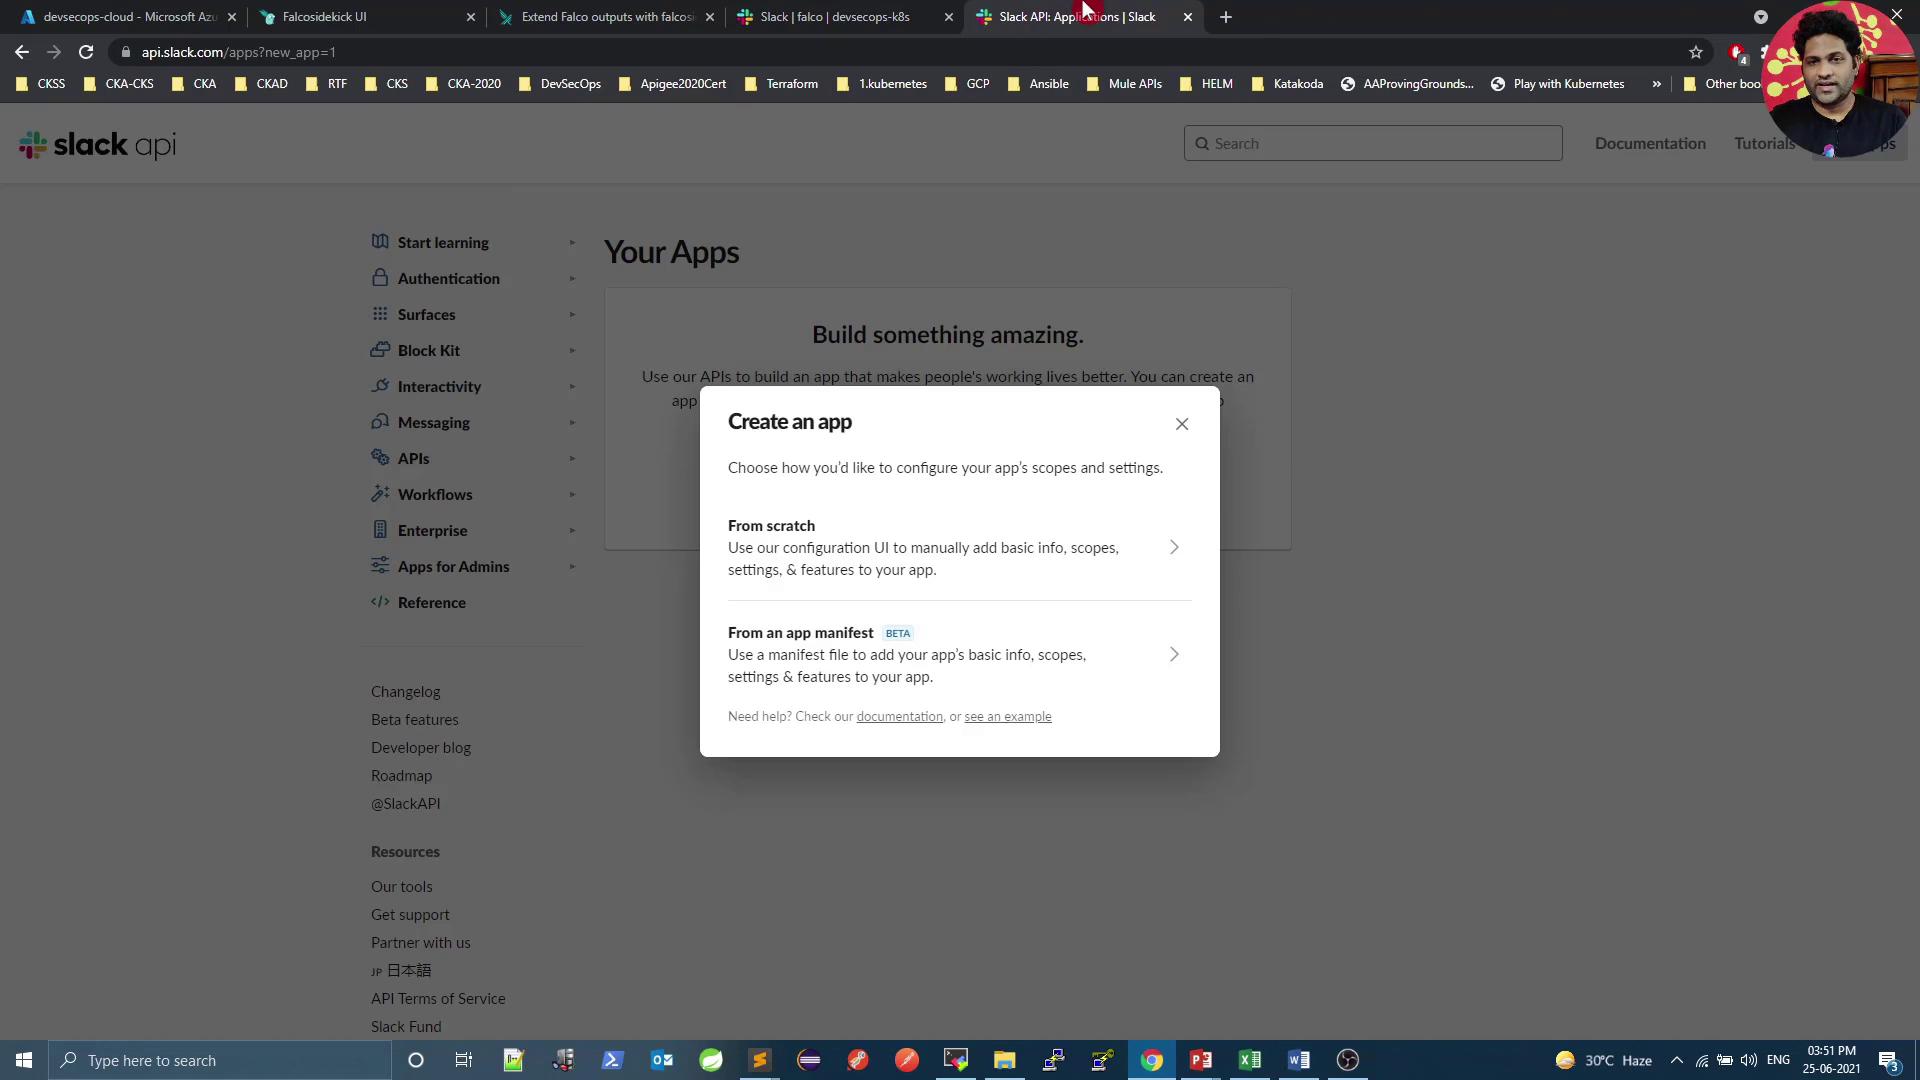
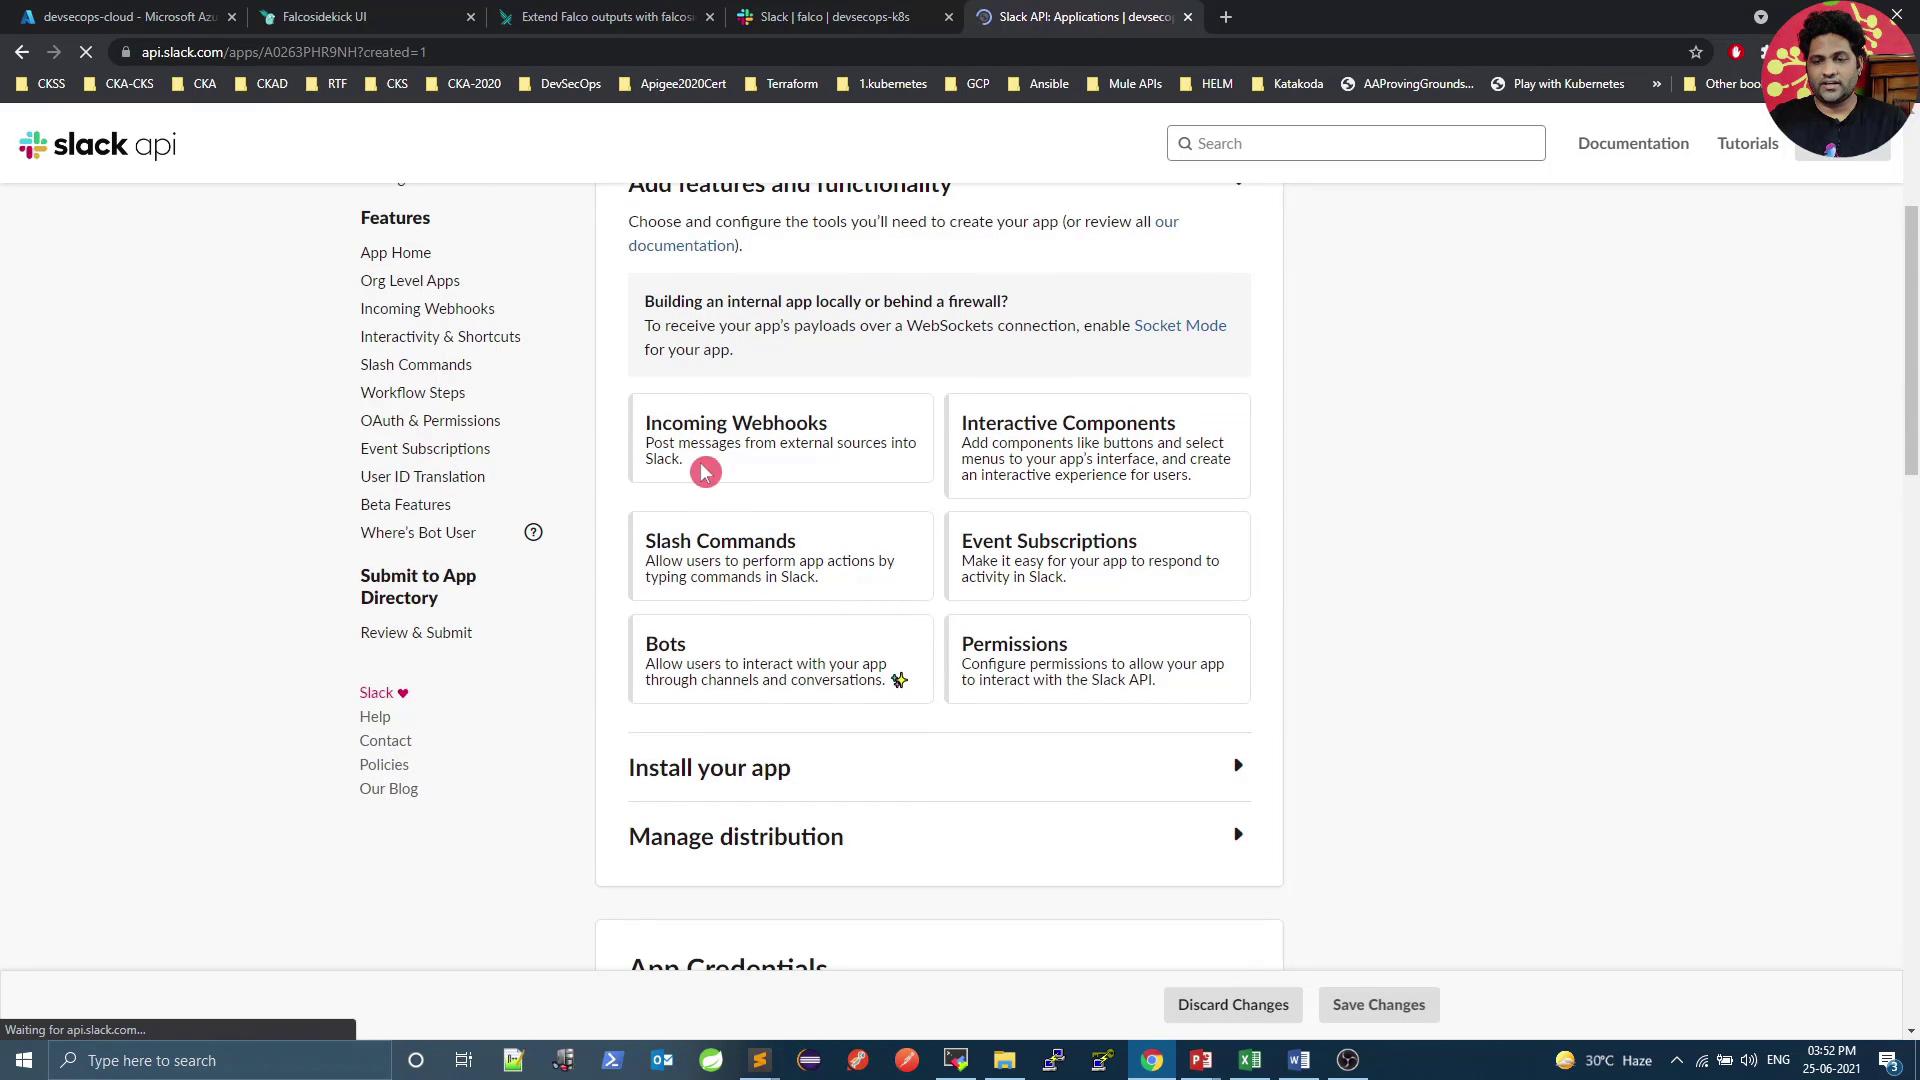
2. Configure an Incoming Webhook

Follow these steps to set up an incoming webhook in Slack.
  1. Open the Slack Incoming Webhooks documentation.
The image shows a webpage from the Slack API documentation, specifically about getting started with incoming webhooks. It includes instructions on creating a Slack app and enabling incoming webhooks.
  1. Click Create an app, choose From scratch, and pick your workspace.
The image shows a Slack API webpage with a pop-up window titled "Create an app," offering options to configure an app's scopes and settings either from scratch or using an app manifest. The browser has multiple tabs open, and a user profile picture is visible in the top right corner.
  1. Under Features, enable Incoming Webhooks.
The image shows a Slack API settings page with options for configuring features like Incoming Webhooks, Slash Commands, and Bots. The interface includes navigation links and a section for managing app credentials.
  1. Click Add New Webhook to Workspace, select #falco, and authorize. Copy the generated URL:
    https://hooks.slack.com/services/T00000000/B00000000/XXXXXXXXXXXXXXXXXXXXXXXX
    
Treat your webhook URL like a password. Do not expose it in public repositories.
  1. Verify the webhook with curl:
    curl -X POST -H 'Content-type: application/json' \
      --data '{"text":"Hello, Falco!"}' \
      https://hooks.slack.com/services/T00000000/B00000000/XXXXXXXXXXXXXXXXXXXXXXXX
    
You should see “Hello, Falco!” in the #falco channel.

3. Install Falco Sidekick with Slack Integration

Use Helm to enable Falco Sidekick and configure Slack:
helm upgrade falco falcosecurity/falco \
  --set falcosidekick.enabled=true \
  --set falcosidekick.webui.enabled=true \
  --set falcosidekick.config.slack.webhookurl="https://hooks.slack.com/services/T00000000/B00000000/XXXXXXXXXXXXXXXXXXXXXXXX" \
  --set falcosidekick.config.customfields="environment:production,datacenter:paris" \
  -n falco
Configuration KeyDescriptionExample
falcosidekick.enabledEnable Falco Sidekick componenttrue
falcosidekick.webui.enabledSidekick Web UItrue
falcosidekick.config.slack.webhookurlSlack incoming webhook URL"https://hooks.slack.com/services/…"
falcosidekick.config.customfieldsCustom metadata fields"environment:production,datacenter:paris"
After upgrading, confirm the release and running pods:
helm ls -n falco
kubectl get all -n falco

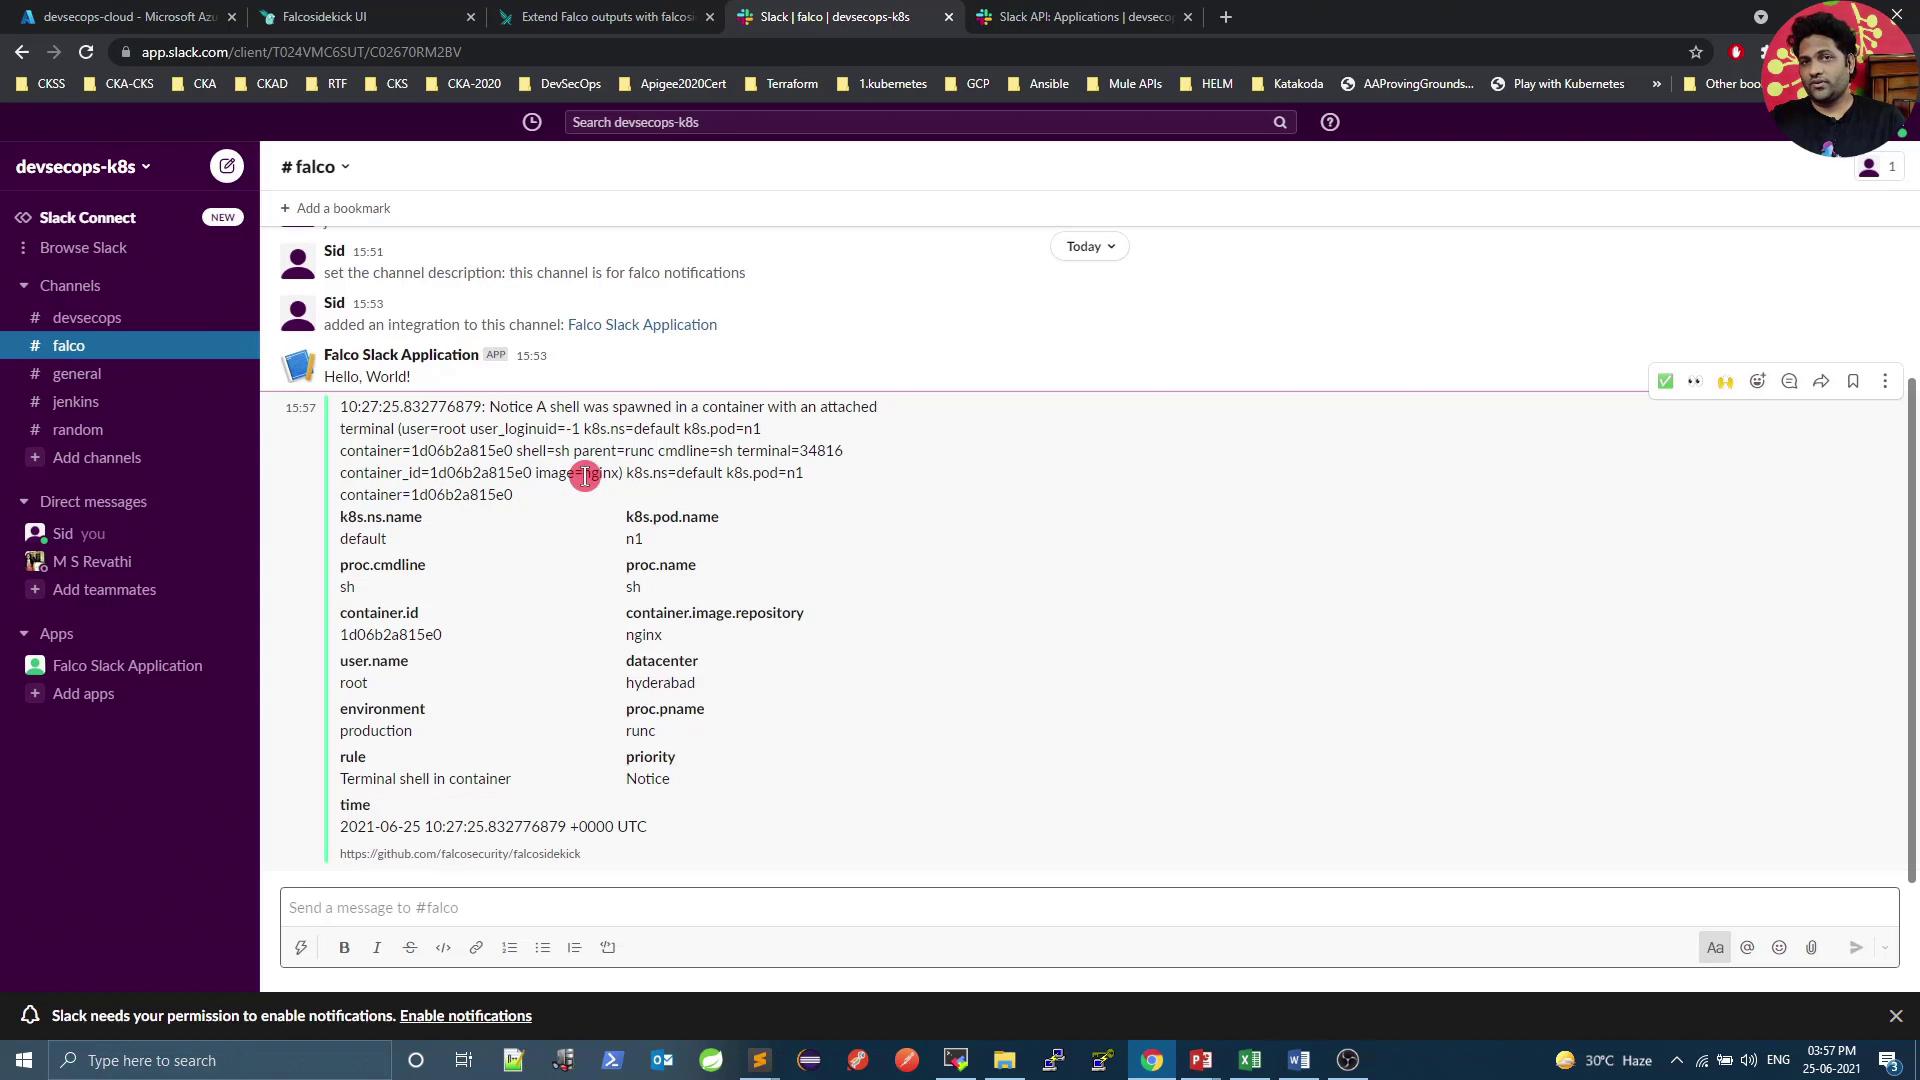
4. Trigger a Test Alert

Spawn a shell in a container to generate a Falco alert. Replace n1 with your Pod name:
kubectl exec -it n1 -- sh -c "touch /tmp/test && ls /tmp/test"
Falco detects the shell spawn and Sidekick forwards the alert to Slack.
The image shows a Slack interface with a notification from the Falco Slack Application, indicating that a shell was spawned in a container with specific details about the container and process.
The message includes rule name, priority, container details, pod/namespace, custom fields, timestamp, and process info.

Conclusion

You’ve successfully integrated Falco with Slack for real-time monitoring. To extend this setup—sending alerts to Microsoft Teams, Discord, Elasticsearch, Datadog, and more—update the falcosidekick.config in your Helm command.