Private IP Addresses
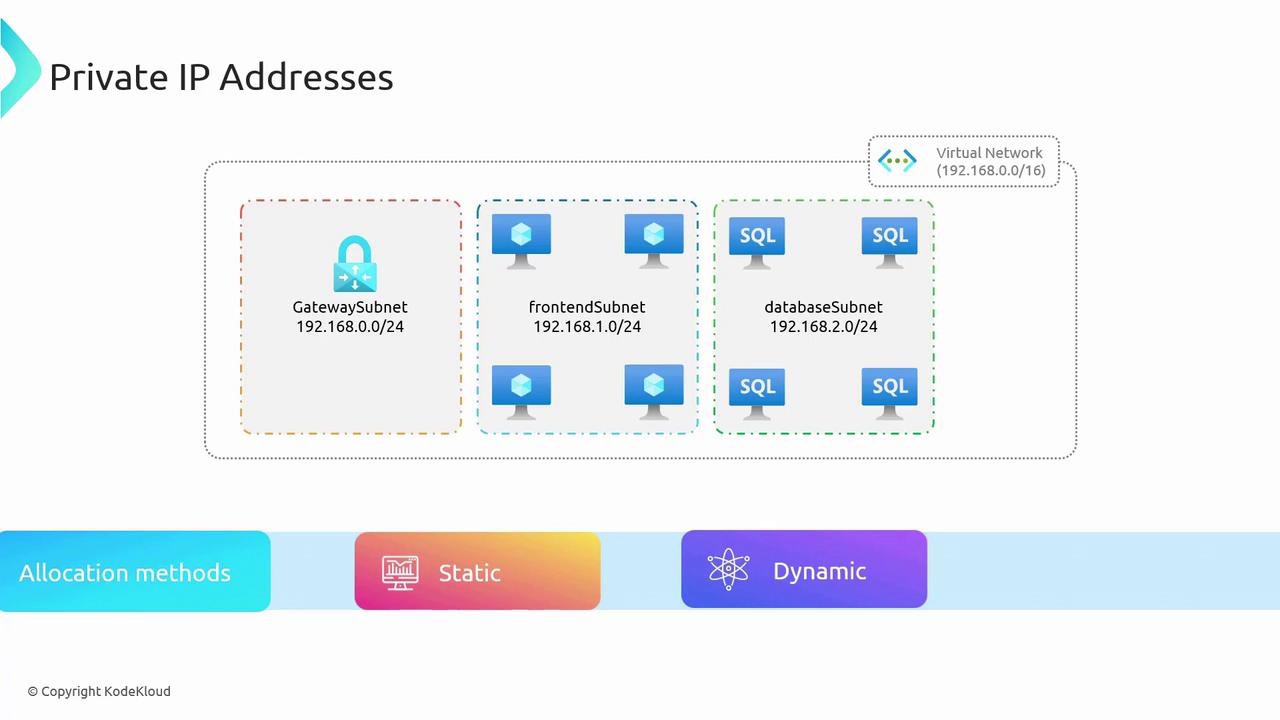
Azure virtual networks are allocated a large private address space defined by a CIDR block (e.g., 192.168.0.0/16). This range forms the backbone for assigning private IP addresses to Azure resources. Within this address space, you can create multiple subnets—such as gateway, front-end, and database subnets—where each resource receives its own private IP, enabling internal communication without exposure to the public internet. For instance, virtual machines in a front-end subnet might be assigned addresses from the 192.168.1.0/24 range. These private IPs facilitate communication within the network and support interactions with other virtual networks or on-premises systems via VPNs. There are two methods for assigning private IP addresses:- Static Allocation: Assign a fixed IP address to critical services (e.g., domain controllers, web servers, DNS servers, internal Azure Load Balancer, or Application Gateway). Static allocation guarantees that the IP address remains unchanged after a server reboot.
- Dynamic Allocation: Automatically assign an available IP address from the address pool (often using DHCP principles). In this case, when a server restarts and its previous IP is unavailable, a new IP is assigned.
Public IP Addresses
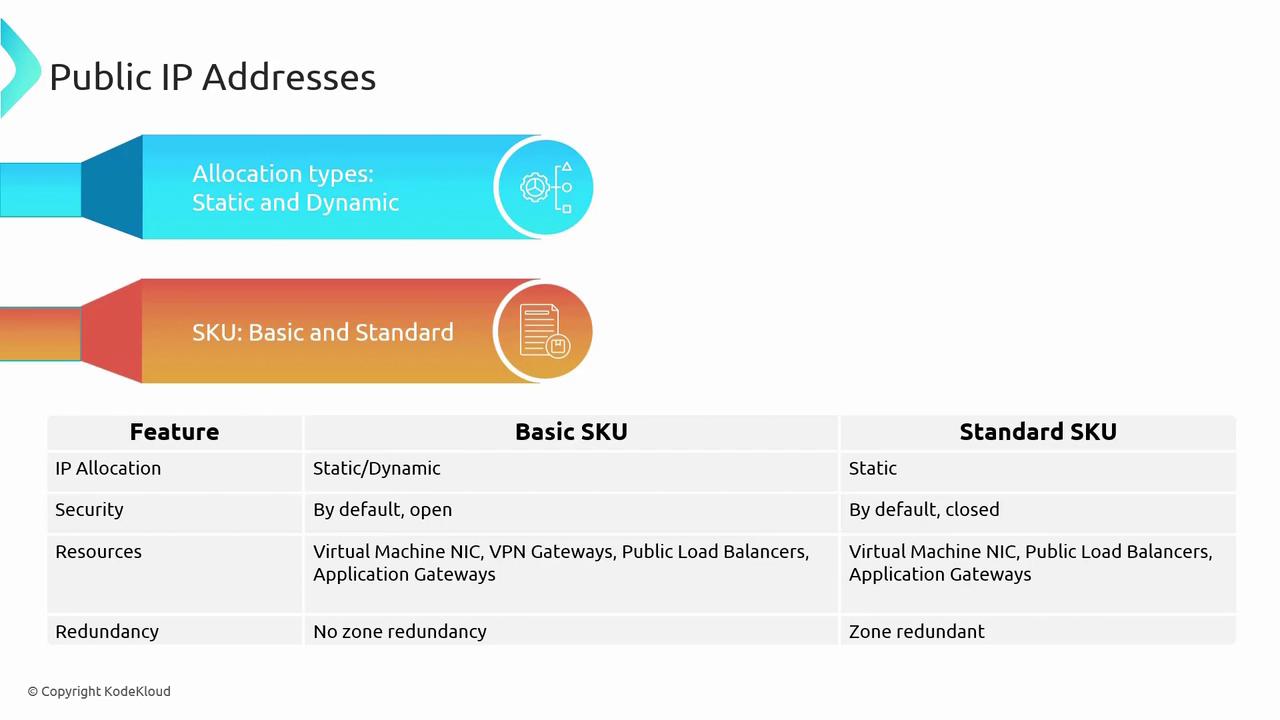
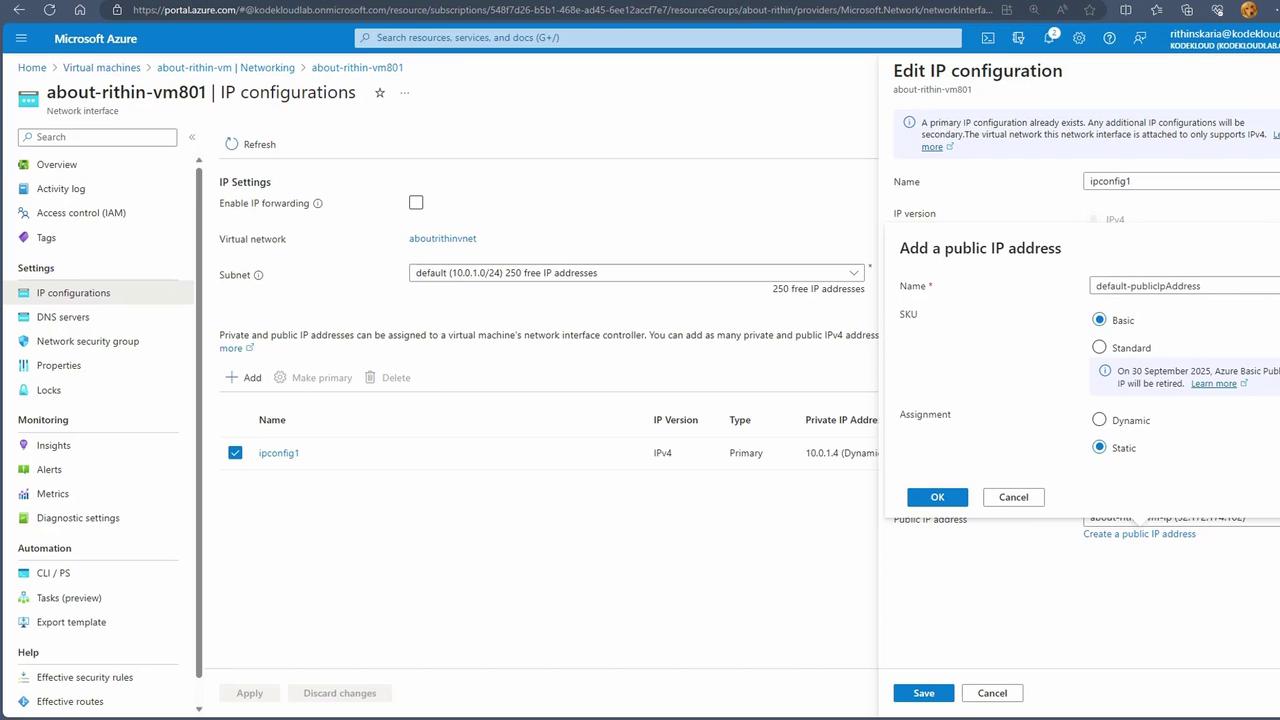
While private IP addresses enable internal communication, they are not routable over the internet. For example, a web service running on a virtual machine with a private IP address (e.g., 192.168.1.4) cannot be directly accessed from the internet. Azure addresses this limitation by using public IP addresses, which allow external access to services. Public IP addresses can also be allocated either statically or dynamically:- Static Public IP Allocation: Provides an unchanging IP address accessible from the internet.
- Dynamic Public IP Allocation: May assign a new IP address upon a system reboot if the previous one is no longer available.
| Feature | Basic SKU | Standard SKU |
|---|---|---|
| Allocation Method | Supports static and dynamic allocation | Supports static allocation only |
| Security | Open by default | Closed by default; secured using NSGs |
| Redundancy | Deployed in a single data center/zone | Offers zone redundancy |
| Resource Attachability | Limited (excludes certain services) | More flexible; supports additional services |
In enterprise architectures, public IPs are often not assigned directly to individual resources. Instead, traffic is routed through a firewall to provide an extra layer of security, protecting resources against threats like DDoS attacks. For testing or lab environments, however, public IPs may be attached directly to VMs for SSH or RDP access.
Configuring a Virtual Network in Azure
Follow these steps to create and configure a Virtual Network in the Azure portal:-
Create a Virtual Network:
Navigate to “Virtual Networks” in the Azure portal and create a new Virtual Network. Choose the appropriate subscription, create a new resource group (for example, “M4”), and select a deployment region. -
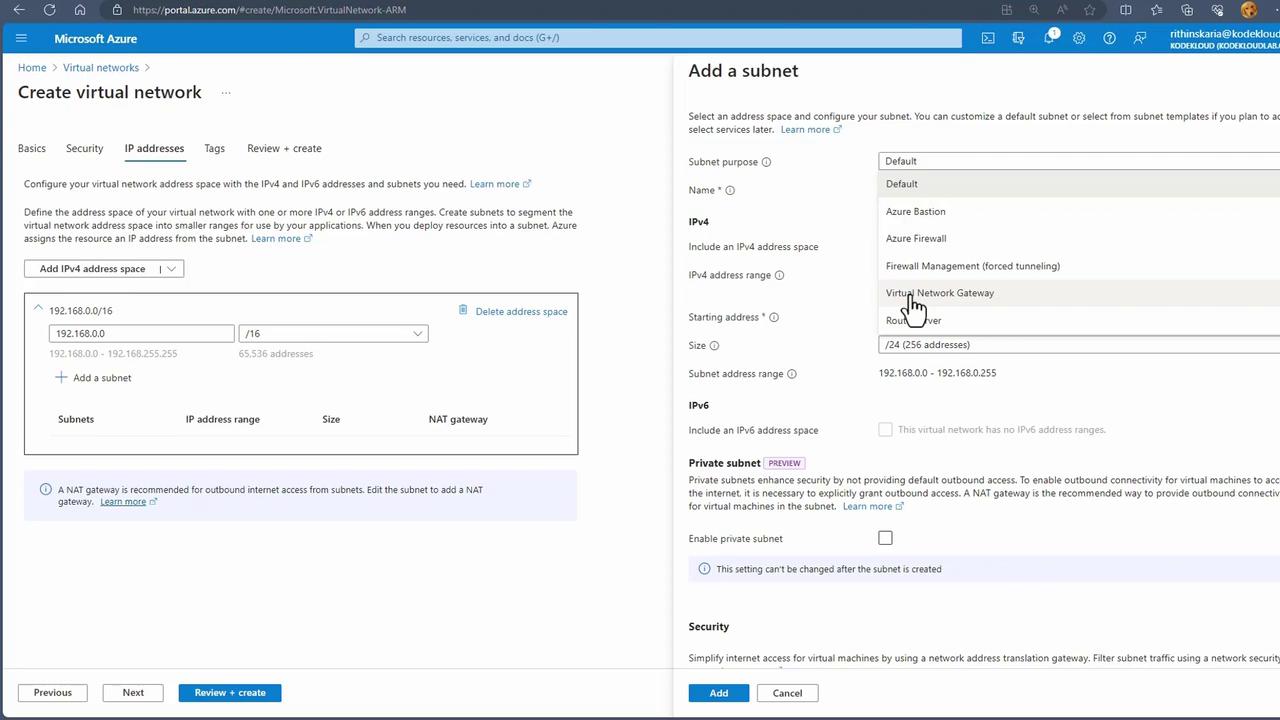
Configure the Address Space:
By default, Azure might assign an address space like 10.0.0.0/16 for new subscriptions. For on-premises compatibility or to align with previous configurations, remove the default and set the address space to 192.168.0.0/16. -
Add a Subnet:
Create a subnet by specifying a name and an IP range. For example, name the subnet “workloads-fe” to designate the front-end subnet. Azure segments the IP range automatically, and you may adjust the subnet mask (e.g., using /24) as needed.
-
Managing Existing Resources:
For existing virtual machines, inspect the network settings to view both private and public IP configurations:- Private IP Address: Facilitates internal communication within the Virtual Network.
- Public IP Address: Exposes the VM to the internet.
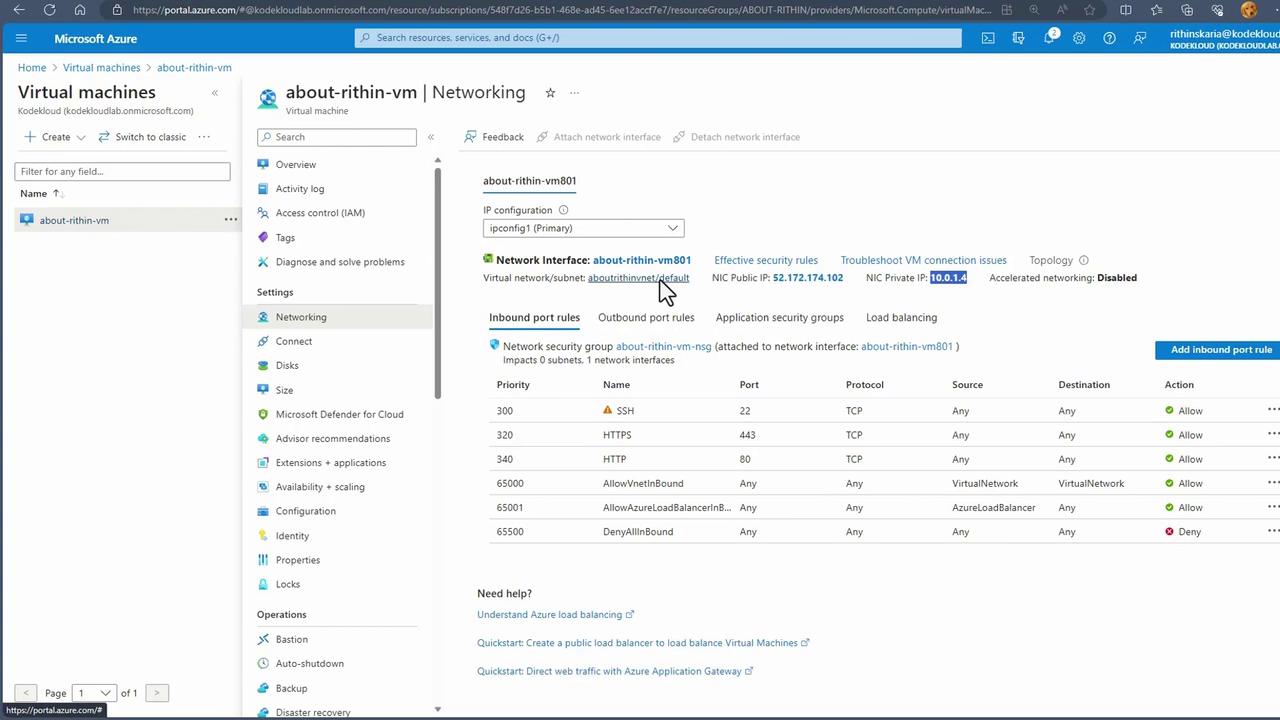
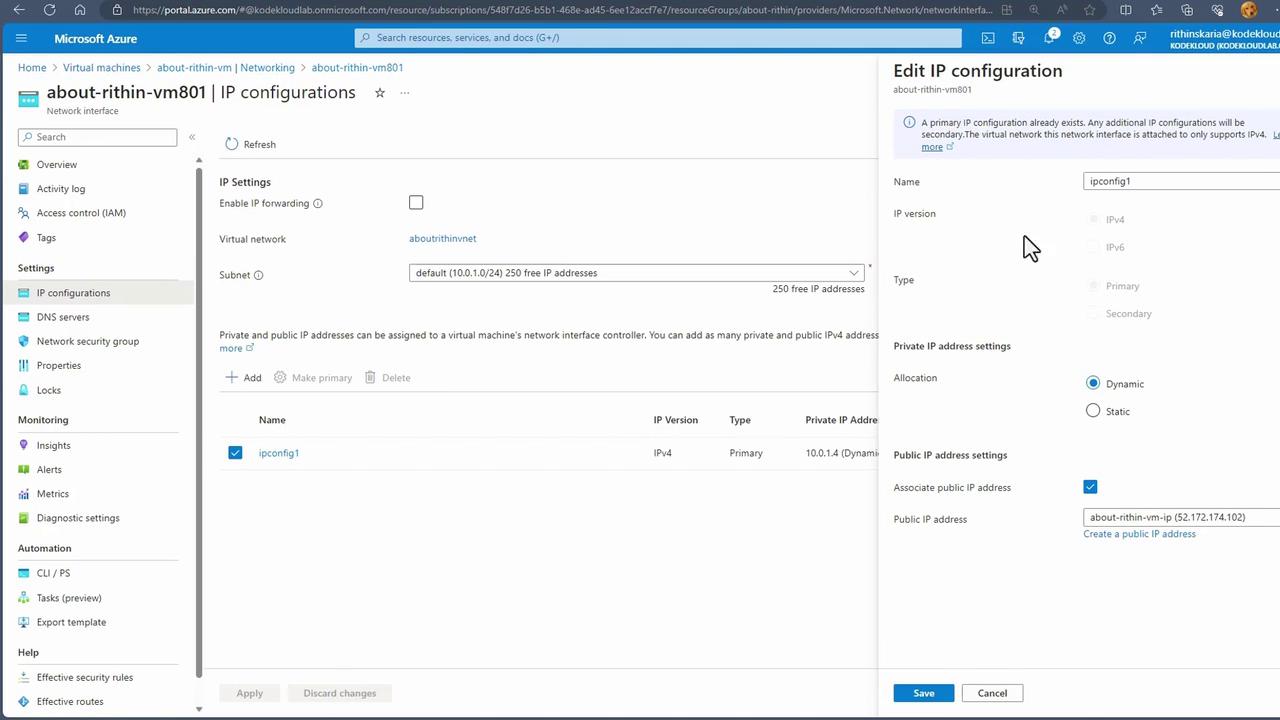
Remember, a single network interface can be configured with only one public IP address. To assign multiple public IP addresses to a virtual machine, attach an additional network interface.