Overview of Azure’s Hierarchy
At the very top of the hierarchy are management groups. These groups serve as a scope above individual subscriptions, allowing you to group multiple subscriptions together. By default, Azure creates a root management group for your organization. Beneath the root, you can establish up to six levels of nested management groups—forming a tiered structure that resembles a tree with many branches (excluding the root itself). As shown in the diagram below, the hierarchy starts with the root management group at the top. It then branches into segments such as IT and Finance. For instance, within the IT branch, further subdivisions like production and development can be created. This logical structure is indispensable for the effective grouping and management of resources.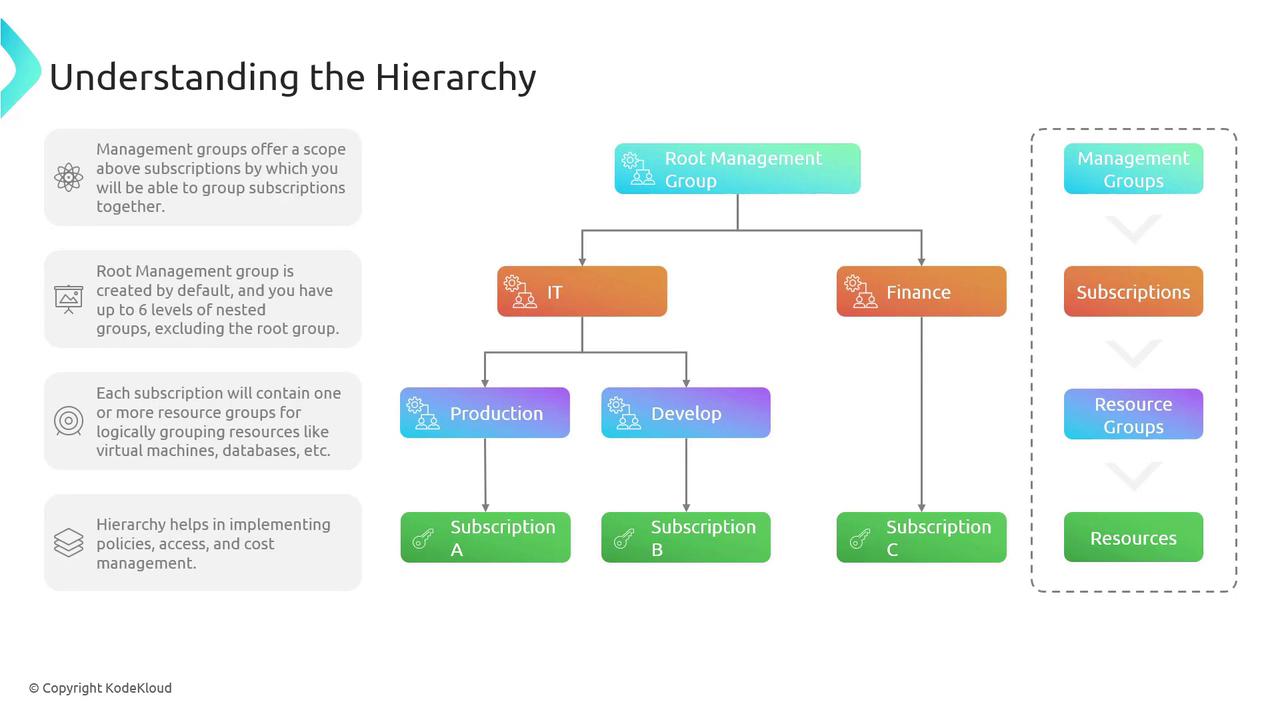
Managing the Hierarchy in the Azure Portal
Working with management groups in the Azure portal is straightforward. Follow these steps to manage your Azure hierarchy effectively:-
Viewing Management Groups and Subscriptions
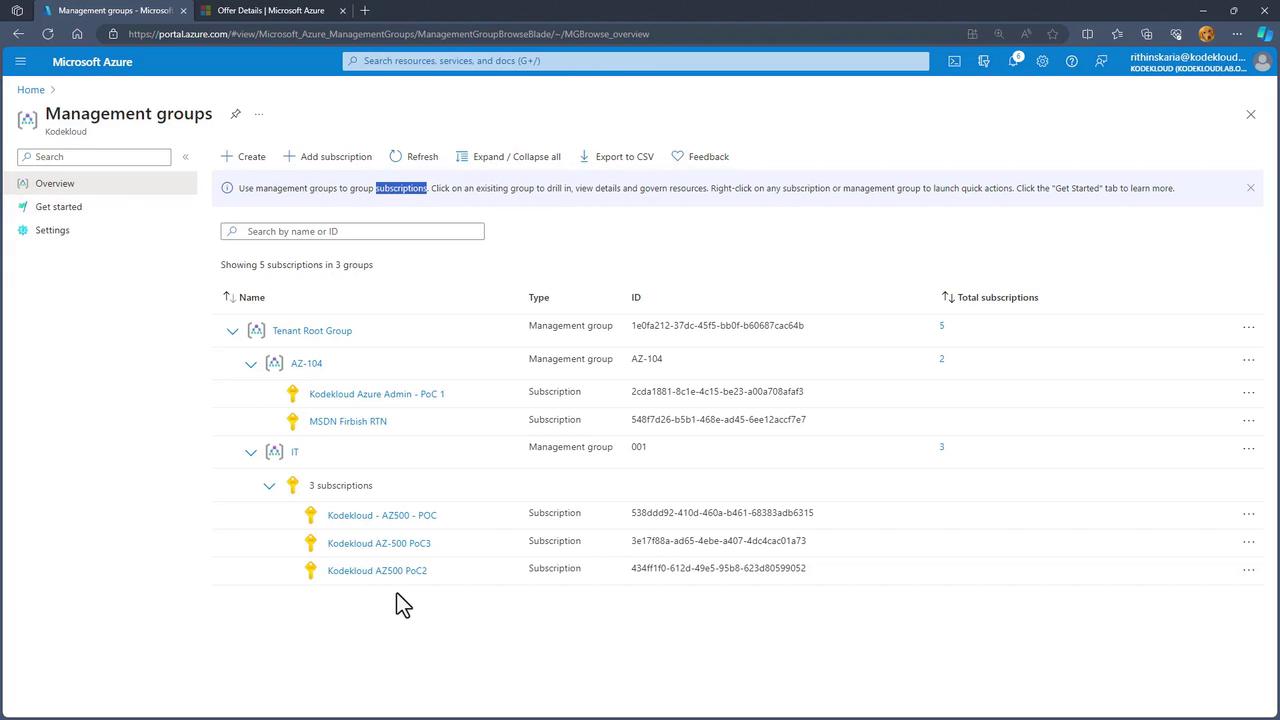
Open the Azure portal and navigate to the management groups section. Here, you will see the root group alongside various subscriptions and any additional management groups. Expanding a group may reveal, for example, three subscriptions under the IT category. -
Creating a New Management Group
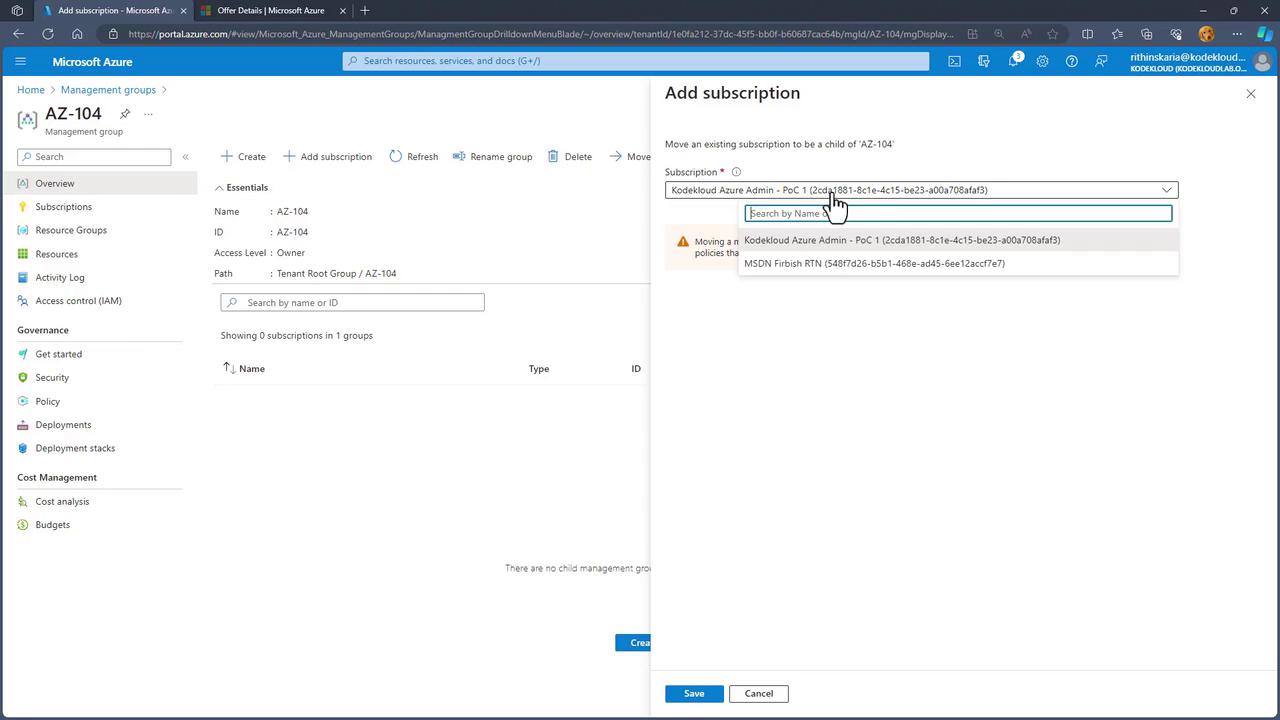
If you need to create a new management group—say, one named AZ-104—enter the desired display name, and the group is created. Initially, AZ-104 will not have any subscriptions assigned. You can later move existing subscriptions into this group.
- Adding a Subscription to a Management Group
To add a subscription to the AZ-104 management group, navigate into the group and select the option to add a subscription.
- Verifying the Hierarchy
After adding subscriptions, refresh the hierarchy view. This ensures that the subscriptions now appear correctly under the AZ-104 group.

- Reorganizing Subscriptions
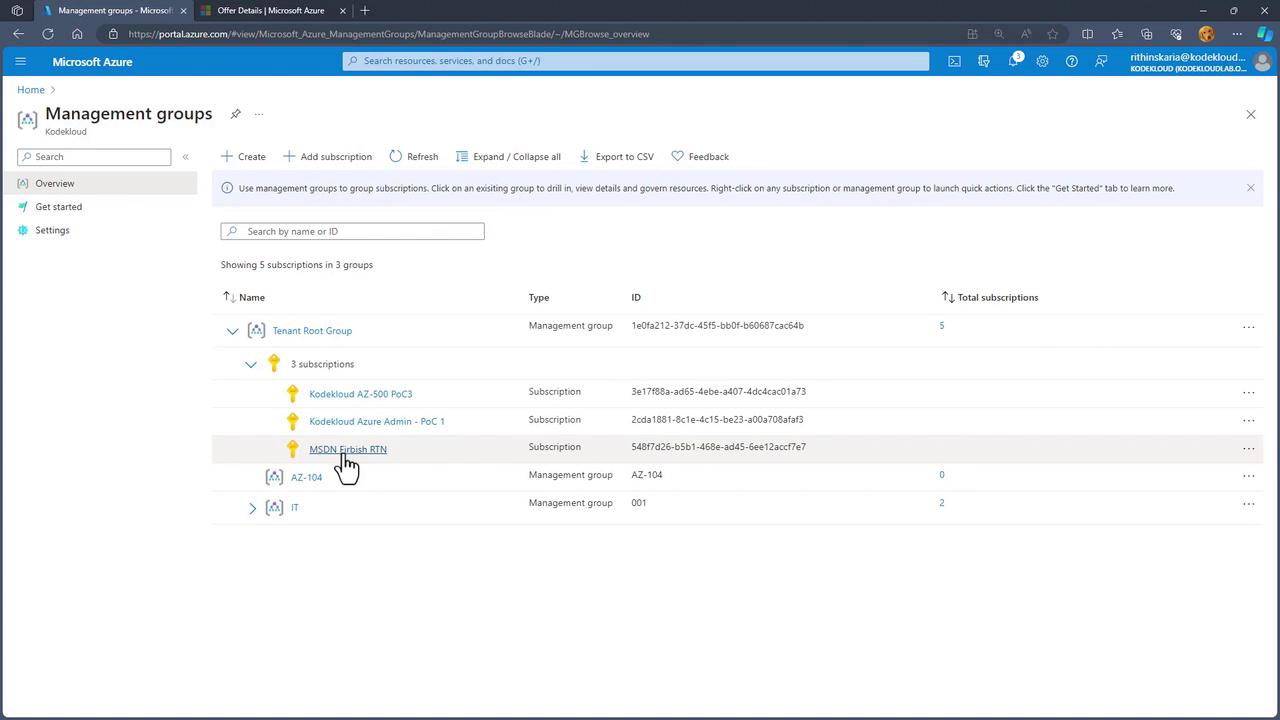
In cases where a subscription isn’t in its appropriate management group—such as appearing under the root instead of the IT group—you can easily move it. Click on the subscription options (typically represented by three dots), select “Move,” choose the target group (e.g., IT), and then click “Save.” This action helps maintain an organized and logical hierarchy.
Remember, applying RBAC policies at a higher level will automatically propagate permissions to all child resources, saving time and ensuring consistency.
Conclusion
The Azure resource hierarchy—comprising management groups, subscriptions, resource groups, and the resources themselves—is vital for efficient policy implementation, access control, and cost management. A solid understanding of this structure not only simplifies governance but also supports scalable management strategies within your Azure environment. Stay tuned for our next discussion, where we will explore Azure Resource Tags in detail.