-
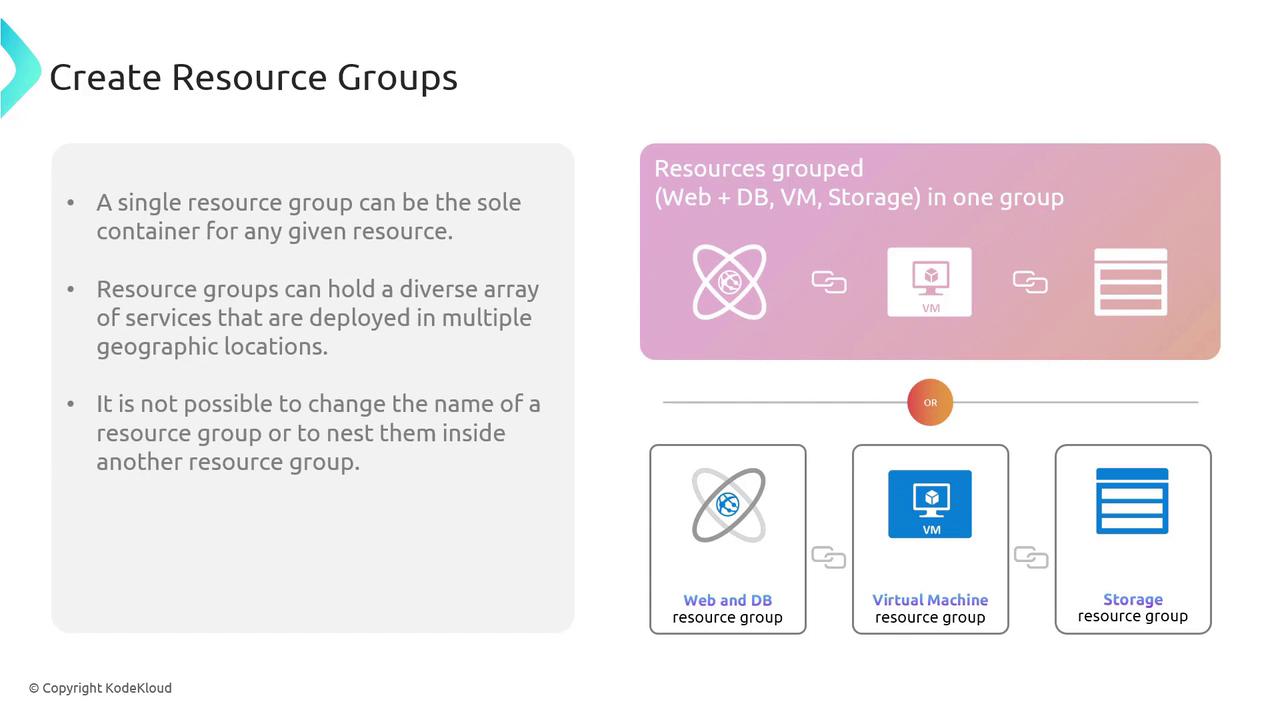
Group all resources related to an application (e.g., web servers, databases, storage) into one resource group.
This approach is ideal for scenarios like an e-commerce website where keeping all components together simplifies management and interdependency tracking. -
Group resources by type.
For instance, you might create one group for all virtual machines and another for storage accounts—similar to organizing shirts and pants in separate drawers. This method works well for large organizations with complex resource management needs.
Key Points about Resource Groups
- A resource group serves as a container to simplify billing, monitoring, and overall administration.
- Resource groups can include services deployed across multiple geographic locations, offering greater scalability and flexibility. For example, a resource group created in East US might contain a resource physically running in West Europe, while the metadata remains stored in East US.
- Once established, the name of a resource group cannot be changed, nor can resource groups be nested within one another.
- Although resource group names are permanent, you can still move resources between groups using Azure Resource Mover—much like moving files between folders on your computer.
Creating a Resource Group in the Azure Portal
To create a resource group using the Azure Portal, follow these steps:- Open the Azure Portal and either click on the Resource Groups button or search for “Resource Groups”.
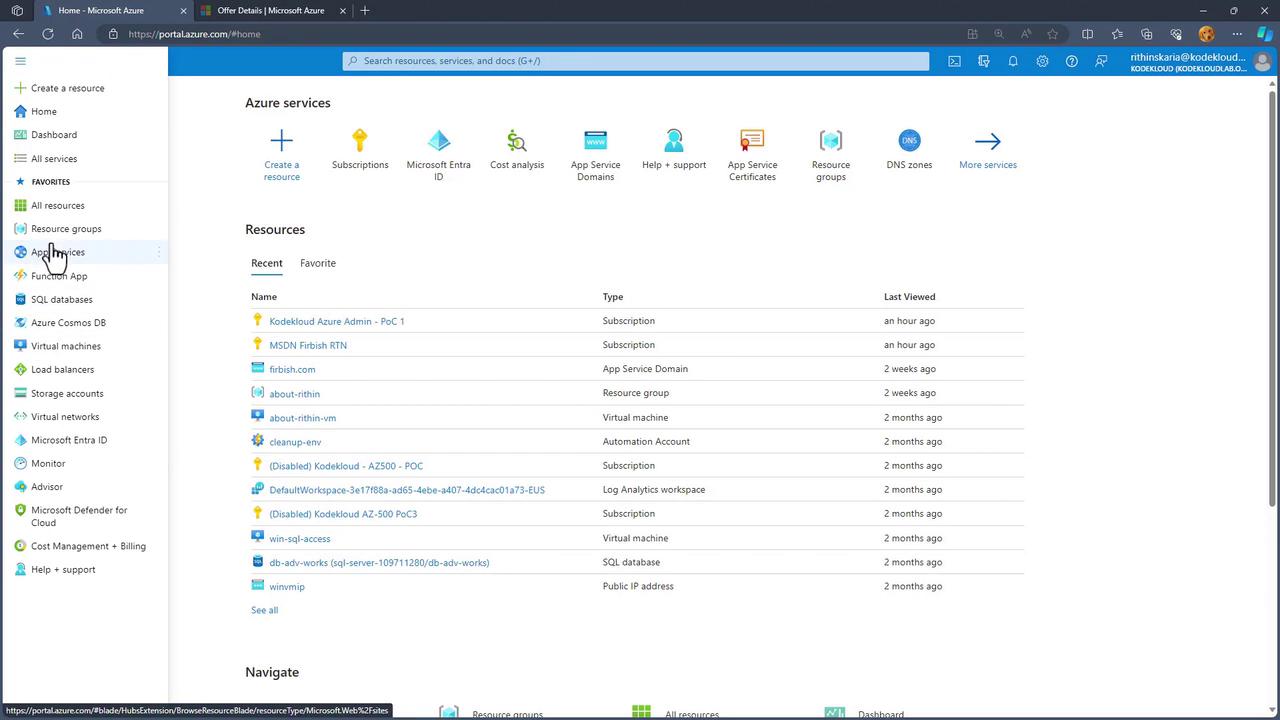
- On the Resource Groups page, view existing groups or create a new one.
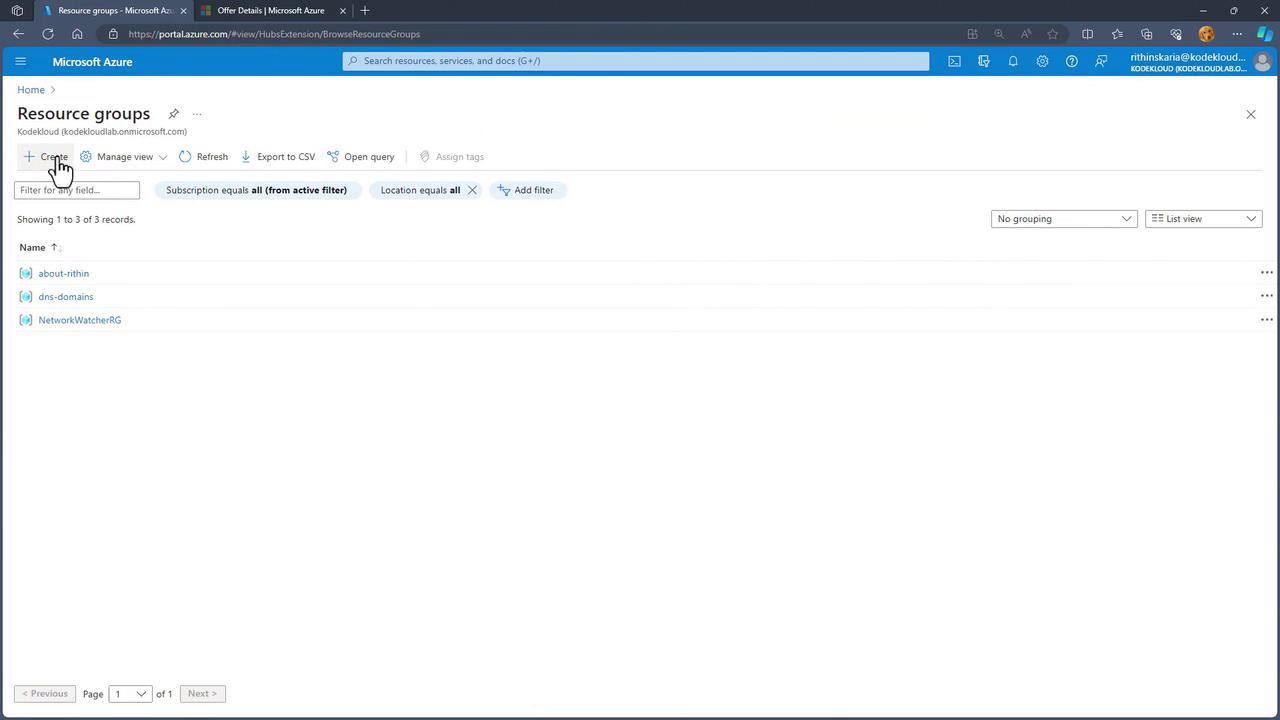
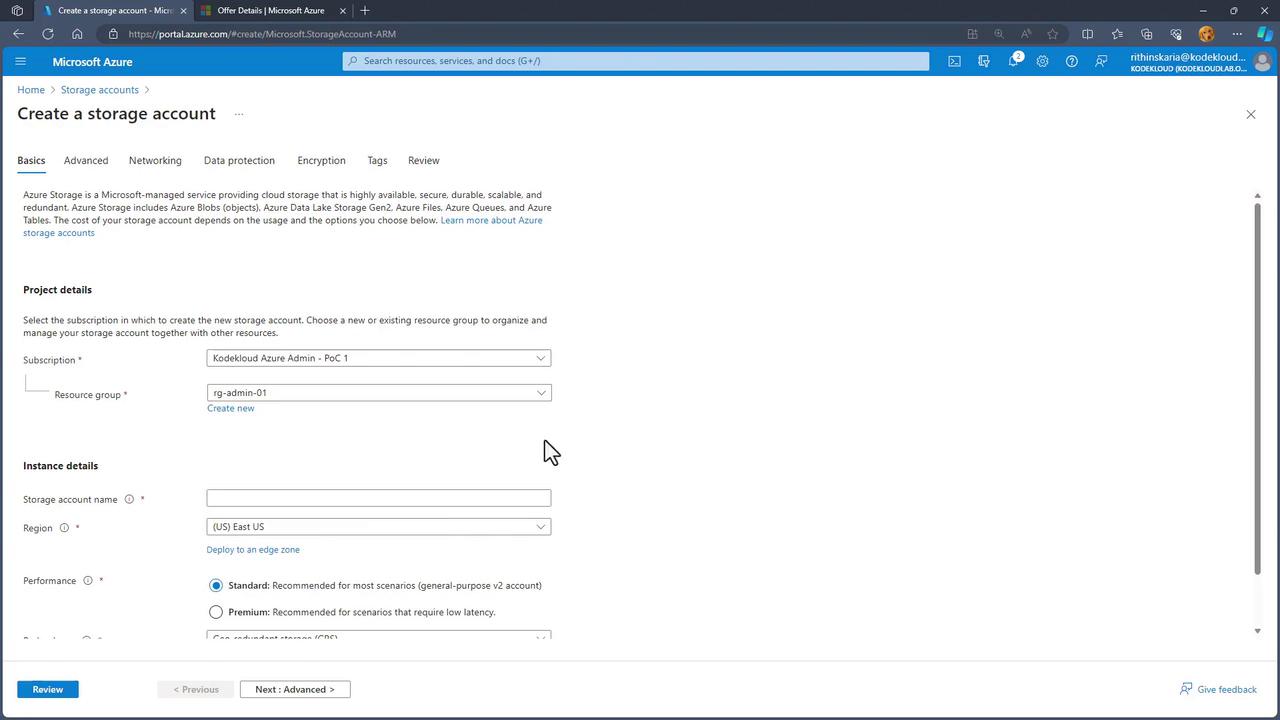
- To create a new resource group:
- Select the desired subscription.
- Enter a unique name for the group.
- Choose a region that meets your compliance and organizational requirements (e.g., East US).
- Optionally, add tags for easier resource management.
- Proceed by clicking “Review and Create”.

Service Limits and Quotas
Azure’s service limits and quotas are designed to maintain the cloud ecosystem’s health and performance. They help prevent unexpected usage spikes that might degrade performance and allow you to manage costs effectively while preventing platform overuse. For example, if a script attempts to deploy 10,000 virtual machines, a predefined limit ensures that one user does not consume all the available resources. This safeguard ensures fair resource distribution among customers. Should your business require usage beyond the default limits, you have the option to request an increase. Azure enforces default limits (quotas) at the subscription level to prevent accidental over-provisioning and unexpected charges. For instance, there might be a cap on the number of virtual CPUs deployable in a region to help manage budgets and resource allocation. You can think of these usage statistics much like a fuel gauge in a car, providing visibility into remaining capacity.
- Some quotas can be increased directly through the portal by submitting a request.
- Others require a support ticket with Microsoft.
- Some limits are “hard limits” that cannot be changed, whereas “soft limits” can be increased with Microsoft’s assistance. In cases where a hard limit is reached, provisioning an additional subscription may be necessary to meet your requirements.
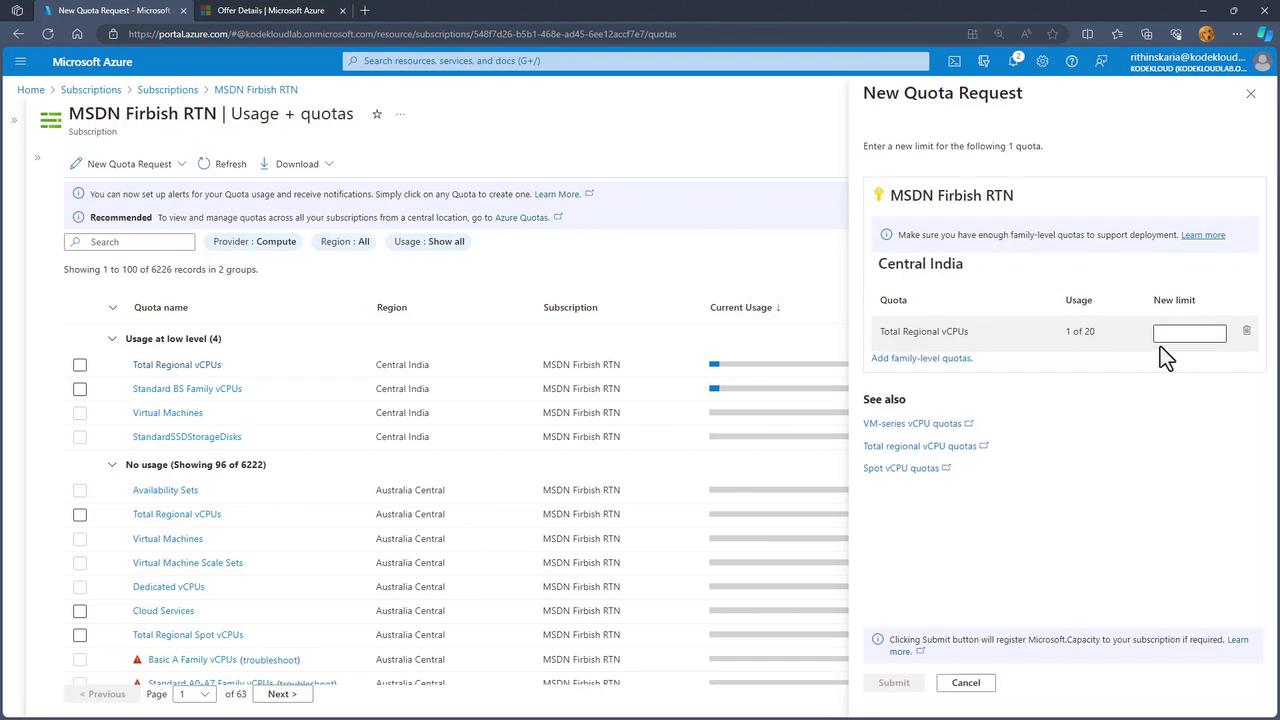
Managing Quotas in the Azure Portal
To view and manage your quotas:- Navigate to your subscription within the Azure Portal, where these limits are enforced.
- Select “Usage + Quotas” to view your current consumption. You can filter the data by provider (e.g., Storage or Compute) or sort by region.
- For example, when reviewing compute resources (virtual machines) in a specific region, you will see the total regional vCPU count along with current usage status. If the quota is adjustable, you may submit a request for an increase.
Free trial or sponsored subscriptions generally have stricter quota limits compared to paid subscriptions, which usually have better chances for quota adjustments.