Step 1: Finding Elastic Cloud
- Open your Google Chrome (or your preferred browser) and search for “Elastic Cloud.”
- Click on the first link in the search results. This will lead you to the Elastic Cloud website where the free trial is prominently featured.

Step 2: Start Your Free Trial
- Click on the “Start Free Trial” button.
- You will see several sign-up options, including registration via cloud marketplaces and a direct sign-up for an Elastic Cloud account.
- For this guide, we will register directly with Elastic Cloud. At the time of recording, no credit card is required to sign up for the free trial.
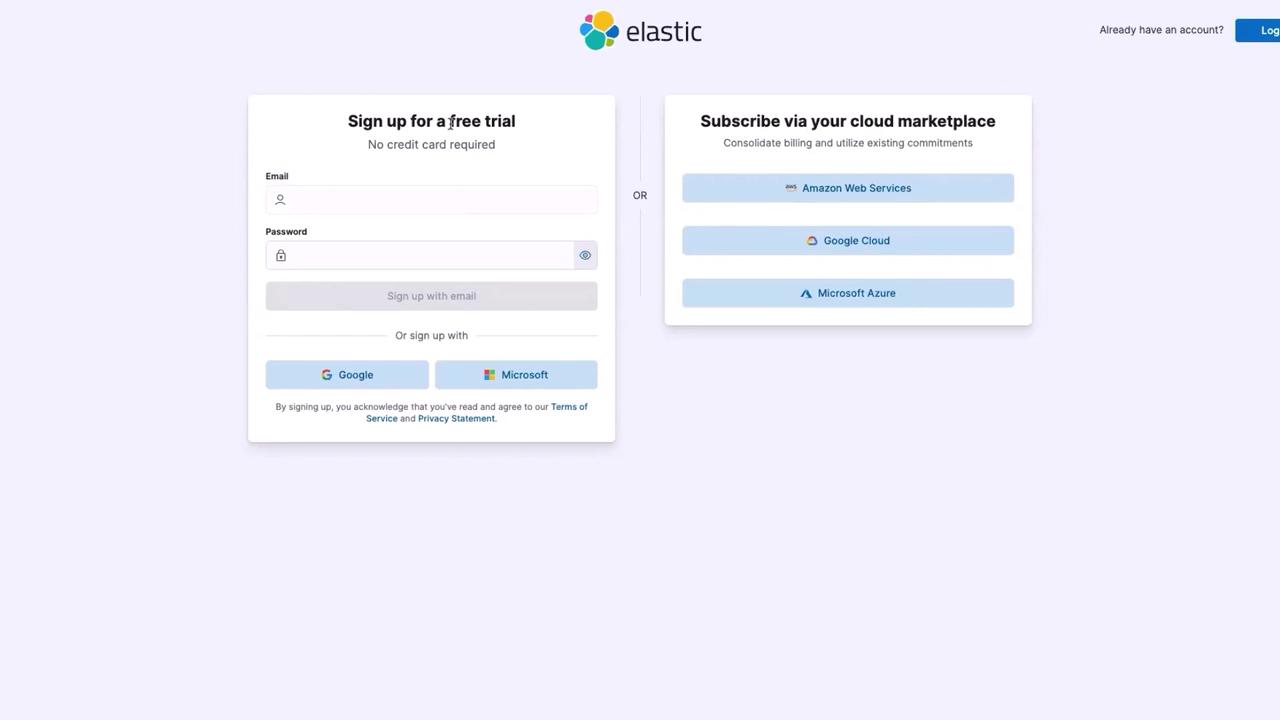
If you’re exploring Elastic Cloud for evaluation, you can register without providing detailed company information—just enter “Not Available” when prompted.
Step 3: Registration Process
- Select Google as your preferred sign-in method.
- Choose your email ID and click “Continue.”
- Fill in your full name and company details. If you do not wish to provide your company information, simply enter “Not Available.”
- When asked about your experience with Elastic, select “I am new” and choose the “Evaluate Elastic for my project” use case.

- Click “Next.”
- If additional details are required, enter “observability logs” or select one of the available options.
- Continue by clicking “Next” and wait for the registration process to complete.
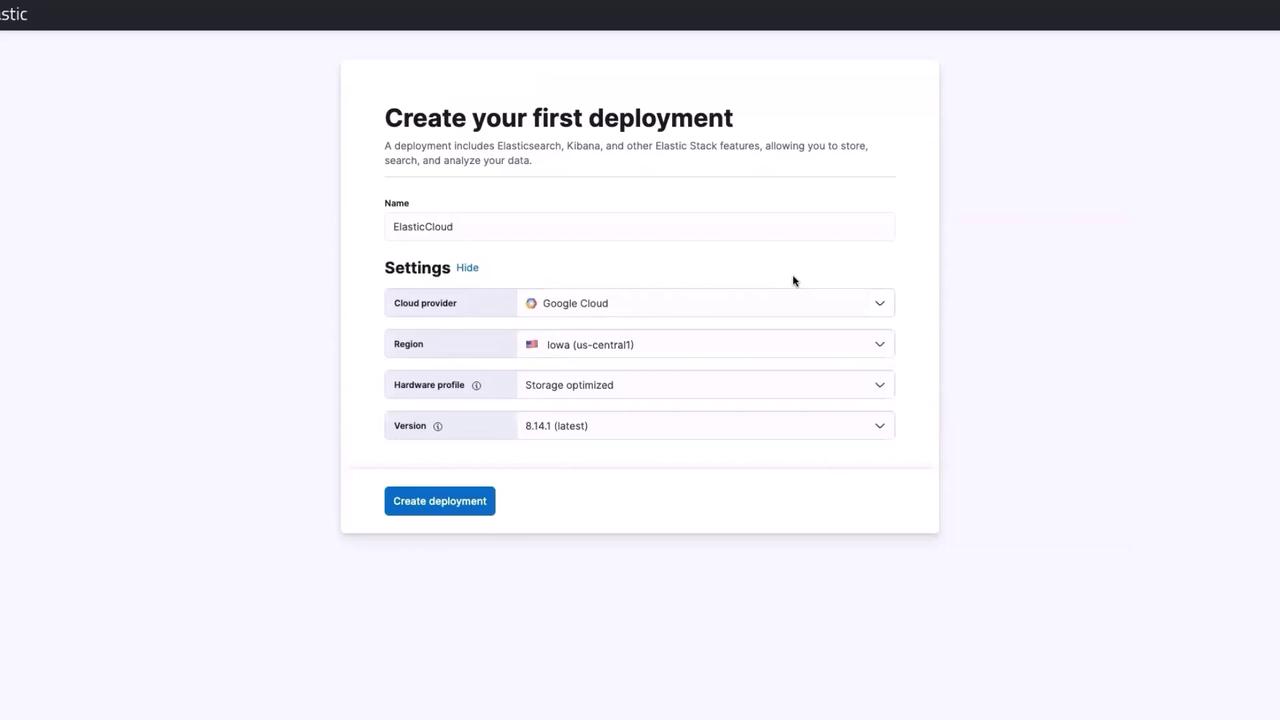
Step 4: Configuring Your Deployment
- Name your deployment (e.g., “Elastic Cloud”) while keeping the remaining settings at their defaults.
- By default, Elastic Cloud deploys your environment on Google Cloud Platform (GCP). To choose a different provider, click “Edit Settings” and select your preferred cloud provider. For this demonstration, we are using the default GCP.
- You can also select the hardware profile. Options include vector search optimized, storage optimized, and more. If you are new to Elastic Cloud, it is recommended to leave these options at their default values.
- Click on “Create Deployment.”
Step 5: Reviewing Your Deployment
- To view the details of your deployment, click on your account and navigate to “Organization.”
- Here, you will see your organization details (typically, only you as the user). Then, click on “Cloud” to review your deployment’s status, ensuring it is healthy and that the cloud provider’s details are correctly displayed.
- Although you have the option to create additional deployments, continue with the one you just created.
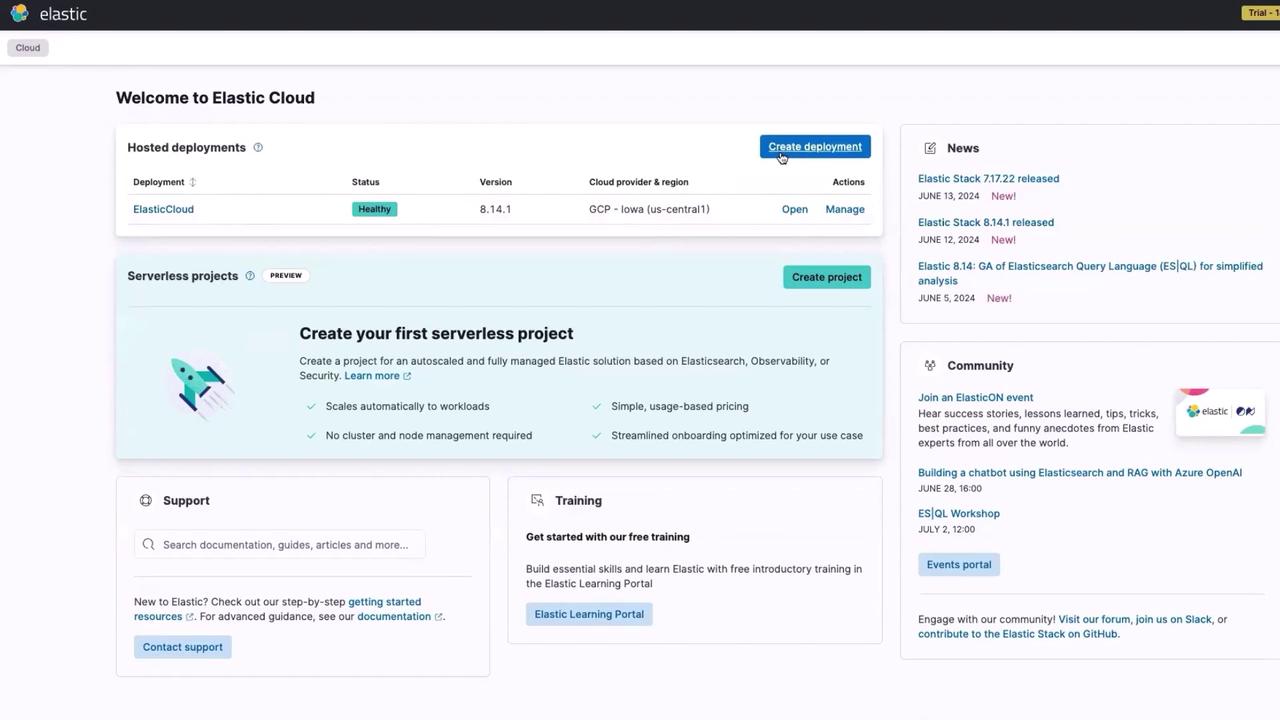
Step 6: Accessing Kibana and Next Steps
- Click the “Open” button to launch your Kibana URL, where you can start monitoring and analyzing your data.
- The next step in this series will demonstrate how to integrate your Kubernetes cluster with Elastic Cloud to collect and forward Kubernetes metrics to Elasticsearch.
In the next article, we will walk you through the process of integrating a Kubernetes cluster with Elastic Cloud for monitoring purposes. Stay tuned!