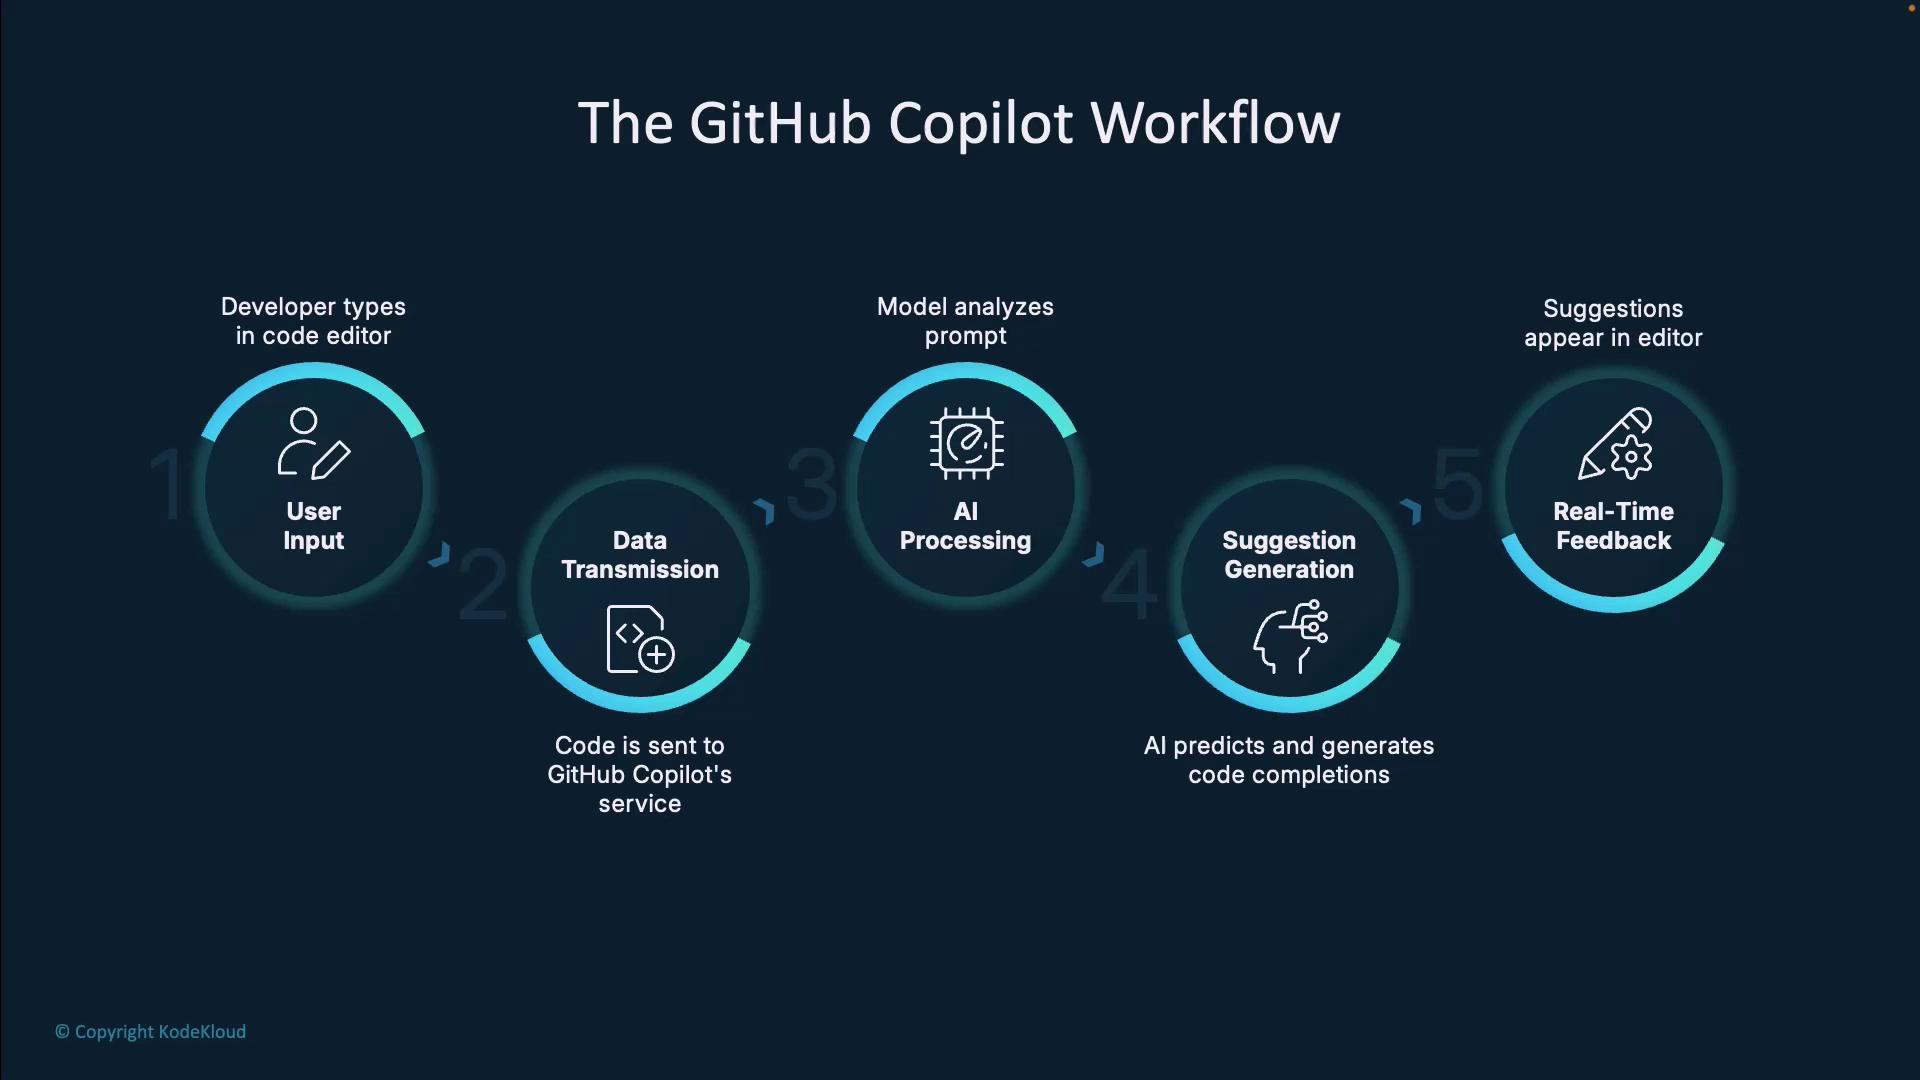
Copilot Workflow Overview
Below is a quick summary of the six stages in Copilot’s continuous loop:| Stage | Description |
|---|---|
| Developer Experience | Captures file context, cursor position, and project scope |
| Data Transmission | Sends only the prompt and surrounding code to GitHub |
| AI Processing | Analyzes syntax, semantics, and patterns with Codex/GPT |
| Suggestion Generation | Predicts and ranks code completions |
| Real-Time Feedback | Shows ghost-text suggestions in your editor |
| Developer Decision | Accepts, rejects, or cycles through suggestions |
Step 1: Developer Experience
All interactions begin in your IDE—VS Code, JetBrains, or another supported environment. As you type code or comments, the Copilot extension continuously captures:- File name, cursor location, and language mode
- Surrounding code structure (functions, imports, classes)
- Open files and repository hierarchy
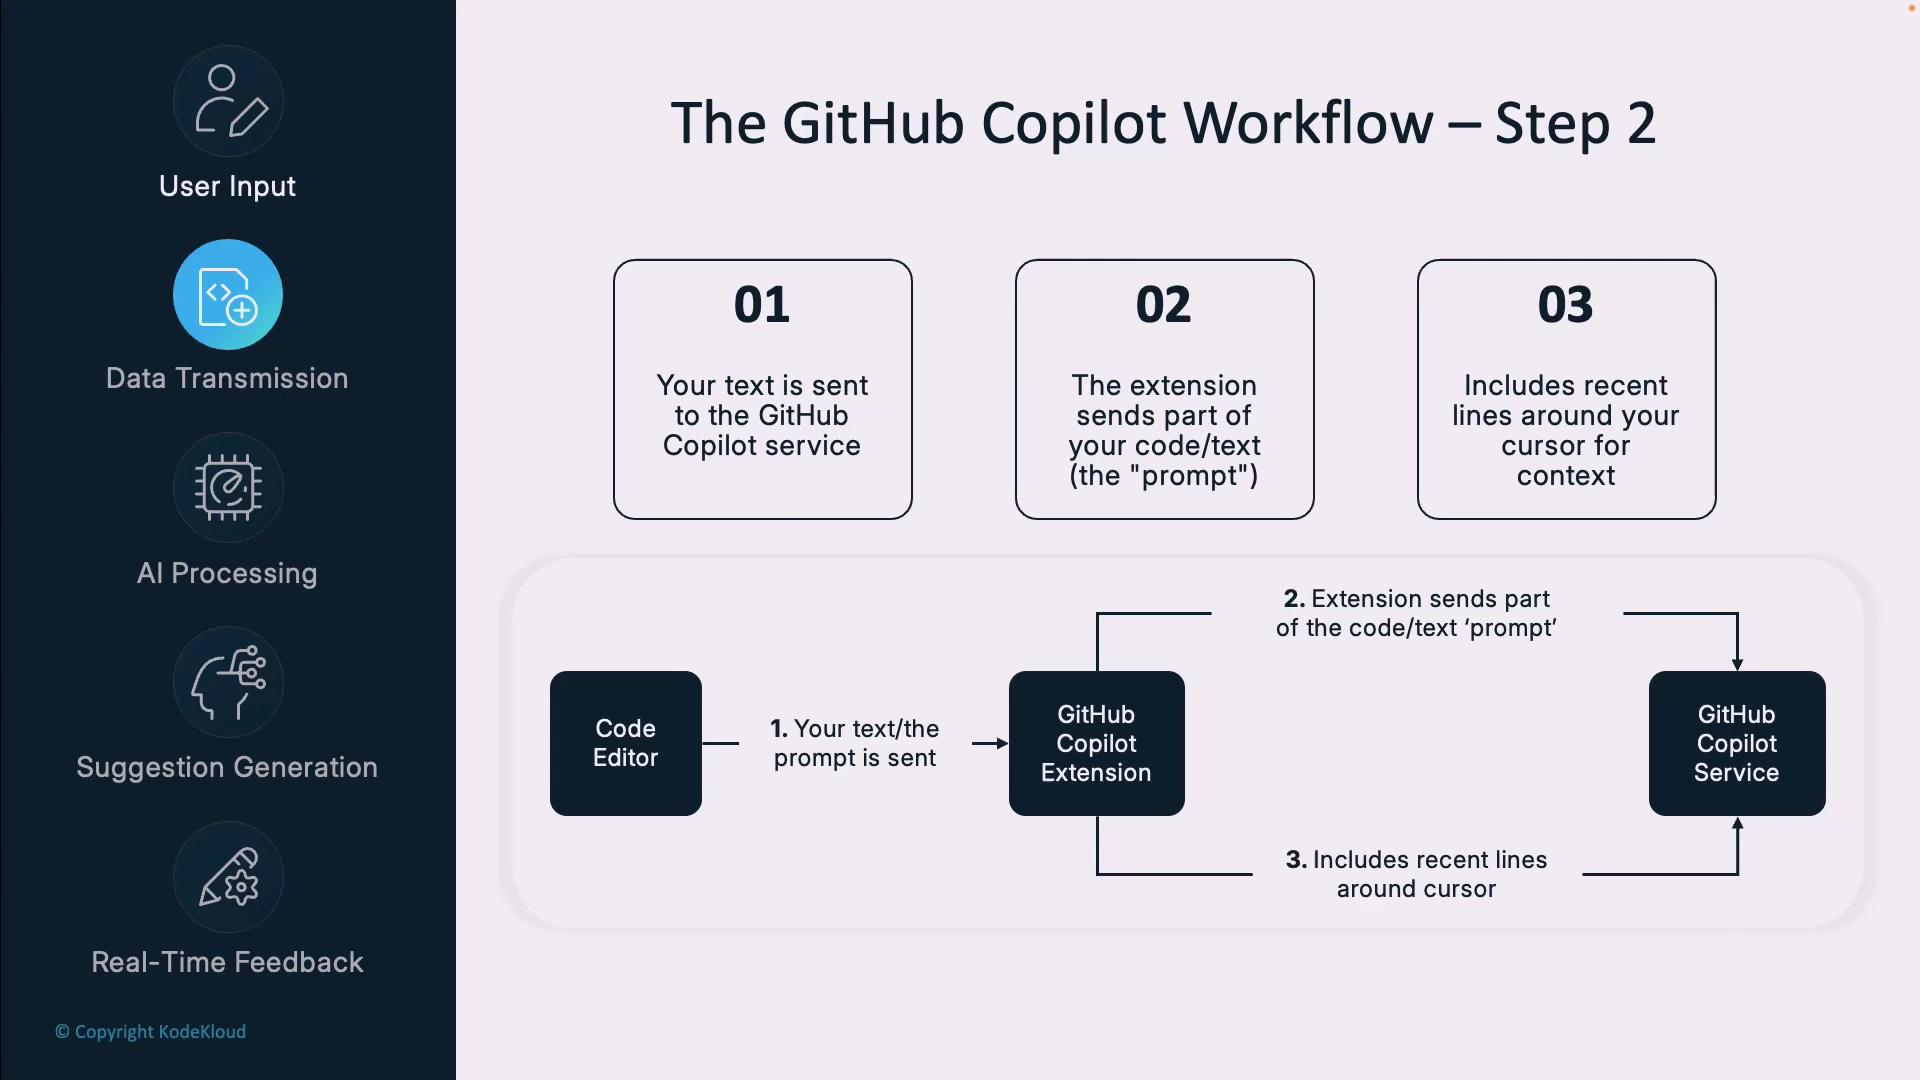
Step 2: Data Transmission
Once your local context is ready, Copilot securely sends a prompt—the code lines around your cursor—to GitHub’s cloud services. Only the minimal snippet needed for the request is transmitted, not your entire repository.Copilot does not upload your full codebase. It only sends the most relevant lines to preserve confidentiality and reduce latency.
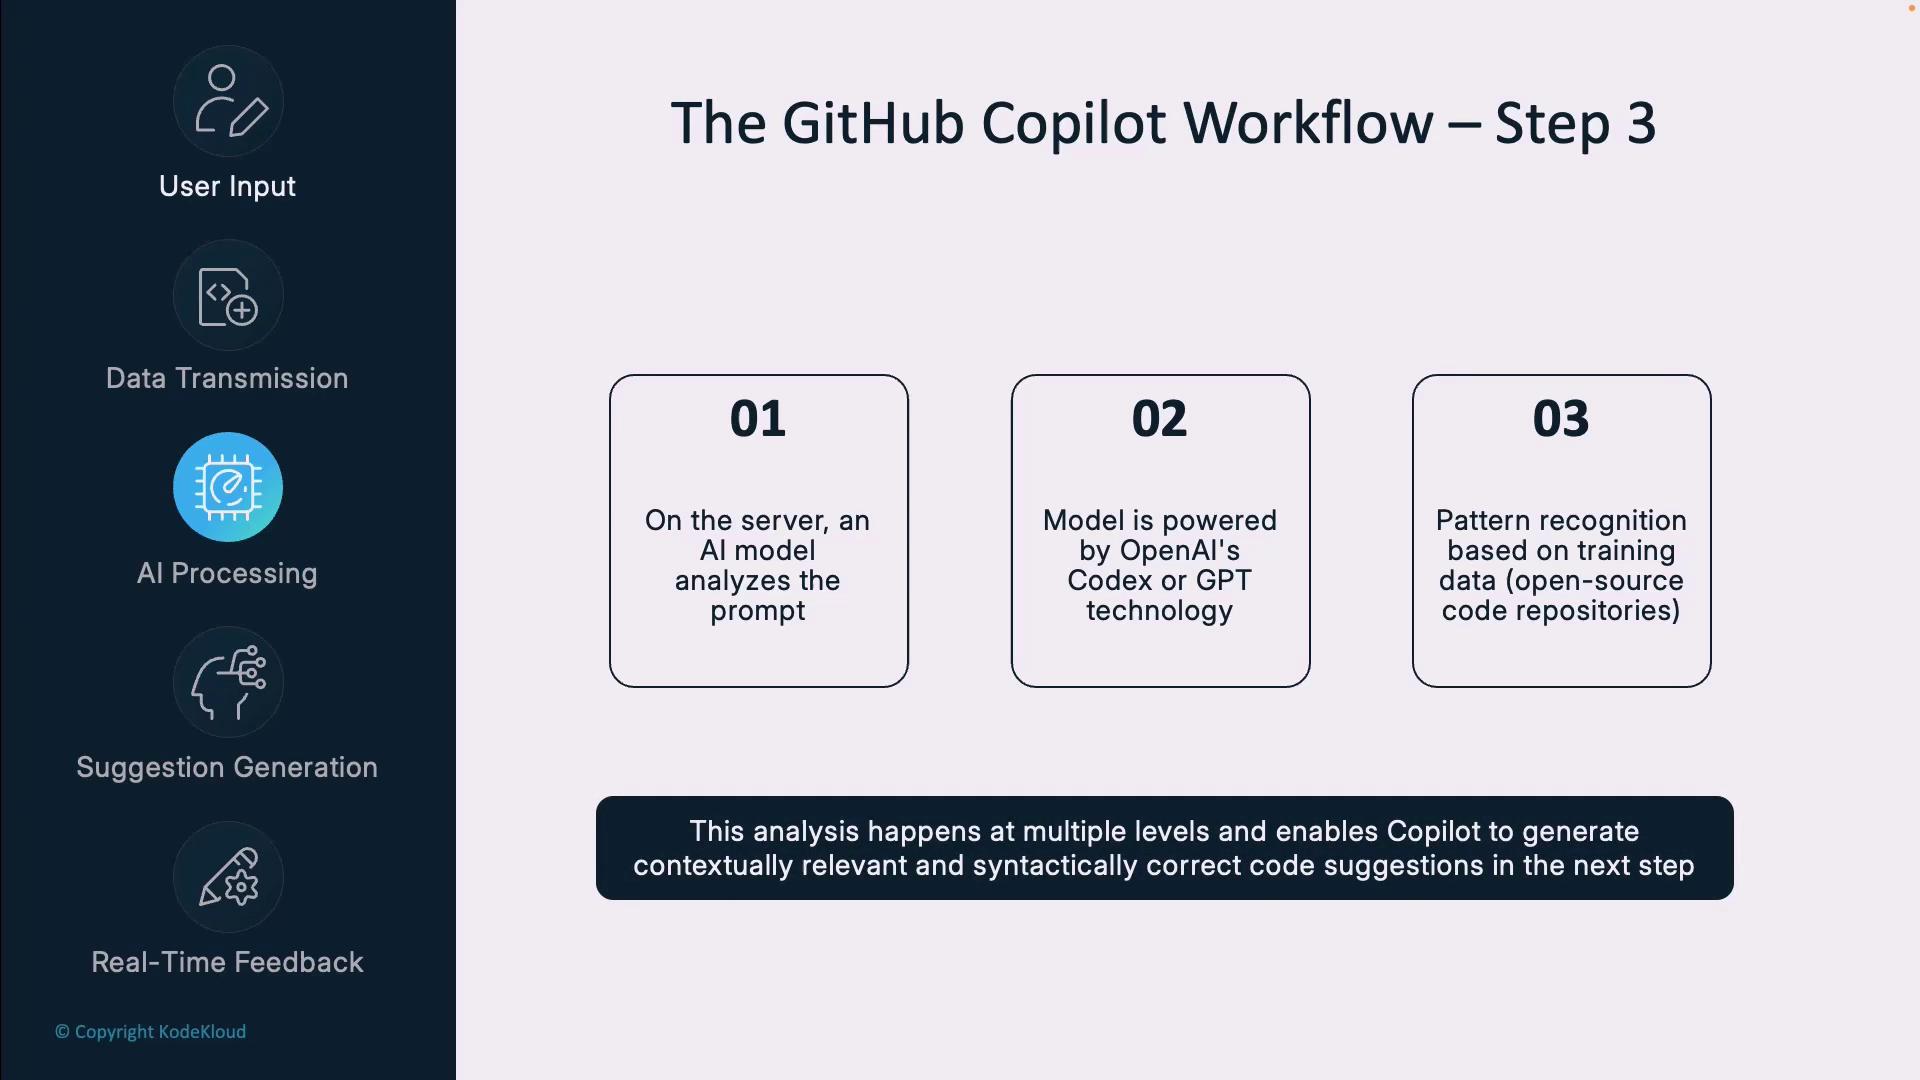
Step 3: AI Processing
On GitHub’s backend, an AI model powered by OpenAI’s Codex/GPT technology parses your prompt:- Detects the programming language, frameworks, and libraries
- Recognizes data structures, algorithms, and naming conventions
- Infers semantic intent and coding patterns from open-source examples
Step 4: Suggestion Generation
Based on the processed context, Copilot generates multiple code continuations. It ranks options by confidence, style, and best practices before returning them to your editor.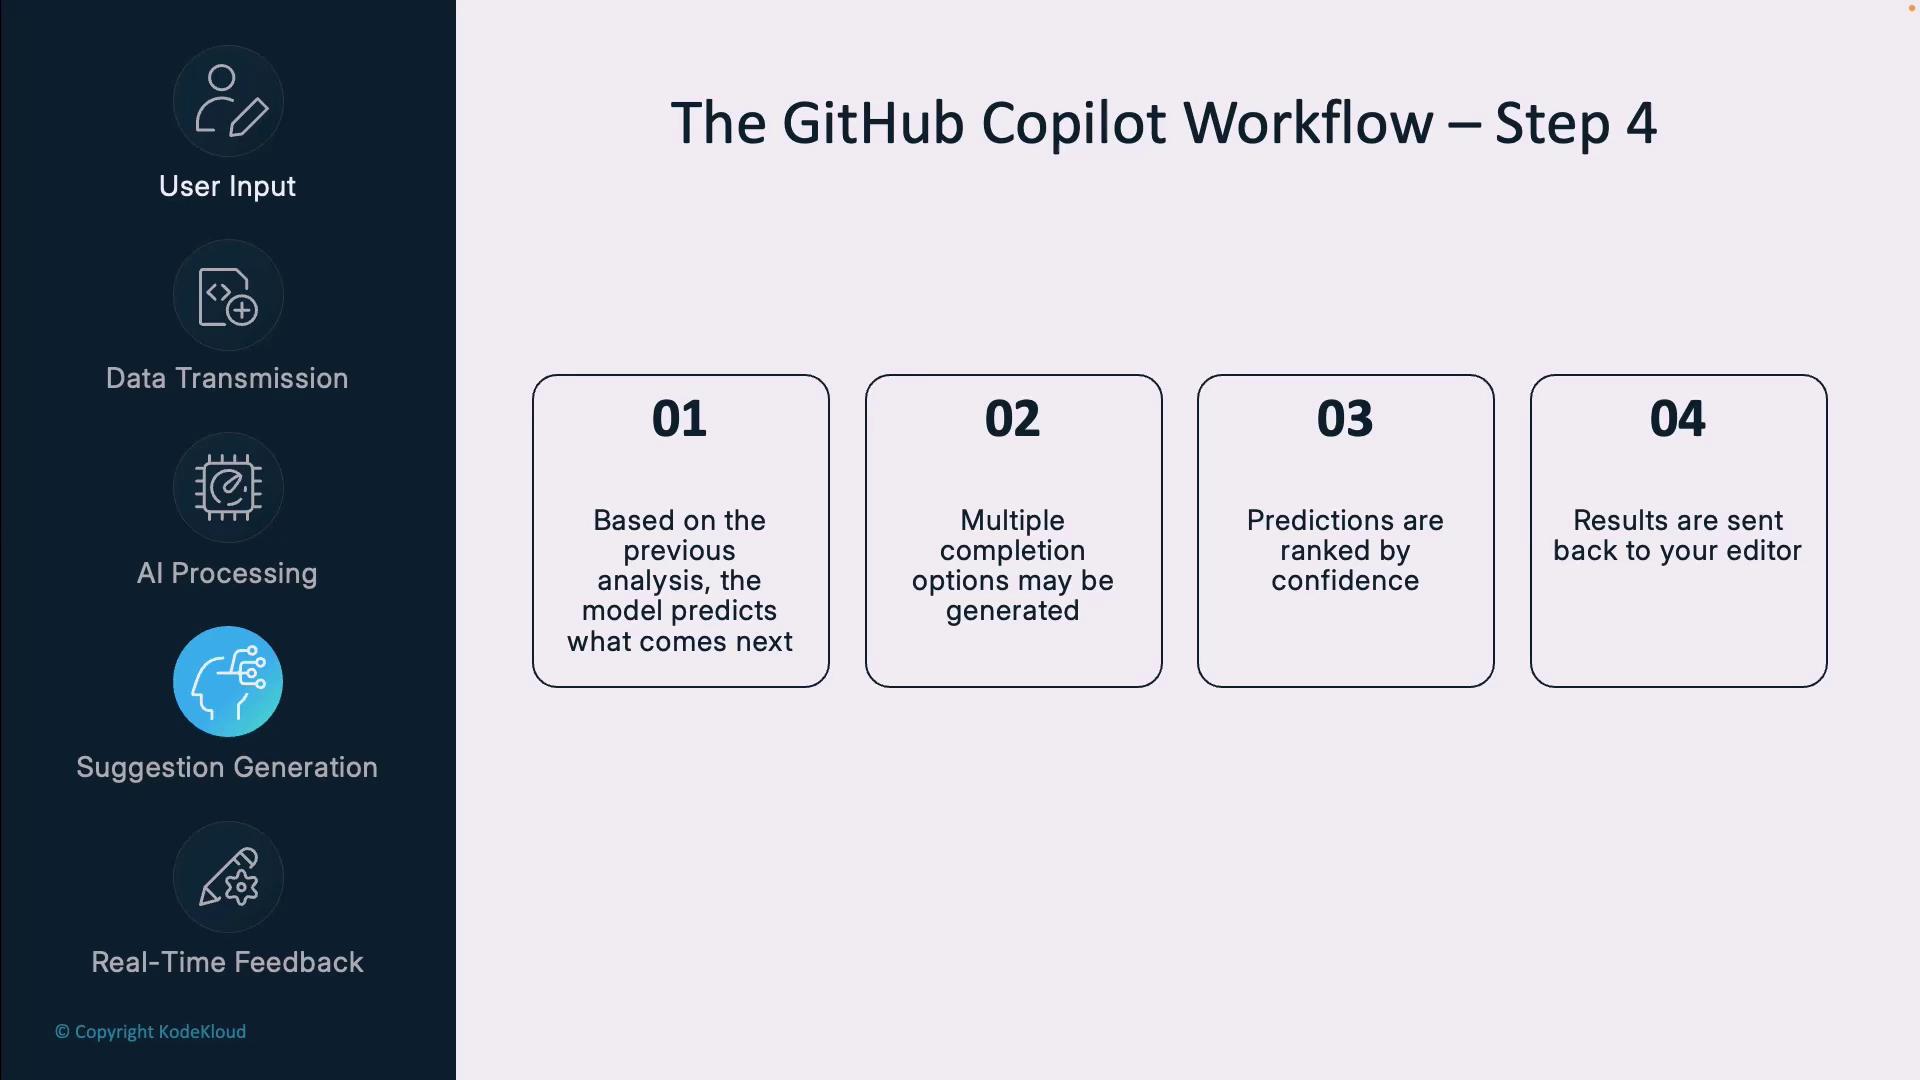
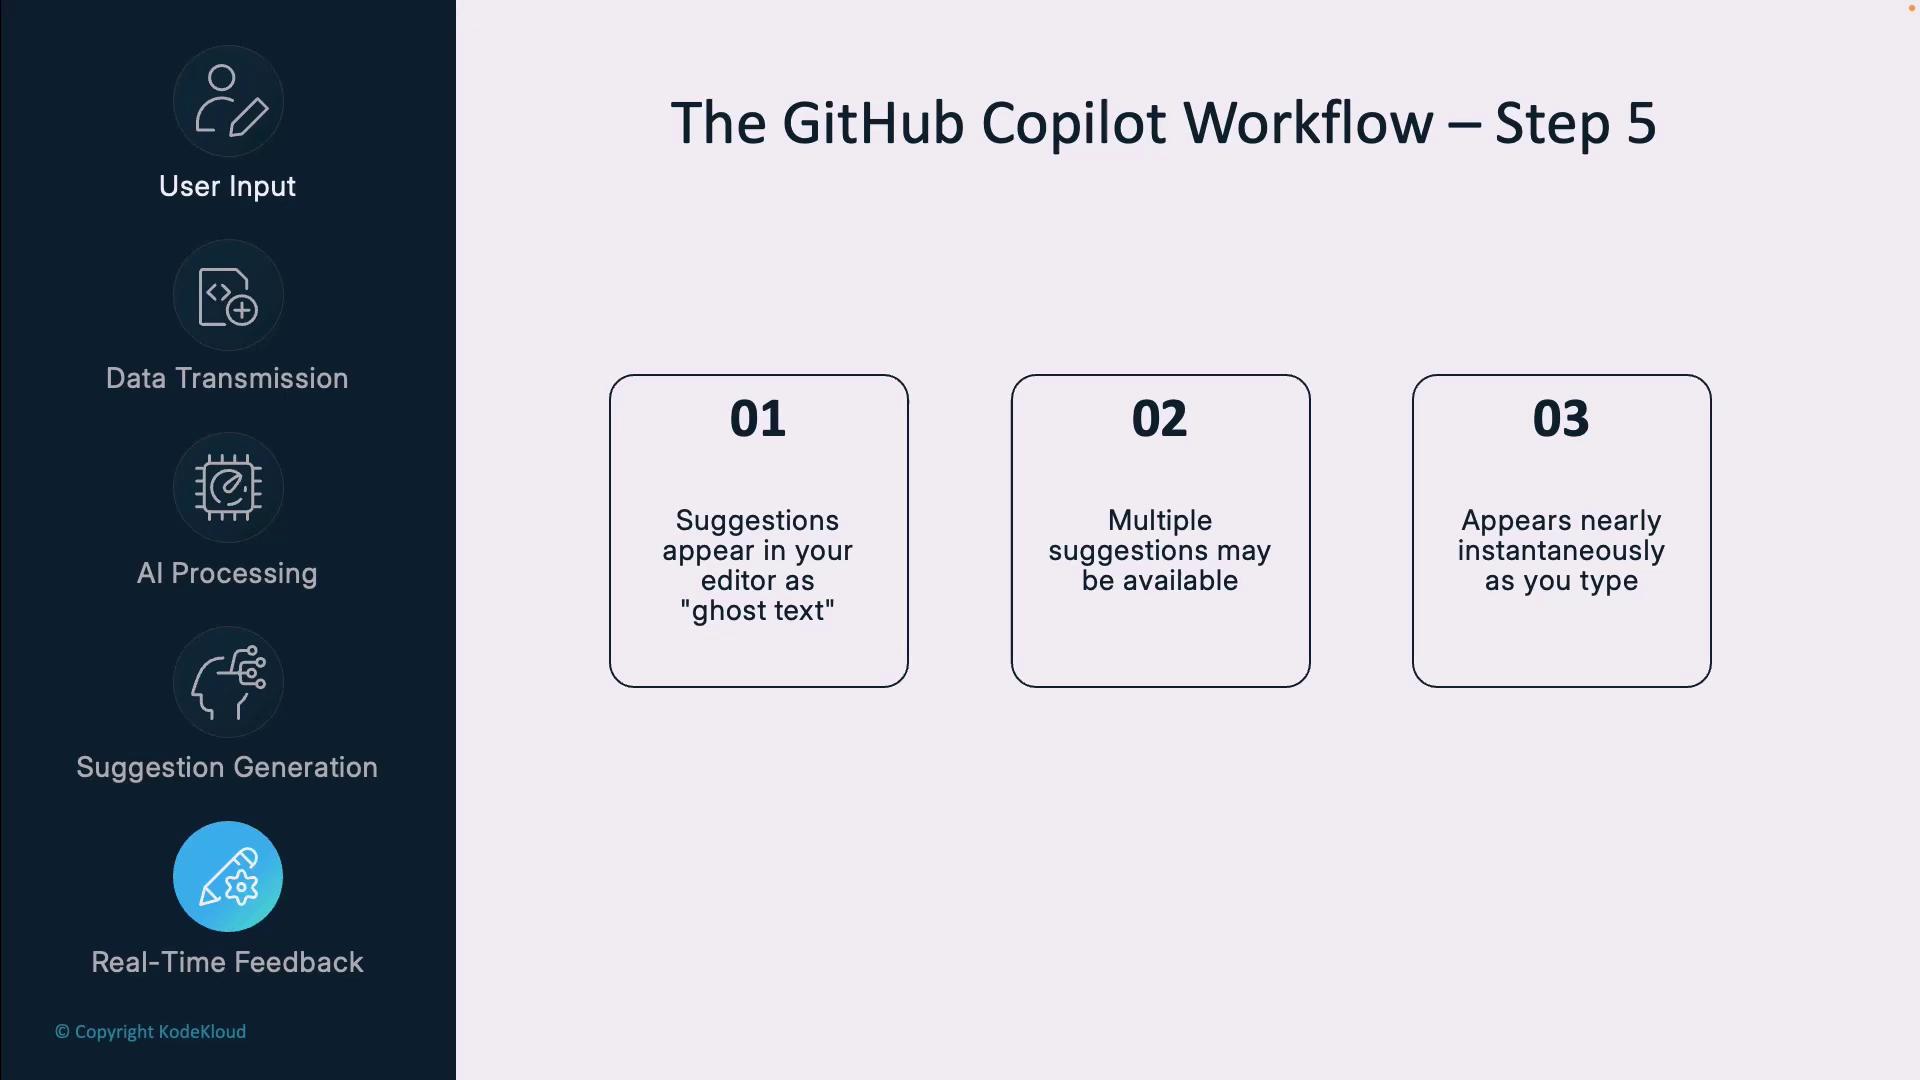
Step 5: Real-Time Feedback
In your editor, Copilot renders suggestions as ghost text. You can:- Press
TaborEnterto accept - Keep typing to ignore or reject
- Use shortcuts to cycle through alternatives
Step 6: Developer Decision
You remain in full control. After previewing suggestions, you can:- Accept (
Tab/Enter) to insert code - Reject by typing custom code
- Cycle through other options if needed

Writing Effective Prompts
To maximize Copilot’s assistance:- Be specific about desired functionality
- Add contextual comments before snippets
- Mention edge cases or constraints
- Use the correct file extension and language syntax
Common Prompt Patterns
| Pattern Type | Description | Example |
|---|---|---|
| Function Description | Outline expected behavior | // function that sorts an array of objects by a specified property |
| Bug Fix Request | Describe an error and desired fix | // the following code throws an exception when the input is null\nFix it to handle null inputs gracefully. |
| Code Refactoring | Ask for modern syntax or optimizations | // refactor this function to use async/await instead of promises |
| Test Generation | Generate unit tests | // write unit tests for the following function |
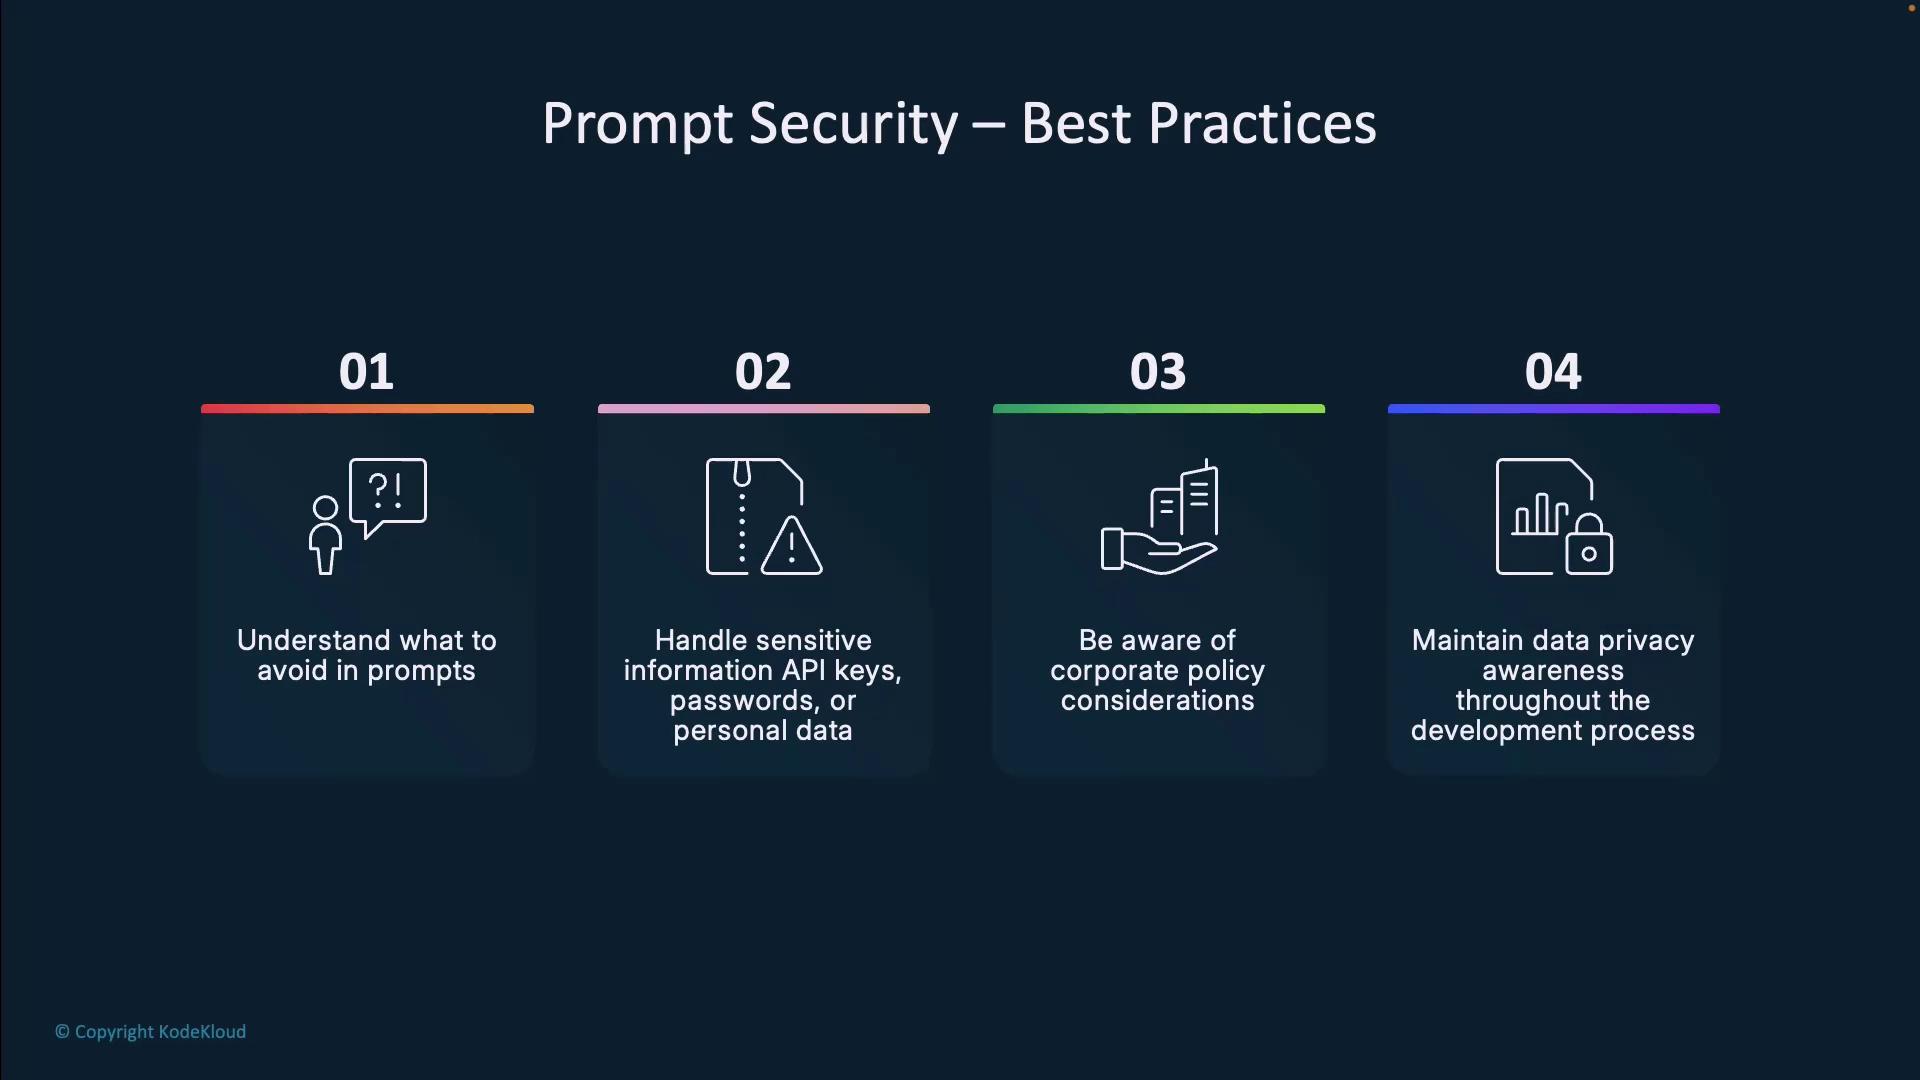
Security Best Practices
Never include sensitive data (API keys, passwords) in your prompts. Use environment variables or secret managers and follow your organization’s AI data-sharing policies.
Continuous Improvement
Copilot evolves on two levels:- Global model updates from GitHub/OpenAI ensure broad enhancements.
- On-the-fly adaptation to your repo’s style, naming conventions, and frameworks.
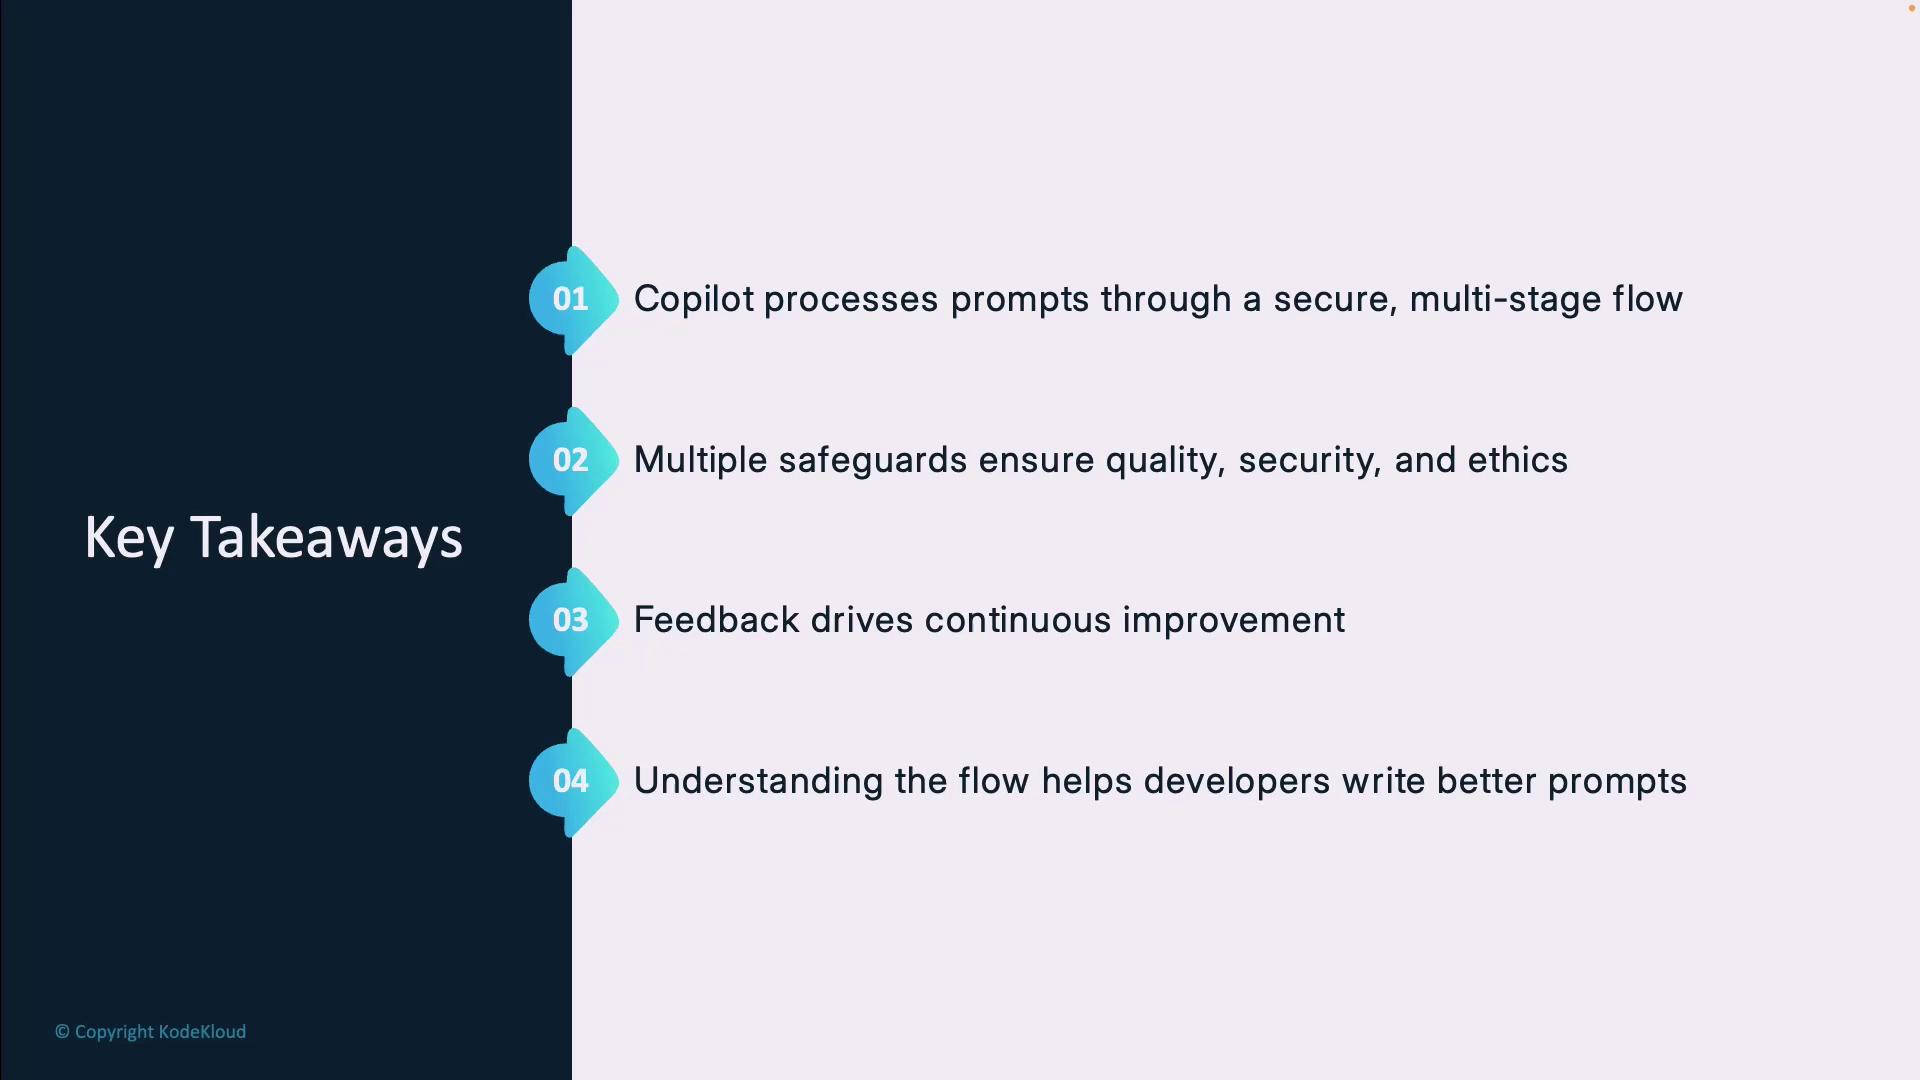
Key Takeaways
- A secure, multi-stage pipeline transforms prompts into code suggestions.
- Copilot enforces privacy, security, and ethics at every step.
- Inline feedback loops drive continuous system and style improvements.
- Mastering this workflow helps you engineer precise prompts and boost productivity.