Cloud Database Architecture
The architecture for this demo is straightforward: users access a URL on their smartphones or laptops, which routes through a cloud load balancer to an instance group. This group then connects to Cloud SQL for database services. Below is a diagram illustrating the typical Google Cloud architecture: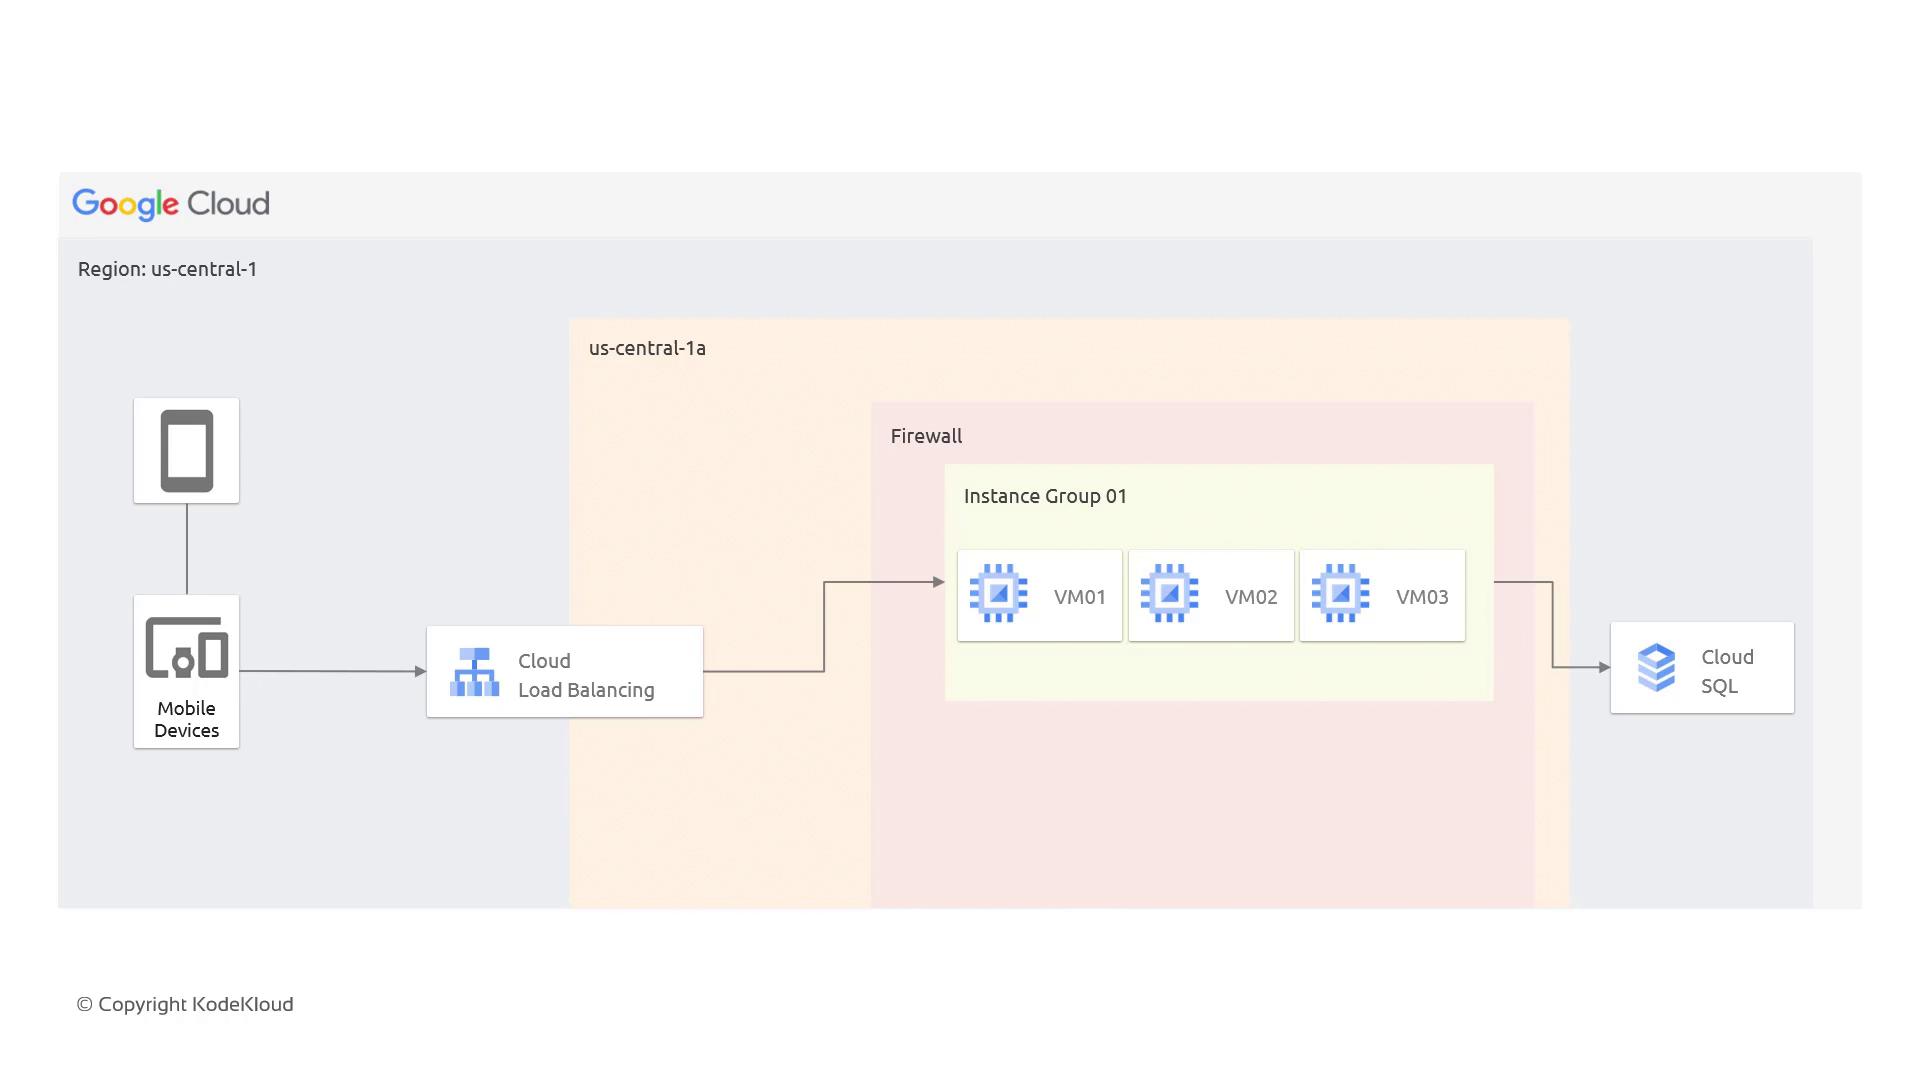
Creating a Cloud SQL Instance
In this section, you’ll learn how to spin up a Cloud SQL instance and configure it for your needs.In production environments, always secure your database with a strong password.
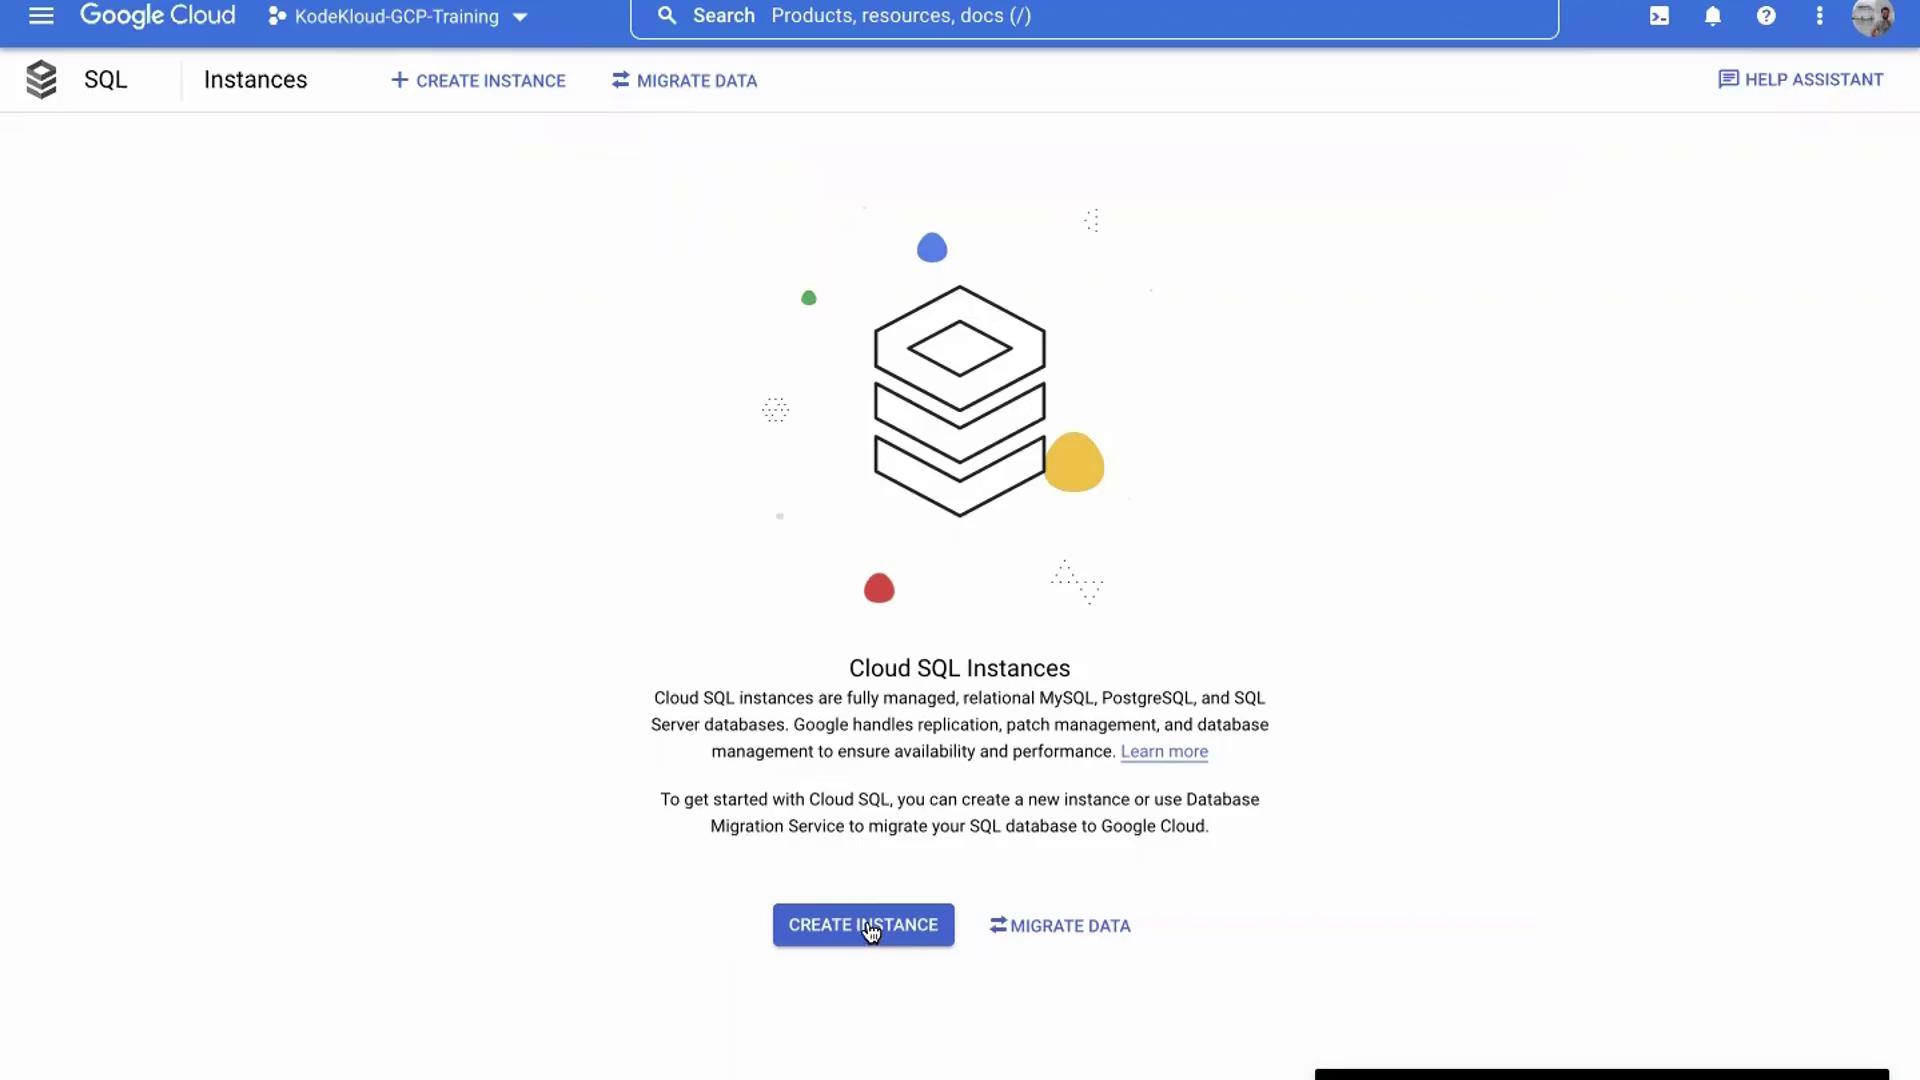
- Access the GCP Console: Start by logging into your GCP account and navigating to the Cloud SQL page.
- Create Instance: Click on Create Instance.
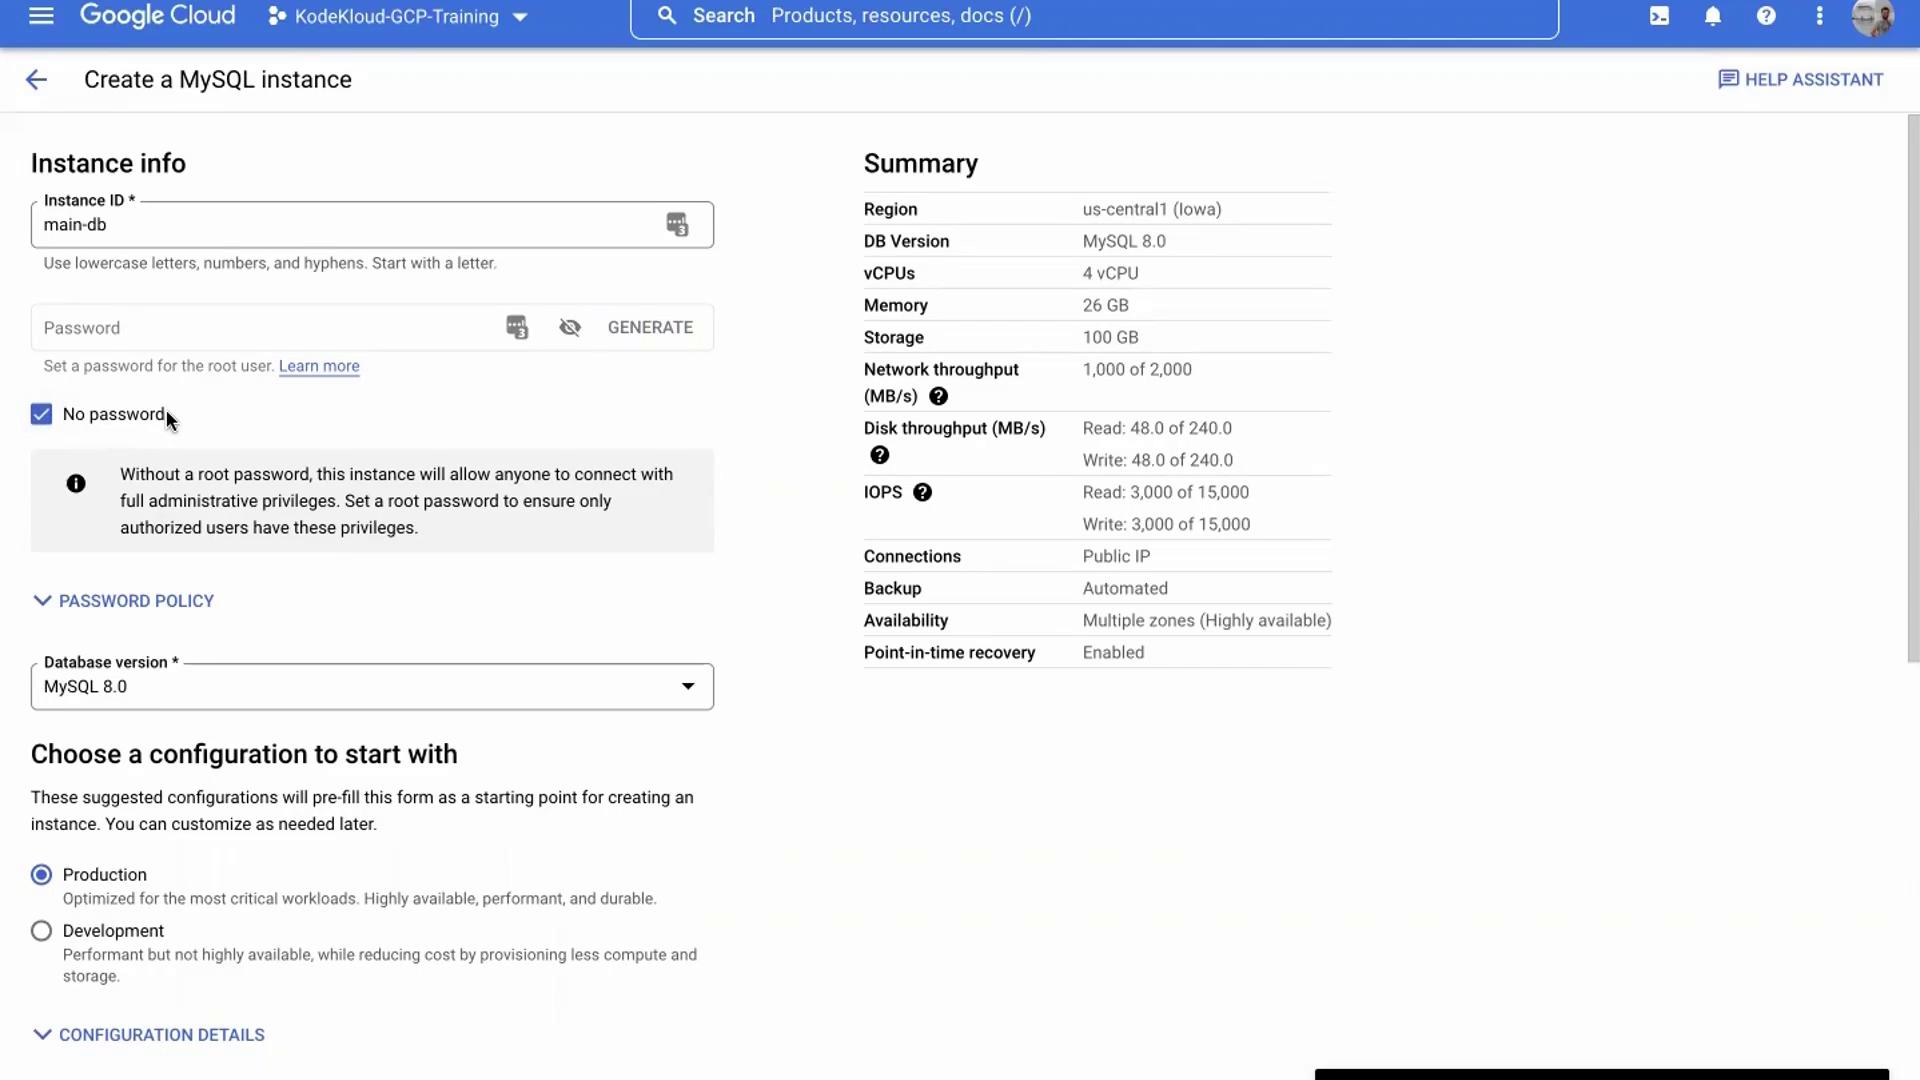
- Select MySQL: From the three options provided, choose MySQL. Name your instance “main-db”. For this demo, the instance is set up without a password. (For production, always use password protection.)
- Configure Instance Settings: Choose your desired MySQL version. Additional configurations include:
- Automated Backups: GCP automatically backs up your database.
- High Availability: The database is spread across multiple zones to minimize downtime.
- Point-in-Time Recovery: Enables quick recovery from failures.
- Choose Environment: Optionally, select whether the database is for development or production. Leave the region at its default value for this demo.
- Create Instance: Once you have verified your settings, click on Create Instance. The process usually takes about 6 to 7 minutes.

Connecting to the Cloud SQL Instance
To interact with your MySQL database, use Cloud Shell available directly in the GCP console.- Launch Cloud Shell: Click on Open Cloud Shell.
-
Connect to the Database: Run the following command to initiate the connection:
- Enable Cloud SQL Admin API: If the connection fails because the Cloud SQL Admin API isn’t enabled, a URL will be provided. Copy and open this URL in a new browser tab to enable the API. This process may take one to two minutes.
-
Reconnect: After enabling the API, execute the command again:
-
MySQL Session: No password was set during creation, so simply press Enter when prompted. Within the MySQL session, you can run commands like:
-
Exit MySQL: To exit the session, type:
In production applications, credentials should be securely stored and used rather than connecting manually through Cloud Shell.
Disabling Delete Protection and Deleting the Instance
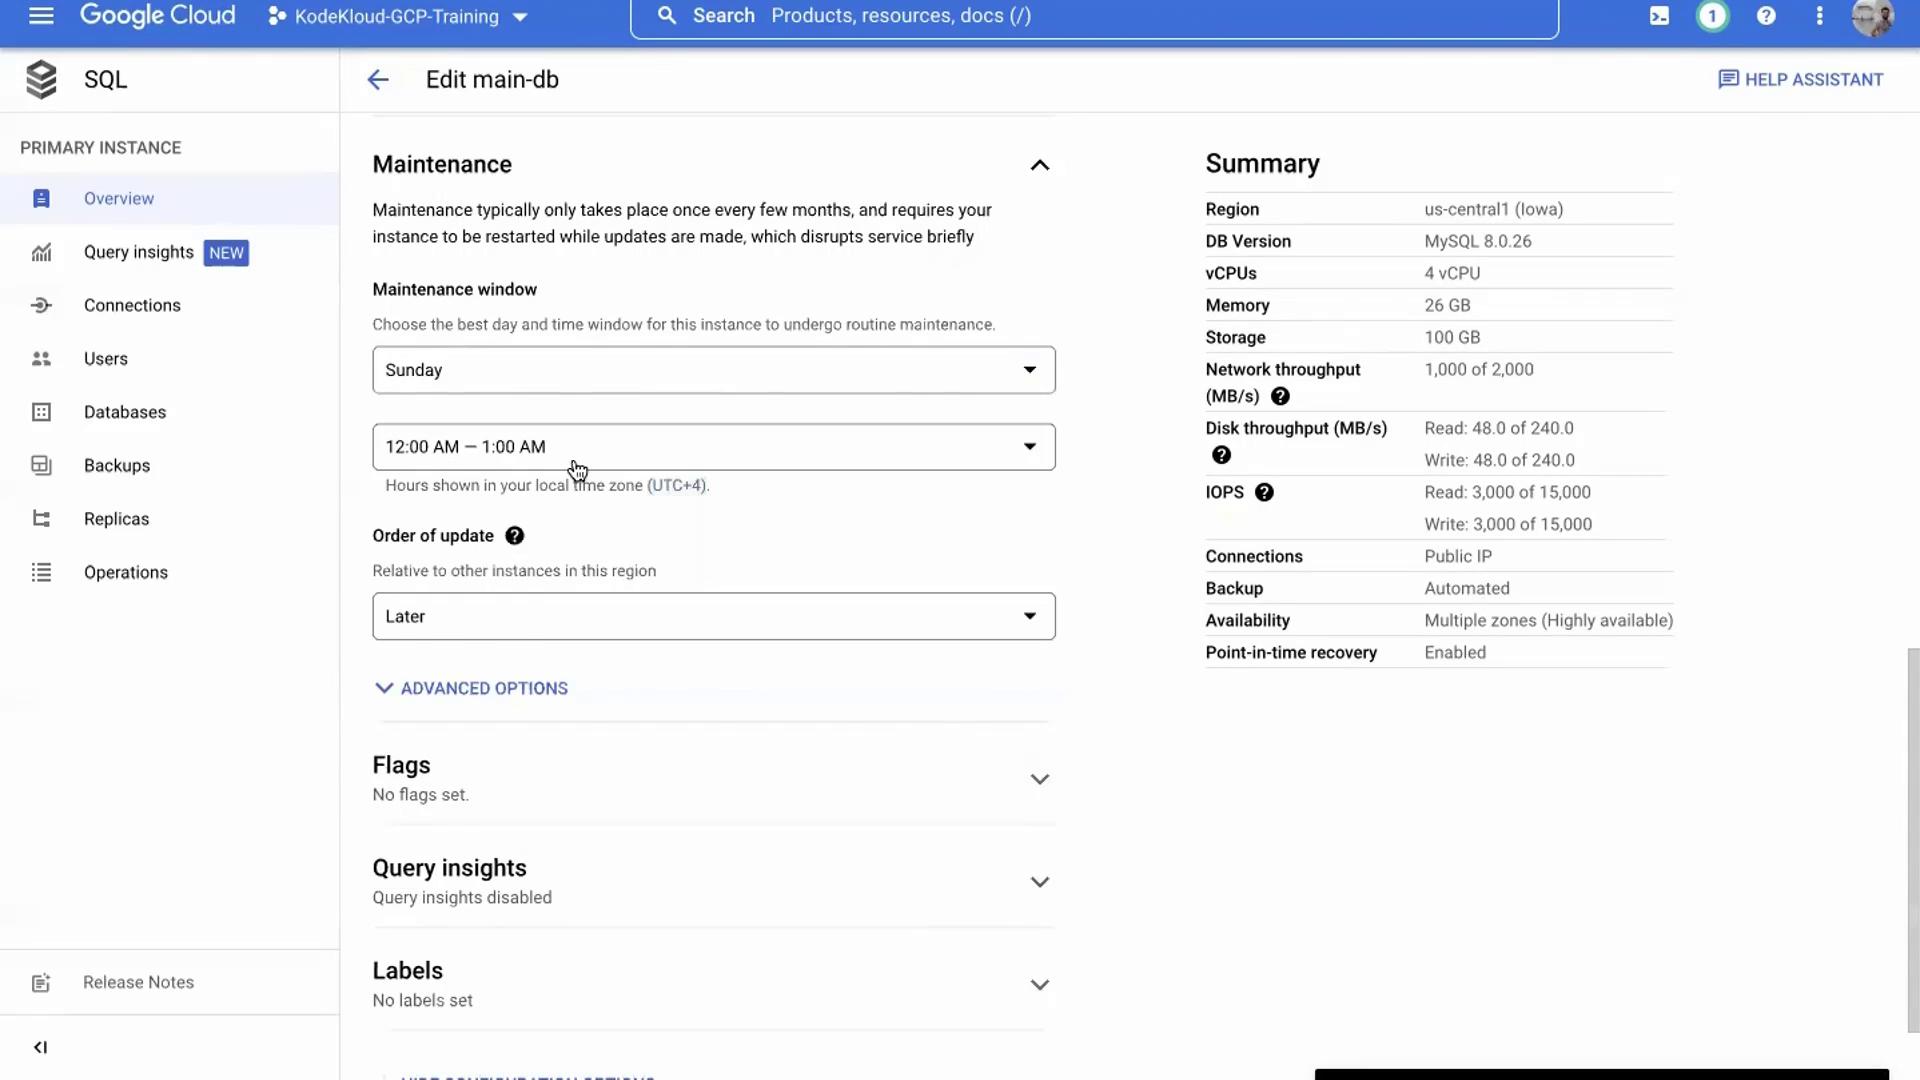
When you’re ready to clean up, you will disable delete protection before deleting the instance.- Edit the Instance: Click on the Edit button for your database.
- Disable Delete Protection: Locate the delete protection option and disable it, then save your changes.
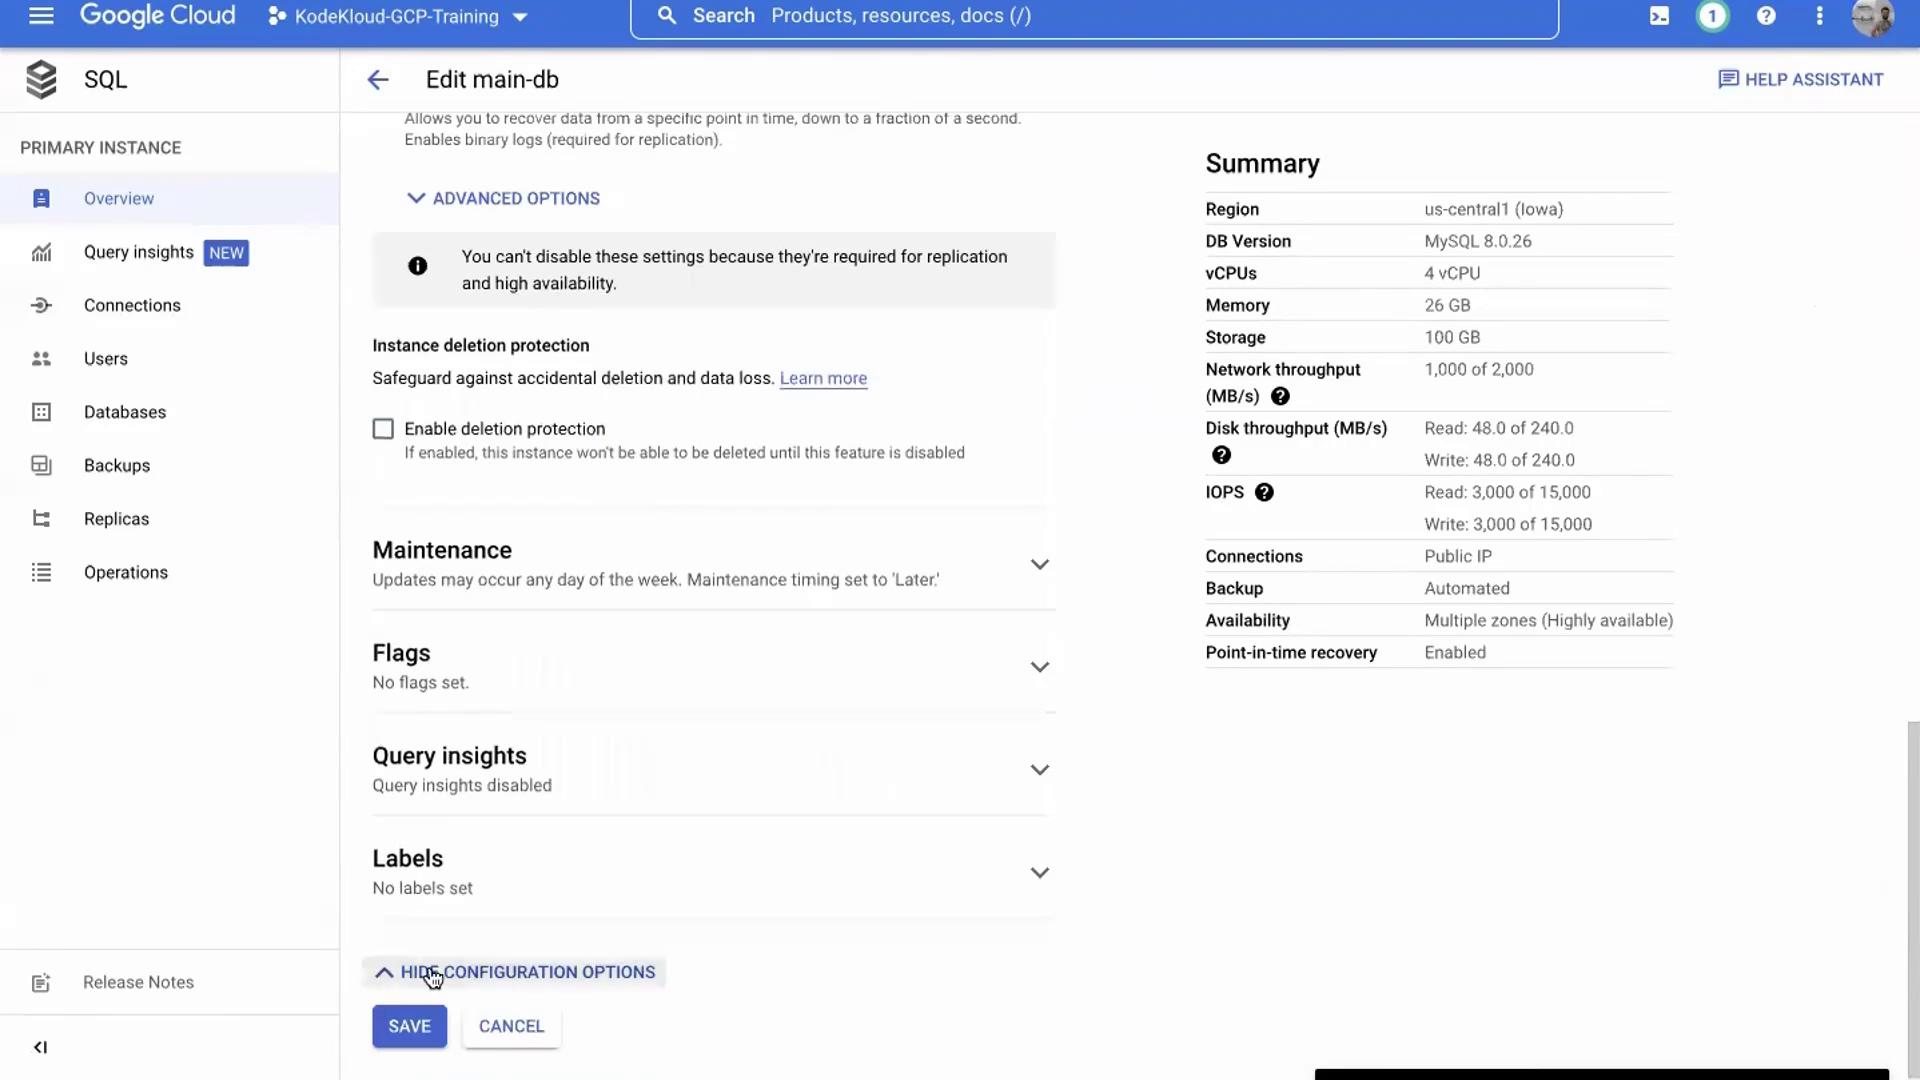
- Review Maintenance Settings (Optional): You may review and adjust maintenance windows by scrolling to the maintenance section. Configure a preferred maintenance window (e.g., Sunday) and set its duration.
- Delete the Instance: Return to the main database page, click Delete, confirm the database name, and proceed. Deletion typically takes about two to three minutes.
Summary
In this lesson, you learned how to:- Spin up a Cloud SQL database on Google Cloud Platform.
- Connect to the database using Cloud Shell.
- Configure key features such as automated backups, high availability, and maintenance windows.
- Disable delete protection and safely delete the database instance.